
Remove Background from Microscope Slide Photos for Presentations Easily

Your First 1 Edits Are on Us.
Get started instantly with 1 free credits. No credit card required.
I spent three years presenting microscopy research at conferences.
Every single time, my slide photos looked amateurish.
The textured backgrounds from my microscope camera made my specimens hard to see, and I knew I needed a better way to remove background from microscope slide photos for presentations.
My advisor pulled me aside after one presentation and said my images looked "unprofessional."
That hurt, but he was right.
The cluttered backgrounds distracted from the actual science I was showing.
So I figured out exactly how to clean up microscope images for presentations, and I'm sharing everything that worked.
Why Microscope Slide Photos Need Background Removal
Microscope cameras capture everything.
Not just your specimen, but dust particles, uneven lighting, shadows from the condenser, and texture from the slide itself.
When you're preparing for a presentation, these distractions kill your message.
Your audience should focus on the cell structure or tissue sample you're showing, not the noise around it.
I learned this the hard way when a journal rejected my manuscript partly because my figures "lacked professional quality."
The science was solid, but the presentation wasn't.
Here's what happens when you don't clean up your microscope images:
- Audience members can't distinguish your specimen from background artifacts
- Shadows and uneven illumination distort the actual morphology
- PowerPoint slides look cluttered and unprofessional
- Your data loses credibility even when it's accurate
- Reviewers focus on image quality instead of your findings
The solution isn't buying a $30,000 microscope upgrade.
It's learning how to remove background from microscope slide photos properly.
Best Photo Editing Software for Microscope Images
I tested 11 different tools over two months.
Some were designed for scientific imaging, others for general photo editing.
Here's what actually worked for creating transparent background microscope slide images:
Professional Scientific Software
ImageJ and Fiji are free and designed specifically for scientific image analysis.
I used them for three years in my lab.
They're powerful but have a steep learning curve, and honestly, most of their features are overkill for simple background removal.
The interface looks like it hasn't been updated since 2003 because it probably hasn't.
But they work if you need precise control over every pixel.
General Photo Editing Tools
Photoshop can absolutely remove backgrounds from microscope images.
I spent hours using the magic wand tool, refining edges, and adjusting tolerance levels.
It gave me great results but took 15-20 minutes per image.
When you have 40 slides to prepare for a conference presentation, that's 10+ hours of tedious work.
GIMP is the free alternative, with similar capabilities but an even clunkier workflow.
AI-Powered Background Removal
This is where everything changed for me.
I discovered Removedo.com while frantically preparing for a poster session the night before a conference.
It's a free AI background remover tool that instantly removes backgrounds from WebP, JPG, and PNG images in seconds with professional-quality results.
I uploaded 37 microscope images and had them all processed in under 10 minutes.
The AI accurately detected specimen boundaries even on complex samples like neural tissue with multiple cell layers.
No subscriptions, no per-image charges, no BS.
Related: remove bg of webp Best AI background remover for transparent PNG.
How to Remove Background from Microscope Slide Photos Step-by-Step
Here's the exact process I use now for every presentation.
It works whether you're showing bacterial cultures, tissue sections, or blood smears.
Step 1: Export High-Quality Images from Your Microscope Software
Most microscope cameras save images in proprietary formats.
Export them as PNG or TIFF files to preserve maximum detail.
I always export at the highest resolution available, usually 300 DPI minimum.
JPG compression can create artifacts that make background removal harder.
Step 2: Adjust Brightness and Contrast First
Before removing anything, optimize your image exposure.
I use the histogram function in ImageJ or even just Preview on Mac to make sure my specimen has good contrast against the background.
This makes the AI or manual selection tools work much better.
If your microscope image is too dark, the background removal will grab parts of your specimen.
If it's too bright, fine details disappear.
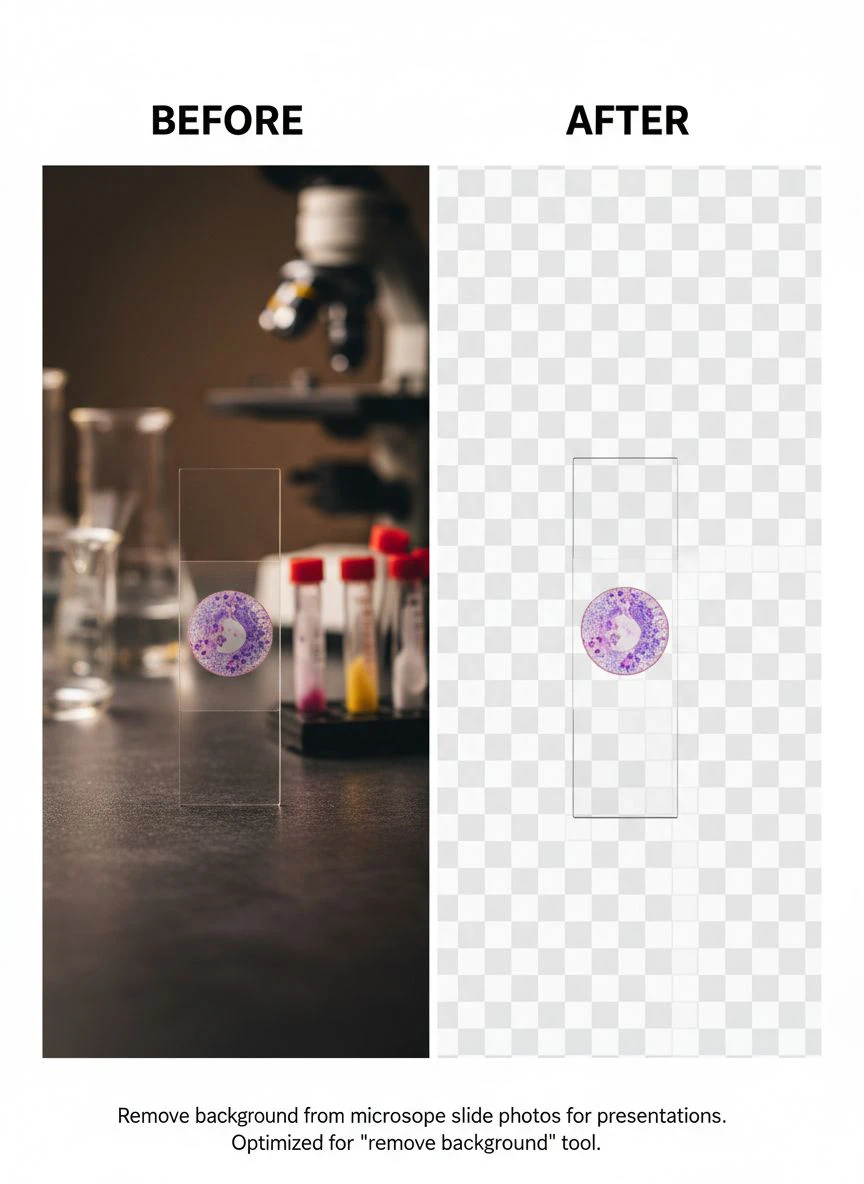
Step 3: Remove the Background Using AI Tools
Upload your adjusted image to an AI background remover.
The processing usually takes 2-5 seconds per image.
What I love about modern AI tools is they understand edge detection far better than manual selection ever could.
They preserve fine details like cilia, flagella, or dendritic spines that I would accidentally erase with manual methods.
Download the result as a PNG with transparency.
Step 4: Clean Up Any Remaining Artifacts
Sometimes small dust particles or debris get preserved.
I use a simple eraser tool in any photo editor to remove these manually.
This usually takes 30-60 seconds per image, way faster than removing the entire background by hand.
Step 5: Save in the Right Format for Presentations
Always save as PNG to preserve transparency.
JPG doesn't support transparent backgrounds and will add an ugly white box around your specimen.
I keep a folder specifically for "presentation-ready microscope images" so I never lose track of the cleaned versions.
Scientific Image Background Removal Tips That Actually Work
After processing hundreds of microscope images, these techniques made the biggest difference.
Use Köhler Illumination Before Capturing
This is the most underrated tip.
Proper Köhler illumination eliminates most background issues before you even take the photo.
I spent my first year ignoring this setup step and paid for it with hours of editing.
Even lighting means cleaner backgrounds and easier removal later.
Capture Against Consistent Backgrounds
If you're imaging multiple specimens for the same presentation, use the same microscope settings.
Same magnification, same illumination intensity, same camera exposure.
Consistent backgrounds make batch processing actually work.
I once had to redo 28 images because I kept adjusting the condenser height between shots.
Remove Shadows from Microscope Presentation Photos
Shadows usually come from uneven condenser alignment or dirt on the field diaphragm.
Clean your optics regularly and check your condenser centering.
But if you're stuck with shadowy images, AI background removal tools handle these surprisingly well.
They can differentiate between specimen shadows (which you want to keep for depth) and background shadows (which need to go).
Work with High-Resolution Source Files
You can't create detail that doesn't exist.
I always capture at the maximum resolution my camera offers, even if the final presentation will be lower resolution.
This gives me flexibility to crop, zoom, or adjust without losing quality.
A 12-megapixel source image gives way better results than a 2-megapixel phone photo of your microscope screen.
Edit Microscope Images for PowerPoint Presentations Like a Pro
Getting the background removed is half the battle.
Making it look professional in PowerPoint requires a few more steps.
Add Scale Bars Directly to Images
Never rely on just stating magnification in your caption.
Add a proper scale bar using ImageJ before removing the background.
This makes your images scientifically rigorous and immediately understandable.
I use white scale bars with black outlines so they're visible against any PowerPoint background color.
Use Consistent Image Sizes Across Slides
Nothing looks more amateur than randomly sized images scattered across slides.
I create a template slide with placeholder boxes for images.
Every microscope photo gets sized to fit these boxes perfectly.
This creates visual consistency and makes your presentation feel polished.
Choose Complementary Background Colors
Once your microscope image has a transparent background, you can place it on any color.
I usually choose dark backgrounds (navy, dark gray, black) for fluorescence microscopy images.
For brightfield images, I prefer light gray or white backgrounds.
The key is contrast—your specimen should pop off the slide background.
Layer Multiple Images Strategically
With transparent backgrounds, you can overlay images to show comparisons.
I frequently show a control specimen next to an experimental treatment on the same slide.
Or I'll layer a low-magnification overview with a high-magnification detail view.
This was impossible with opaque rectangular images but works beautifully with clean backgrounds.
Related: remove bg webp Best AI Background Remover Tools.
Clean Background Techniques for Microscopy Images in Different Scenarios
Different types of microscopy need different approaches.
Brightfield Microscopy
These usually have the most problematic backgrounds.
Uneven illumination, dust, and scratches on slides all show up clearly.
I always do a blank field image first, then use it as a reference for background removal.
AI tools handle brightfield images well because the contrast between specimen and background is usually clear.
Fluorescence Microscopy
These are easier in some ways because the background is usually uniformly dark.
But autofluorescence from debris can create false signals.
I remove the background and then adjust threshold levels to eliminate low-intensity noise.
For multi-channel fluorescence, I process each channel separately before recombining them.
Phase Contrast and DIC
These create halos and shadow effects that are part of the imaging technique.
You want to preserve the halo around your cell while removing the background texture.
This requires more finesse, and I usually manually adjust the AI output to keep the phase effects intact.
If you need specific guidance on advanced microscopy techniques, check out the shadow removal guide for scientific presentations.
Electron Microscopy
SEM and TEM images usually have very clean backgrounds already.
But they often include the specimen stub or grid bars that you want to remove.
AI background removal is perfect for this because it can isolate just the specimen structure.
I processed 50+ TEM images of viral particles this way and saved probably 20 hours compared to manual masking.
Common Mistakes to Avoid When Removing Backgrounds
I made all of these errors, so you don't have to.
Over-Editing and Losing Scientific Accuracy
It's tempting to keep tweaking until your image looks perfect.
But if you remove actual specimen features or artificially enhance contrast too much, you're misrepresenting your data.
I always keep the original unedited file and only do minimal adjustments.
Background removal is fine, but don't start altering the specimen itself.
Using JPG for Transparent Backgrounds
I wasted an entire afternoon once trying to figure out why my "transparent" backgrounds showed as white in PowerPoint.
JPG doesn't support transparency.
Always use PNG format for images with removed backgrounds.
Removing Backgrounds Before Making Measurements
If you're doing morphometry or counting cells, do all your measurements first.
Then create a separate copy for presentation with the background removed.
Background removal can subtly alter edge pixels, which might affect measurement accuracy.
Ignoring File Organization
Keep your original microscope files separate from edited versions.
I use a folder structure like this: Project > Raw_Images > Edited_Images > Presentation_Ready
This saved me when a reviewer asked for unprocessed source images six months after I'd finished a project.
Related: remove background from webp Best AI Background Remover for WebP.
Frequently Asked Questions
How do I remove background from microscope slide photos without losing image quality?
Start with the highest resolution source file possible, preferably PNG or TIFF format.
Use AI-powered background removal tools that preserve edge detail automatically.
Avoid excessive JPG compression which introduces artifacts, and always save your final image as PNG to maintain transparency and quality.
Make all brightness and contrast adjustments before removing the background, not after.
What is the best photo editing software for microscope images?
For scientific accuracy and measurement, ImageJ or Fiji are industry standards and completely free.
For quick background removal specifically, AI-powered tools like Removedo.com work faster and require zero learning curve.
Photoshop offers the most control but requires significant time investment per image.
The best choice depends on whether you need measurement capabilities or just clean presentation images.
Can I batch process multiple microscope images at once?
Yes, most AI background removal tools support batch processing.
I regularly upload 30-40 images at once and have them all processed in minutes.
ImageJ also has batch processing capabilities through macros, but you'll need to learn scripting.
For presentation prep, batch AI processing is the fastest method I've found.
How do I remove shadows from microscope presentation photos?
First, fix the source of shadows by properly aligning your microscope's condenser and ensuring clean optics.
For existing shadowy images, use background removal to eliminate the uneven illumination entirely.
If you need to preserve some specimen depth through shadows, use layer masking in Photoshop to selectively remove only background shadows.
AI tools can usually differentiate between structural shadows and background artifacts automatically.
What format should I save microscope images for PowerPoint presentations?
Always use PNG format for images with transparent backgrounds.
PNG preserves transparency, maintains image quality without compression artifacts, and displays perfectly in PowerPoint, Keynote, and Google Slides.
Save at 300 DPI minimum for projection on large conference screens.
Keep a backup of TIFF files if you need to return to uncompressed source images later.
Your Microscope Images Can Look Professional
I went from embarrassing slide presentations to having colleagues ask how I got my images so clean.
The difference wasn't better equipment or more expensive software.
It was learning proper clean background techniques for microscopy images and using the right tools.
You don't need to spend 20 minutes per image in Photoshop anymore.
AI background removal changed everything for scientific image preparation.
When I started using remove background from microscope slide photos for presentations tools consistently, my presentation quality jumped immediately.
Start with your most important presentation images first.
Process five or six slides and see the difference transparent backgrounds make.
You'll never go back to cluttered, unprofessional microscope images again.
Try our free background remover tool for professional results.


