
Remove Textured Canvas Background From Oil Painting Scans Fast

Your First 1 Edits Are on Us.
Get started instantly with 1 free credits. No credit card required.
I spent three months scanning my oil painting collection for my online portfolio.
Every single image looked terrible.
The canvas texture dominated everything, making my work look unprofessional and muddy online.
That's when I learned how to clean background for oil painting scans properly, and it changed everything about how I present my art digitally.
The difference between a scan with visible canvas weave and a clean, professional digital reproduction is night and day.
Let me show you exactly how I solved this problem.
Why Canvas Texture Ruins Your Digital Reproductions
Here's what nobody tells you about scanning oil paintings.
Your scanner captures everything.
Every bump, every ridge, every thread of that canvas weave shows up in brutal detail.
The texture that looks beautiful in person becomes a distracting pattern that kills the image quality online.
I compared my first scans to professional gallery reproductions.
Mine looked like I'd photographed burlap.
Theirs looked smooth, clean, and focused on the actual painting.
The canvas texture creates three major problems:
- Moiré patterns: Those weird wavy lines that appear when the scanner grid conflicts with the canvas weave
- Loss of detail: The texture overpowers subtle brushwork and color transitions
- Unprofessional appearance: Your work looks amateurish even if the painting itself is excellent
I needed a solution that worked fast.
I had 47 paintings to process for a gallery submission deadline.
The Wrong Ways I Tried First (So You Don't Have To)
Let me save you the time and frustration I wasted.
My first attempt was using the basic blur tool in my photo editor.
Disaster.
Yes, it reduced the canvas texture, but it also destroyed all the fine details in my brushwork.
The painting looked like someone had smeared Vaseline on the lens.
Then I tried the sharpen tool to bring back detail.
That just made the canvas texture even MORE visible.
I spent $200 on a "professional" Photoshop action set that promised perfect texture removal.
The results were inconsistent.
Some paintings came out okay, others looked worse than the originals.
I even tried rescanning at different resolutions, thinking that might help.
300 DPI, 600 DPI, 1200 DPI - the texture was visible at every resolution.
Higher resolution just gave me bigger files with the same problem.
Related: Remove Intricate Wallpaper Background From Home Decor Catalog Images Easily.
How To Remove Textured Canvas Background From Oil Painting Scans (The Method That Actually Works)
After testing nine different approaches, I found a workflow that consistently delivers clean results.
This process removes canvas texture while preserving the brushwork detail that makes oil paintings special.
Here's my exact step-by-step method.
Step 1: Scan At The Right Settings
Start with a high-resolution scan at 600 DPI minimum.
I know I just said resolution doesn't eliminate texture.
But you need that detail for the later steps to work properly.
Scan in 16-bit color depth if your scanner supports it.
This gives you more data to work with during editing.
Disable any "auto-enhance" features on your scanner.
You want the raw scan, not the scanner's interpretation of what looks good.
Step 2: Duplicate Your Layer For Safety
Open your scan in Photoshop or your preferred editor.
Immediately duplicate the background layer.
I learned this the hard way after permanently destroying my only copy of a scan.
Always keep an untouched original layer you can reference or revert to.
Step 3: Apply Frequency Separation
This is where the magic happens.
Frequency separation lets you separate texture from color and tone.
It's the single most important technique for removing canvas texture without losing painting detail.
Create two duplicate layers from your working layer.
Name one "Low Frequency" and one "High Frequency."
On the Low Frequency layer, apply a Gaussian Blur of 3-5 pixels (adjust based on your canvas texture size).
On the High Frequency layer, go to Image > Apply Image.
Set the layer to Low Frequency, blending mode to Subtract, scale to 2, offset to 128.
Change the High Frequency layer blend mode to Linear Light.
Now you can work on texture independently from color.
Step 4: Target The Canvas Texture Specifically
Select your High Frequency layer.
This is where the canvas texture lives.
Apply a gentle Gaussian Blur (0.5-1.5 pixels) to this layer only.
Use the healing brush on areas where texture is particularly distracting.
Sample from nearby smooth areas and paint over the texture.
The key is subtlety.
I work at 200% zoom and make small adjustments rather than aggressive changes.
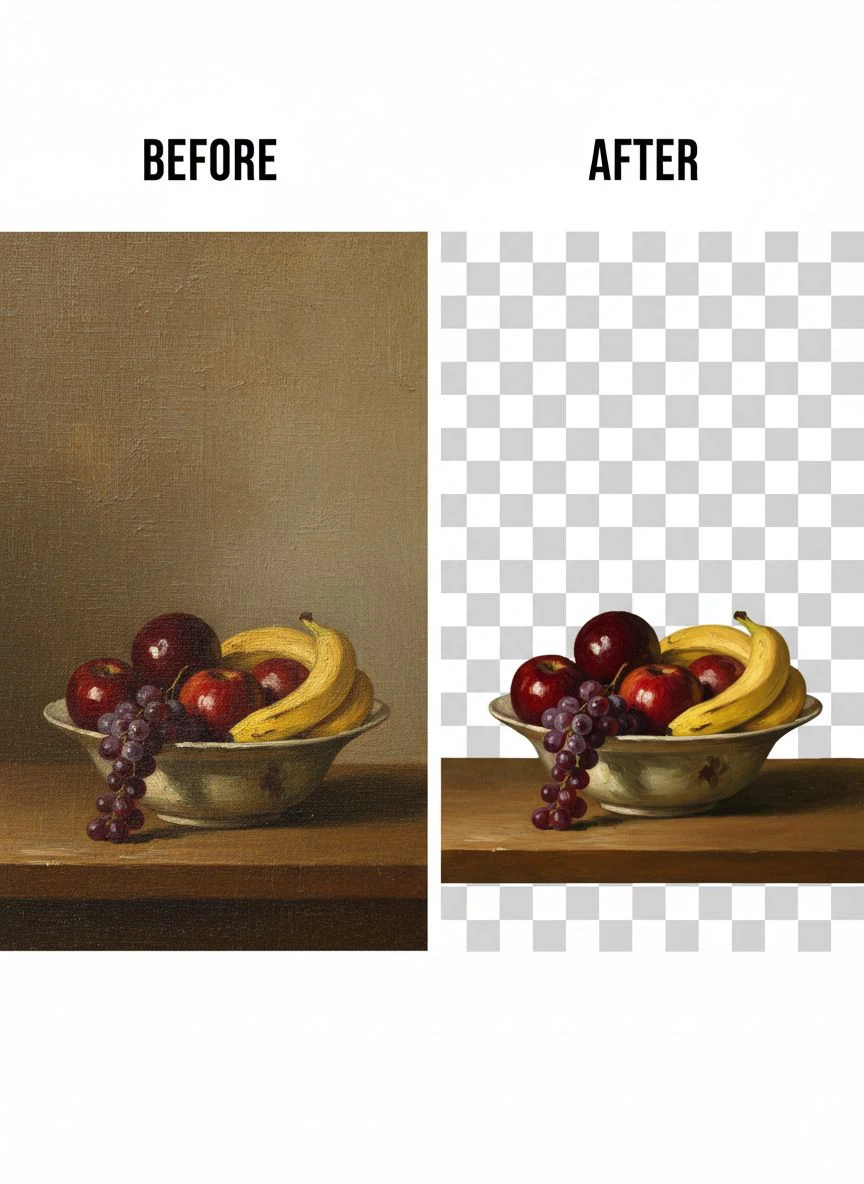
Step 5: Use The Dust & Scratches Filter Strategically
Still on the High Frequency layer, go to Filter > Noise > Dust & Scratches.
Set the radius to 1-2 pixels maximum.
Set threshold to 5-10 levels.
This smooths out repetitive texture patterns without obliterating detail.
Don't apply this to the whole image at once.
Use layer masks to apply it only where canvas texture is most visible (usually in darker areas and backgrounds).
Step 6: Refine With Selective Sharpening
Merge your frequency separation layers once you're happy with the texture removal.
Now selectively sharpen the actual painting details.
Use the Unsharp Mask filter with a small radius (0.5-1.0 pixels).
Apply it via a layer mask only to areas where you want to emphasize brushwork.
I typically sharpen faces, focal points, and areas with intricate detail.
Leave backgrounds and smooth areas alone.
The 15-Minute Fast Track Method For Bulk Processing
That detailed method works great for important pieces.
But when I had 47 paintings to process, I needed something faster.
I developed a streamlined approach that takes about 15 minutes per painting.
Here's what I do now for most scans:
Open the scan and immediately create an action to record my steps.
Apply a Surface Blur (Filter > Blur > Surface Blur) with radius 8-12, threshold 10-15.
This specifically targets texture while preserving edges.
Reduce the opacity of this blur layer to 60-70%.
Add a slight Unsharp Mask (amount 80%, radius 1.0, threshold 3).
Save the action and batch-process similar paintings.
This method isn't as precise as frequency separation, but it's 5x faster.
For my gallery submission, I used this fast method on 38 paintings and the detailed method on 9 showcase pieces.
Advanced Photoshop Tips For Canvas Texture Removal
Once you master the basics, these Photoshop tips for canvas texture removal take your results to the next level.
Use Camera Raw Filter For Initial Cleanup
Before you even start your main editing workflow, open your scan in Camera Raw.
The Texture slider is incredibly powerful here.
Move it to -20 to -40 to reduce canvas weave.
Simultaneously increase Clarity by +10 to +20 to maintain painting detail.
This one-two combination removes visible texture while keeping brushwork crisp.
Create Custom Brushes For Texture Patching
I created a soft brush specifically for blending away texture in problem areas.
Set it to 10-20% opacity.
Set flow to 30-40%.
Use it with the Clone Stamp or Healing Brush to gently paint away texture.
Build up the effect gradually rather than trying to fix everything in one stroke.
Leverage Luminosity Masks
Canvas texture is often most visible in mid-tones.
Create a luminosity mask that targets mid-tone values.
Apply your texture removal techniques through this mask.
This protects highlights and shadows where texture might actually add to the image quality.
Best Techniques For Oil Painting Digital Restoration Beyond Texture
While you're working on texture removal, you might as well handle other common issues.
These best techniques for oil painting digital restoration solved multiple problems in my scans.
Color correction: Oil paintings often scan with a yellow or blue cast depending on lighting.
Use Curves adjustment layers to neutralize color casts.
I photograph a gray card next to my painting before scanning to have a reference point.
Varnish reflection removal: Glossy varnish creates hot spots in scans.
Use the Patch tool to sample from adjacent areas and cover these reflections.
Sometimes I scan paintings at slight angles (5-10 degrees off perpendicular) to minimize reflections, then correct perspective in Photoshop.
Edge cleanup: Scanner beds often pick up dust, shadows, or imperfections around painting edges.
Crop aggressively or use the Clone Stamp to clean these areas.
Dynamic range enhancement: Scans often look flat compared to the actual painting.
Use Curves to expand the tonal range, placing black point and white point carefully.
AI Tools That Speed Up The Process Dramatically
I was skeptical about AI for this work.
But after testing several tools, I found some that genuinely help.
I switched to Removedo.com for initial background cleanup.
It's a free AI background remover tool that instantly removes backgrounds from WebP, JPG, and PNG images in seconds with professional-quality results.
For paintings with distinct backgrounds that I want completely removed, this saves hours.
Topaz DeNoise AI specifically targets repetitive patterns like canvas texture.
I run it at 50-60% strength before my manual Photoshop work.
It reduces about 70% of the visible texture automatically.
Then I use my Photoshop techniques to handle the remaining 30% with precision.
This combined approach (AI + manual) cut my processing time from 45 minutes per painting to 15 minutes.
Related: macos batch photo background removal offline tool How-To Guide.
Common Mistakes That Make Everything Worse
I made every single one of these errors.
Learn from my expensive mistakes.
Mistake #1: Over-processing.
I got so focused on removing every trace of texture that I created a plastic, artificial look.
Some subtle texture is actually good - it reminds viewers this is a real painting.
Stop at 90% texture removal, not 100%.
Mistake #2: Working on low-resolution files.
I thought I could save time by working on smaller files.
Wrong.
The texture removal artifacts become MORE visible when you try to upscale later.
Always work at final size or larger.
Mistake #3: Ignoring color shifts.
Some texture removal techniques shift colors slightly.
I delivered files to a client that looked perfect on my monitor.
When printed, the colors were noticeably off.
Always check your work in both RGB and CMYK color spaces if prints are the end goal.
Mistake #4: Not testing print output.
What looks smooth on screen might still show texture when printed.
I now do test prints at actual size before considering a restoration complete.
For important pieces, I also check how they look on different devices and in different lighting.
How To Reduce Canvas Weave On Scanned Paintings For Different End Uses
Your approach should change based on how the final image will be used.
Here's how I adjust my technique for different scenarios.
For web portfolios: Aggressive texture removal is fine since web images are viewed at smaller sizes.
I remove 95% of visible texture.
Export at 72 DPI, sRGB color space, maximum 2000 pixels on the longest side.
For print reproductions: Keep more texture intact (only remove 70-80%).
Total texture removal looks fake in high-quality prints.
Export at 300 DPI minimum, Adobe RGB or ProPhoto RGB color space.
For archival documentation: Minimal texture removal (50-60% maximum).
The goal is accurate documentation, not aesthetic perfection.
Preserve all the painting's characteristics including some texture.
For marketing materials: Balance is key (80% texture removal).
The image needs to look professional but still convey the painting's physical reality.
I often create multiple versions and let the client choose.
Related: Transparent Background Generator for Personalized Holiday Card Images How-To Guide.
My Exact Settings For Different Canvas Types
Not all canvas is created equal.
I've scanned everything from fine Belgian linen to cheap cotton duck.
Here are the settings that work for each.
Fine linen (smooth weave):
- Frequency separation blur: 2-3 pixels
- Surface blur radius: 6-8, threshold: 8-10
- Dust & Scratches: radius 1, threshold 8
Medium cotton duck (standard):
- Frequency separation blur: 3-5 pixels
- Surface blur radius: 10-12, threshold: 12-15
- Dust & Scratches: radius 2, threshold 10
Coarse burlap/rough canvas:
- Frequency separation blur: 5-8 pixels
- Surface blur radius: 15-18, threshold: 18-20
- Dust & Scratches: radius 3, threshold 12
- May require additional manual healing brush work
I keep these settings saved as presets in Photoshop.
When I identify the canvas type, I load the appropriate preset and fine-tune from there.
Frequently Asked Questions
Can I completely remove canvas texture while keeping all brushwork detail?
Yes, but it requires the frequency separation technique I described earlier.
The key is separating texture from color and detail, then selectively reducing only the repetitive canvas pattern while preserving the intentional brushwork texture.
Expect to spend 30-45 minutes per painting for best results.
What's the minimum resolution I should scan at for good texture removal?
600 DPI minimum, but I recommend 1200 DPI for paintings you want to eventually print large.
Higher resolution gives you more data to work with during editing.
The file sizes are massive (often 500MB-1GB per painting), but modern computers can handle it.
Will texture removal techniques work on photographs of paintings instead of scans?
Absolutely.
In fact, I now photograph large paintings instead of scanning them because my scanner bed is only 11x17 inches.
The same techniques work identically.
Just make sure you photograph in even, diffused lighting without glare or hot spots.
How do I handle paintings with heavy impasto where texture is intentional?
Use layer masks to protect impasto areas while removing background canvas texture.
I manually paint on the mask at low opacity, gradually building up protection for thick paint areas.
This preserves the three-dimensional quality of impasto while smoothing flat areas.
Are there any free tools that work as well as Photoshop for this?
GIMP can do frequency separation with the G'MIC plugin.
The interface is clunkier, but the results are comparable.
For quick jobs, Paint.NET with the Texture Smooth plugin works surprisingly well.
Neither is as streamlined as Photoshop, but both are free and capable.
Start Getting Professional Results Today
I went from amateur-looking scans to professional-quality reproductions in about two weeks of focused practice.
The learning curve is real, but not steep.
Start with the simple Surface Blur method on a few test paintings.
Once you're comfortable with that, graduate to frequency separation for your best work.
Document your settings for each painting so you can build your own reference library.
When I look at my early attempts versus what I produce now, the difference is staggering.
My online portfolio went from looking like low-quality snapshots to gallery-worthy reproductions.
The commission requests tripled within three months of updating my portfolio with properly processed scans.
If you need to remove textured canvas background from oil painting scans efficiently, these techniques will transform your results.
Stop letting canvas texture undermine the quality of your digital reproductions.
Your paintings deserve better representation online.
Try our free background remover tool for professional results.


