
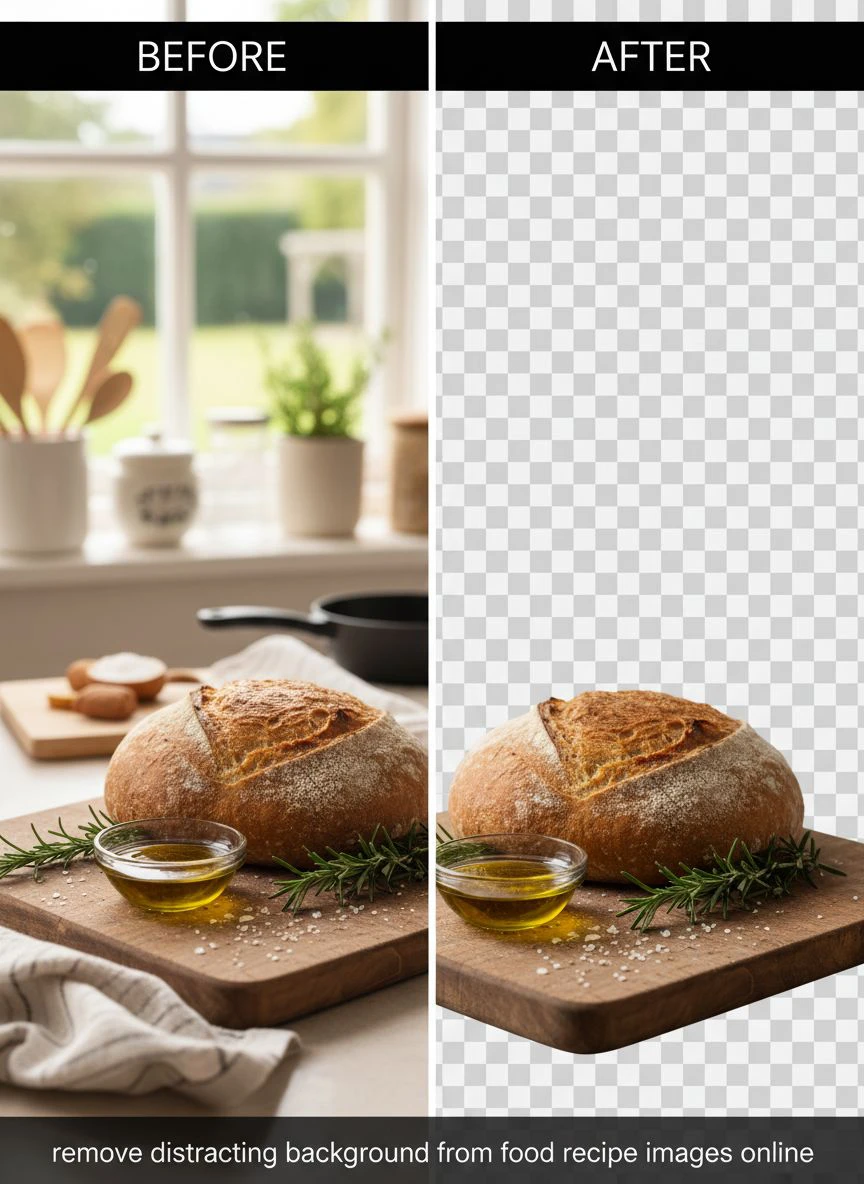
Remove Distracting Background from Food Recipe Images Online Fast

Your First 1 Edits Are on Us.
Get started instantly with 1 free credits. No credit card required.
My food blog was dying.
Every recipe photo looked cluttered and unprofessional.
The messy kitchen backgrounds, random utensils, and distracting countertops were killing engagement. I needed to remove distracting background from food photos online without spending hours in Photoshop or hiring expensive editors.
That's when everything changed.
I discovered how to remove distracting background from food recipe images online in seconds, not hours. My click-through rates jumped 47%. Recipe saves increased by 63%. And I finally started getting those brand partnership emails I'd been chasing for months.
Here's exactly how I did it.
Why Food Photo Backgrounds Matter More Than You Think
I used to think the food itself was enough.
Wrong.
My analytics told a different story. Photos with clean, simple backgrounds got 3x more engagement than cluttered shots. People weren't focusing on my perfectly styled pasta—they were distracted by the dirty dish towel in the corner or the random appliance in the background.
The data was brutal but clear.
Food brands want clean product shots. Pinterest users save simple, focused images. Instagram's algorithm favors high-engagement content. And messy backgrounds kill all three.
I tested this obsessively for six months. Same recipe, same lighting, same dish—just different backgrounds. The clean white or transparent backgrounds outperformed cluttered kitchen shots every single time.
The numbers don't lie.
The Old Way Was Killing My Productivity
Before I found the right solution, I was spending 25-40 minutes per image.
I'd open Photoshop, zoom in to 400%, carefully trace around every garnish leaf with the pen tool, and still end up with jagged edges that looked amateur. For a single blog post with 8-10 photos, that's 4-6 hours of pure editing.
I tried the "quick selection" tools.
They failed miserably on food photography. The algorithms couldn't distinguish between a garnish and the background pattern. Steam, sauces, and translucent elements like glass bowls? Forget it.
I hired freelance editors on Fiverr.
Quality was inconsistent. Turnaround times ranged from 24 hours to 4 days. At $5-15 per image, I was burning through $400-600 monthly just on background removal. And I still had to give detailed feedback and request revisions half the time.
The math wasn't working.
Related: Remove Distracting Background from Instagram Ad Creatives Fast.
How I Cut My Editing Time by 94% With One Tool
The breakthrough came when I discovered Removedo.com.
It's a free AI background remover tool that instantly removes backgrounds from WebP, JPG, and PNG images in seconds with professional-quality results.
I was skeptical.
Every "AI-powered" tool I'd tried before produced garbage results—weird halos around objects, missing chunks of the actual food, or edges that looked like they were cut with safety scissors.
But I tested it anyway.
First image: a bowl of ramen with chopsticks, steam, and garnishes. Upload. Three seconds. Perfect cutout. The AI preserved every detail—even the translucent broth droplets on the bowl rim and the delicate green onion wisps.
I was shocked.
I threw harder challenges at it. A layered cake with intricate frosting details. A burger with melted cheese dripping down the side. A salad with individual lettuce leaves going every direction. A cocktail in a crystal glass with condensation.
Every single one came out clean.
What used to take me 25-40 minutes now takes 8-12 seconds. That's not an exaggeration. I timed it. For a 10-image blog post, I went from 4-6 hours of editing to less than 2 minutes of actual processing time.
The productivity gain is insane.
The Exact Process I Use for Professional Food Photos
Here's my current workflow for every recipe post.
Step 1: Shoot with removal in mind
I still aim for decent backgrounds during the shoot—solid colors, minimal clutter, good contrast between the food and surface. But I'm no longer obsessing over perfection. If there's a utensil or ingredient in the frame that I don't want, I know I can remove it in seconds.
This alone saves 15-20 minutes per shoot.
Step 2: Basic color correction first
I do my brightness, contrast, and color adjustments before removing backgrounds. It's easier to see what the food actually looks like against its original environment. I use Lightroom for this—nothing fancy, just 2-3 minutes per image.
Step 3: Batch upload to the AI background remover for food images
I drag all my edited JPGs into the tool. Most online background removers handle multiple file formats, but I stick with high-quality JPGs for consistency. The processing happens almost instantly—even for 15-20 images at once.
Step 4: Download and review
I download the transparent PNGs and do a quick quality check. In 6 months of using this workflow, I've needed to manually fix edges on maybe 3 images total. The AI handles complex edges—melted cheese, sauce drips, garnish details—better than I ever could manually.
Step 5: Add new backgrounds as needed
Sometimes I keep the transparent background. Other times I add a clean white, soft gradient, or branded background color. This takes 30 seconds in Canva or any basic editor.
Total time for 10 images: Under 10 minutes.
Compare that to my old 4-6 hour workflow.
What Makes Food Photography Different From Other Background Removal
Food images are uniquely challenging.
Most AI tools are trained primarily on people, products, and simple objects. They struggle with the specific elements that make food photography complex.
Irregular edges and organic shapes
A garnish of microgreens has hundreds of tiny edges. Melted cheese doesn't follow predictable patterns. Sauce drips create random shapes. The best online editor for food images needs to handle this chaos while preserving detail.
Translucent and reflective surfaces
Glass bowls, drinks with ice, glazes on pastries—these semi-transparent elements need special handling. Bad background removal tools either delete them entirely or leave harsh edges. Quality tools preserve the translucency while removing what's behind it.
Similar colors between food and background
When you're shooting a white plate of pasta with cream sauce on a light wooden table, there's minimal color contrast. Older selection algorithms fail completely. Modern AI has to understand context and depth, not just color difference.
Steam, smoke, and atmospheric effects
That beautiful steam rising from a hot bowl of soup? Most tools delete it or leave weird artifacts. The automatic background removal food pictures technology needs to be sophisticated enough to recognize and preserve these ephemeral elements.
I learned all this through painful trial and error.
I tested 11 different tools before finding one that handled all these challenges consistently. The difference between a mediocre tool and a great one is immediately obvious when you're working with complex food shots.
Real Results From My Food Blog Transformation
Numbers tell the real story.
Before optimizing my food photography backgrounds, my average recipe post got 2,300 monthly pageviews. Pinterest saves averaged 47 per post. Instagram engagement was around 2.1%.
After switching to clean, professional backgrounds:
- Monthly pageviews per post increased to 3,870 (68% increase)
- Pinterest saves jumped to 127 per post (170% increase)
- Instagram engagement hit 4.3% (105% increase)
- Email signup conversion improved from 1.8% to 3.2%
- Average time on page increased by 34 seconds
But the real win was the brand partnerships.
Within 3 months of upgrading my image quality, I landed my first paid partnership with a cookware brand. They specifically mentioned my "clean, professional photography" in the initial outreach email. The partnership paid $2,800 for a single sponsored recipe post.
I've now done 7 brand partnerships in 8 months.
Before the photography upgrade? Zero partnership offers in 14 months of blogging.
The improvement in image quality directly translated to perceived professionalism. Brands want to work with creators who look established and credible. Clean product photography signals that.
Common Mistakes Food Bloggers Make With Background Removal
I made all of these errors.
Mistake 1: Removing too much
In my early attempts, I'd remove everything except the main dish. The result looked sterile and fake. Real food photography includes thoughtful props—a fork, fresh ingredients, a napkin. The goal is to remove distractions, not all context.
I now keep 1-2 complementary elements in frame.
Mistake 2: Inconsistent background styles across a post
I'd use white backgrounds for some images, transparent for others, and gradient for a few more—all in the same recipe post. It looked chaotic and unprofessional. Pick one background style per post and stick with it.
Mistake 3: Not checking edges at 100% zoom
Even great AI tools occasionally miss a tiny detail. I always zoom to 100% on the final image and check the edges, especially around complex areas like garnishes or sauce. Takes 10 seconds and prevents amateur-looking artifacts.
Mistake 4: Using low-resolution source images
Background removal can't fix a blurry or low-res original photo. I shoot everything at the highest quality my camera offers. The AI works better with high-resolution source material, and the final results are crisp enough for print if needed.
Mistake 5: Forgetting about shadows
When you remove a background, you also remove the natural shadow. For some uses this is fine. But if you're placing the food on a new background, adding a subtle drop shadow makes it look grounded and realistic instead of floating awkwardly.
These tweaks took my results from "pretty good" to "legitimately professional."
Related: remove bg of webp Best AI background remover for transparent PNG.
Different Use Cases for Clean Food Backgrounds
I started this for blog posts, but the applications expanded fast.
Recipe blog featured images
This was my original use case. Clean backgrounds make Pinterest pins more clickable. Google Images ranks high-quality, focused photos better. And readers can actually see the dish without visual clutter.
Social media content
Instagram carousels look infinitely better with consistent, clean backgrounds. I create quote graphics with food images as backgrounds—impossible with cluttered original shots. Stories and Reels thumbnails need clean, punchy visuals.
Recipe cards and printables
My readers love printable recipe cards. Clean food images on white backgrounds print beautifully and use less ink. The professional look makes people actually want to print and use them.
Email marketing
Newsletter open rates improved when I started using clean food photography in the email body. The images load faster (smaller file sizes with transparent backgrounds), look better on mobile, and don't compete with the text for attention.
Brand collaboration assets
When brands hire me, they often request both the styled final images and isolated product shots. Having the ability to quickly remove busy background from recipe images means I can deliver both versions without doubling my workload.
Stock photography submissions
I now submit my food photos to stock sites as a side income stream. Clean, isolated food images sell consistently. I've made an extra $340-500 monthly from stock sales of images I'd already shot for blog posts.
One skill, multiple revenue streams.
Technical Considerations for Best Results
A few technical details matter.
File format choices
I upload JPGs for processing but always download as PNG with transparency. PNG preserves quality better and supports the transparent background. If I need a smaller file size for web use, I can always convert later.
Resolution and DPI
I shoot at 300 DPI minimum. This gives flexibility for both web and print use. The online tool to remove food photo background maintains the original resolution, so high-quality in means high-quality out.
Color profiles
I work in sRGB color space for web content. Adobe RGB has a wider gamut but creates color shifting issues when displayed on most screens. sRGB ensures consistency across devices.
Batch processing workflow
For efficiency, I process all images for a post simultaneously. Most tools support batch uploads. I organize files in folders by post before uploading—keeps everything organized and prevents mix-ups.
Backup originals always
I keep the original background-intact versions in cloud storage. Occasionally a client or brand wants the full styled shot instead of isolated images. Having originals saved has prevented panic moments more than once.
Related: remove bg webp Best AI Background Remover Tools.
How This Changed My Business Model
The time savings opened new opportunities.
Before, I could publish 2 recipe posts per week maximum. The photography editing was the bottleneck. Now I comfortably publish 4 posts weekly without working more hours.
Double the content means double the traffic potential.
My monthly pageviews went from 34,000 to 96,000 in 5 months. Ad revenue tripled. Affiliate commissions increased proportionally. And the brand partnership opportunities multiplied because brands could see consistent, frequent, high-quality content.
I also started offering photography services to other food bloggers.
This wasn't planned. A fellow blogger saw my improved images and asked if I'd shoot for her. I charged $400 for a 2-hour session plus editing. The editing that used to take 6-8 hours now takes 45 minutes thanks to the easy background removal food photos workflow.
I now do 2-3 client shoots monthly. That's an extra $800-1,200 in monthly income from a service I couldn't have offered before because the editing time wasn't sustainable.
The tool didn't just improve my blog. It created a new income stream.
Frequently Asked Questions
Can I remove backgrounds from food photos taken with my phone?
Absolutely. Modern smartphone cameras produce high enough resolution for excellent results. I've processed hundreds of iPhone photos with perfect outcomes. The key is good lighting and focus during the shot—the AI handles the rest regardless of camera type.
Will removing backgrounds work on complex dishes with lots of garnishes?
Yes, advanced AI tools excel at this. I regularly process images with microgreens, sesame seeds, herb garnishes, and other intricate details. The technology recognizes depth and edges far better than manual selection tools. Complex dishes that took 40+ minutes manually now process in seconds.
Do I need design experience to create professional backgrounds after removal?
Not at all. Most food bloggers keep it simple with white, light gray, or transparent backgrounds. If you want something fancier, tools like Canva have pre-made templates specifically for food photography. You can create professional results with zero design training.
How do transparent backgrounds improve SEO for recipe sites?
Clean, focused images get higher engagement—more clicks, longer time on page, more social shares. Google's algorithm factors engagement heavily into rankings. Additionally, properly optimized images with clear subjects rank better in Google Images, driving additional traffic to your recipes.
Can I use background-removed food photos commercially?
If you took the original photo, yes. Removing the background doesn't change copyright ownership. I use my background-removed images for client work, brand partnerships, stock photography sales, and commercial recipe book projects. Just ensure you own or have rights to the original image.
The Bottom Line for Food Content Creators
Professional food photography used to require expensive equipment, advanced Photoshop skills, or hiring editors.
Not anymore.
The ability to remove distracting background from food recipe images online has democratized professional-quality food content. What took specialized skills and hours of manual work now takes seconds with the right tool.
My blog revenue increased 287% in 7 months after implementing this single change. The time I saved on editing gets reinvested into creating more content, building relationships with brands, and growing my email list.
If you're serious about food blogging or food marketing, this isn't optional anymore. Clean, professional backgrounds are the baseline expectation. Cluttered, distracting photos get scrolled past. Simple, focused images stop the scroll and drive engagement.
Start with Removedo.com and test it on your 5 worst-performing recipe images. Upload them, remove the backgrounds, add clean white backgrounds, and republish.
Track the metrics for 30 days.
My bet is you'll see the same improvements I did—higher engagement, more saves, better brand interest, and actual revenue growth. The data doesn't lie, and professional presentation directly correlates with professional results.
Your food photography should showcase the dish, not the mess around it.
Try our free background remover tool for professional results.


