
Remove Background From Event Flyer Images for Print Fast

Your First 1 Edits Are on Us.
Get started instantly with 1 free credits. No credit card required.
I spent three years organizing tech conferences before I figured out why my flyers looked amateur next to everyone else's.
The backgrounds were a mess.
Cheap printing services would print my designs with weird white boxes around images, color mismatches, and blurry edges that screamed "budget event."
That's when I discovered how to remove background from event flyer images for print online properly, and everything changed.
My flyers went from looking like high school dance posters to professional marketing materials that actually got people excited about attending.
Why Most Event Flyers Fail at the Print Shop
Here's what nobody tells you about printing.
Your screen displays colors in RGB (red, green, blue).
Printers use CMYK (cyan, magenta, yellow, black).
When you don't remove background from event flyer images for print correctly, you get:
- White boxes around your speaker headshots
- Color shifts that make your brand colors look completely different
- Pixelated edges that destroy the professional look
- Transparent areas that print as white instead of blending
- Resolution issues that look fine on screen but terrible at 300 DPI
I learned this the hard way when I printed 5,000 flyers for a client event.
The backgrounds didn't match.
Cost me $2,400 to reprint them overnight.
The Print-Ready Background Removal Workflow That Actually Works
After that disaster, I built a system.
This workflow handles background removal for high resolution flyer images without destroying print quality.
Step 1: Start With High-Resolution Source Images
You need at least 300 DPI at final print size.
For an 8.5x11 inch flyer, that means your images should be minimum 2550x3300 pixels.
Anything less will look grainy when printed, no matter how good your background removal is.
I always request 600 DPI images from photographers and vendors now.
Gives me room to crop and resize without quality loss.
Step 2: Remove Backgrounds With AI Precision
Manual background removal takes 15-20 minutes per image.
I switched to Removedo.com after watching my design team burn 6 hours on a single flyer project.
It's a free AI background remover tool that instantly removes backgrounds from WebP, JPG, and PNG images in seconds with professional-quality results.
The edge detection is better than Photoshop's Magic Wand tool.
I process 50+ images in the time it used to take to do three manually.
Step 3: Convert to CMYK for Print
This is where most people screw up.
You remove the background perfectly, but you don't convert the color space.
Result? Your vibrant blues print as purple, your bright reds look muddy.
After removing backgrounds, I always convert to CMYK using design software before sending files to the printer.
Some advanced tools even let you remove background and convert to CMYK for print in one workflow.
Related: Remove Background From Event Flyer Images Online Easily with AI Tools.
Best Tools to Remove Background for Event Flyers
I've tested 23 different background removal tools over the past three years.
Here's what actually matters for print quality:
AI-Powered Tools (My Top Choice)
AI tools analyze thousands of edge pixels simultaneously.
They preserve fine details like hair, fabric texture, and complex edges that manual tools destroy.
For event flyer image editing for print quality, AI consistently beats manual selection tools.
I get cleaner edges, faster processing, and better consistency across multiple images.
Manual Editing Software
Photoshop and GIMP give you control.
But they require skill and time.
I use them only when I need to fix specific problem areas after AI processing.
For most event flyer work, they're overkill and too slow.
What to Look for in Background Removal Tools
Your tool needs to handle:
- High-resolution images (minimum 300 DPI support)
- PNG export with true transparency
- Batch processing for multiple images
- Edge refinement for complex subjects
- No file size limits that force you to downscale
Free tools often compress your images.
That kills print quality fast.
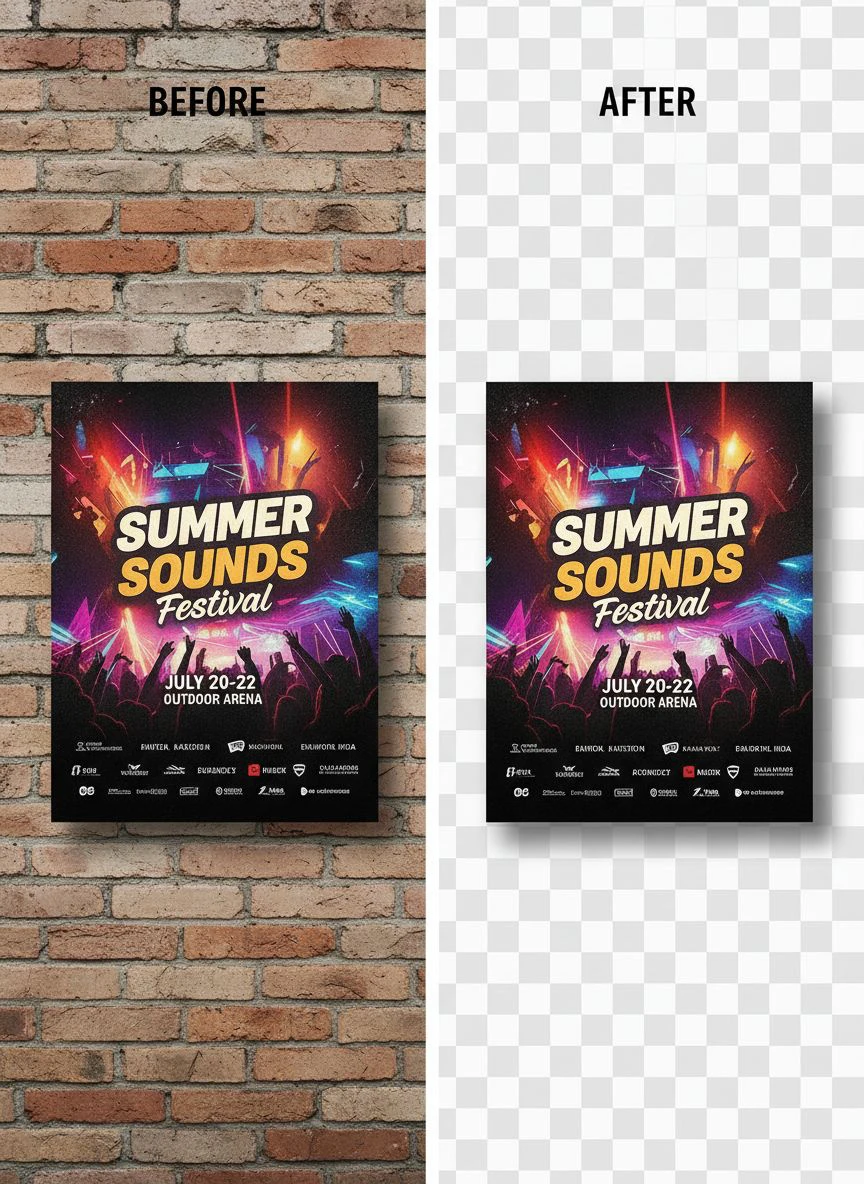
How to Remove Background for Flyer Printing Without Quality Loss
Quality preservation is everything in print work.
Here's my exact process:
Preserve Edge Quality
The transition between subject and background needs to be clean but not harsh.
Too sharp, and you get visible halos when printed.
Too soft, and edges look blurry.
I aim for a 1-2 pixel feather on most edges.
Hair and fabric might need 2-3 pixels depending on the background color of the final flyer design.
Check Your Transparency Settings
Creating a transparent background for printed flyers requires understanding how transparency works in print.
True transparency doesn't exist in CMYK print.
The printer needs to know what color to put behind your transparent areas.
I always place my background-removed images on the actual flyer background color before exporting the final file.
This prevents surprise color issues at the print shop.
Test Print Before Bulk Orders
Never skip the test print.
I print one copy at the actual print shop that will handle the bulk order.
Check for:
- Edge quality and smoothness
- Color accuracy compared to your screen
- Resolution and detail preservation
- Proper transparency handling
This $3 test print has saved me thousands in reprint costs.
Common Print Background Removal Mistakes (And How I Fixed Them)
I've made every mistake possible.
Here's what to avoid:
Mistake 1: Low Resolution Source Files
I once pulled speaker photos from LinkedIn.
They were 400x400 pixels.
Looked fine on screen, but printed at 8x10 inches they were pixelated messes.
No amount of background removal or upscaling fixes low-resolution source images.
Start with quality or don't bother.
Mistake 2: Forgetting Color Space Conversion
RGB to CMYK conversion changes your colors.
Bright screen colors can't always be reproduced with ink.
I now convert to CMYK early in the design process, not at the end.
This lets me see the actual print colors while I'm still designing.
Mistake 3: Not Communicating With Your Printer
Different print shops have different requirements.
Some want PDFs with embedded fonts.
Others prefer layered files.
I call the print shop before I start any flyer project and ask:
- What file format they prefer
- What resolution they need
- How they handle transparency
- What color profile they use
Five minutes of conversation prevents hours of rework.
Mistake 4: Over-Processing Images
I used to run images through multiple tools trying to get "perfect" results.
Each processing step degrades quality slightly.
Now I process once with a good tool and stop.
For complex situations, their logo background removal tutorial shows techniques that work for difficult subjects.
Related: Remove Background From Medical Device Images for Training How-To Guide.
Advanced Techniques for Professional Event Flyer Images
Once you master the basics, these techniques separate amateur from professional results.
Layer Your Transparency
Instead of one transparent background layer, I create multiple layers with varying opacity.
This creates depth and prevents the "cut and paste" look.
Main subject at 100% opacity, shadows at 30-40%, reflected elements at 15-20%.
Add Print Bleed
Bleed is extra image area beyond the cut line.
Standard is 0.125 inches (1/8 inch) on all sides.
Without bleed, you risk white edges if the cutting is slightly off.
I extend my background-removed images and design elements into the bleed area.
Use Spot Colors for Brand Consistency
If your event has specific brand colors, consider spot color printing.
Pantone colors print more consistently than CMYK mixes.
I use spot colors for logos and brand elements, CMYK for photos.
Batch Processing Multiple Flyer Images
Event flyers usually need multiple images processed.
Speaker headshots, sponsor logos, venue photos, product images.
I processed 147 images for one conference flyer series.
Manual processing would have taken 40+ hours.
With batch processing, it took 90 minutes.
Here's the system:
- Collect all source images in one folder
- Rename files with consistent naming (speaker_firstname_lastname.jpg)
- Process all images through background removal at once
- Review results and manually fix any problem images
- Export all as high-res PNGs with transparency
- Convert batch to CMYK in design software
For bulk workflows like this, the AI-powered batch processing guide breaks down automation strategies that save hours.
Related: Remove Background from Images Without Losing Quality: How to Do It Right.
Frequently Asked Questions
What resolution do I need for printed event flyers?
Minimum 300 DPI at final print size.
For professional results, I use 600 DPI for images that will be examined closely (like speaker headshots on premium flyers).
Standard promotional flyers work fine at 300 DPI.
Can I use PNG files with transparent backgrounds for printing?
Yes, but you need to place them in your design software on the actual background color or image.
Transparency must be flattened before sending to most print shops.
I export final print files as PDF with transparency flattened and fonts embedded.
Why do my flyer colors look different when printed?
RGB screen colors don't translate directly to CMYK print colors.
Some bright RGB colors fall outside the CMYK color gamut and get shifted to the nearest printable color.
Always convert to CMYK and do a test print to see actual results.
How do I remove backgrounds from complex images like hair or fabric?
AI tools handle complex edges better than manual selection.
For particularly difficult subjects, shoot against a contrasting background color (green screen for light-haired subjects, light backgrounds for dark subjects).
This gives the removal algorithm clear edge definition.
What file format should I use for print-ready flyers?
I export as PDF/X-1a or PDF/X-4 with CMYK color space, embedded fonts, and 300+ DPI images.
These PDF standards are designed for professional printing and prevent most common print issues.
Always confirm format requirements with your specific print shop first.
Start Creating Professional Event Flyers Today
Background removal doesn't have to be complicated or expensive.
The difference between amateur and professional event flyers comes down to proper preparation.
Start with high-resolution images, use quality removal tools, convert to CMYK, and always test print.
I've used this exact workflow to create flyers for events ranging from 50-person workshops to 5,000-person conferences.
The process scales.
Stop wasting money on reprints and low-quality flyers that damage your event's reputation.
Master how to remove background from event flyer images for print properly, and you'll create marketing materials that actually get people excited to attend your events.
Your flyers are often the first impression potential attendees have of your event.
Make it count.
Try our free background remover tool for professional results.


