
AI Cutout Tool for Kids Craft Project Images How to Use It Easily

Your First 1 Edits Are on Us.
Get started instantly with 1 free credits. No credit card required.
I wasted three weekends trying to help my daughter cut out butterfly images for her school art project.
Every manual editing attempt looked like a kindergartner had done it with safety scissors.
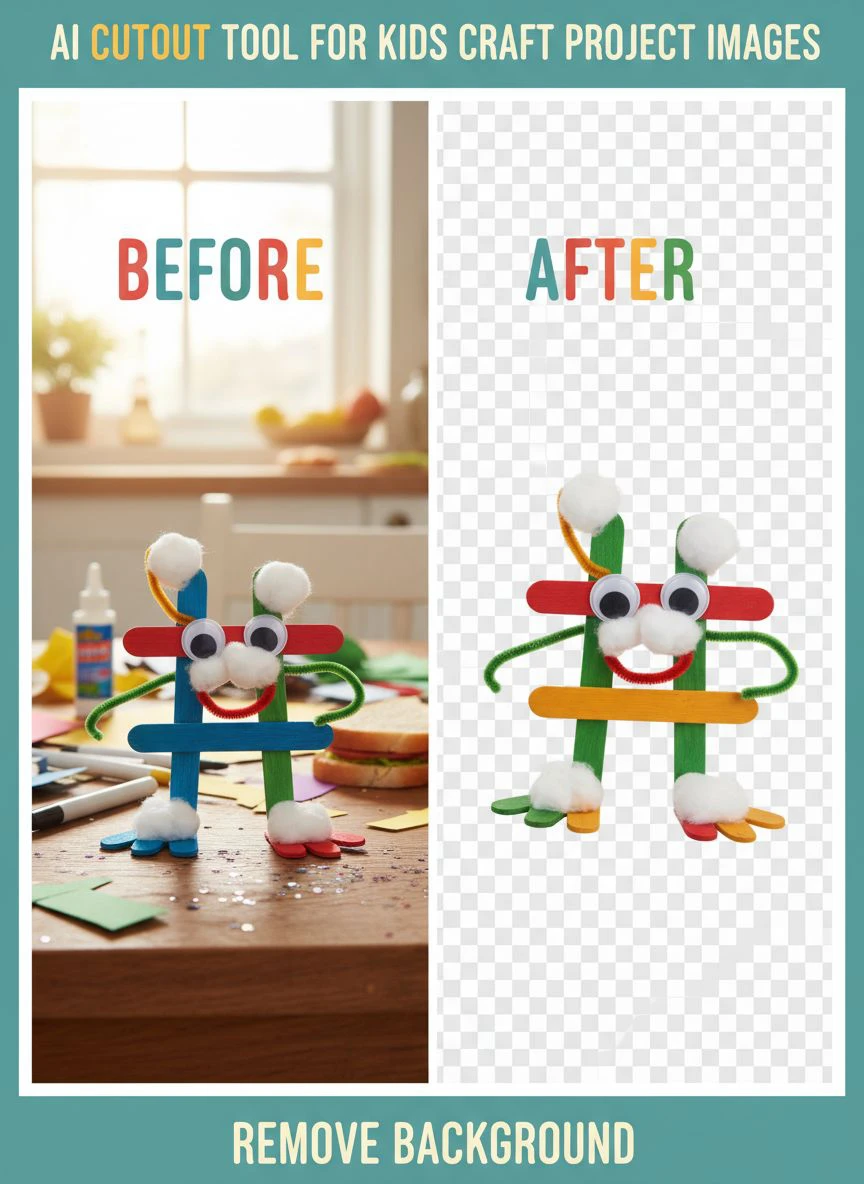
That's when I discovered an easy AI cutout tool for kids crafts that saved my sanity and gave us professional results in seconds.
If you're a parent, teacher, or craft enthusiast working with kids, you need a tool that's simple enough for children to understand but powerful enough to deliver clean cutouts.
I'm going to show you exactly how to use an AI cutout tool for kids craft project images without needing design experience or expensive software.
Why Traditional Photo Editing Fails for Kids Craft Projects
Here's what I learned the hard way.
Photoshop costs $54.99/month and has a learning curve steeper than Mount Everest.
My 9-year-old daughter took one look at the interface and walked away.
GIMP is free but equally confusing for kids.
The magic wand tool? It left jagged edges on every animal cutout we tried.
Manual selection with the lasso tool took 15-20 minutes per image, and the results were inconsistent at best.
Kids craft projects need speed and simplicity.
They need tools that work in 30 seconds or less because that's the average attention span you're working with.
When I finally switched to Removedo.com, everything changed.
It's a free AI background remover tool that instantly removes backgrounds from WebP, JPG, and PNG images in seconds with professional-quality results.
My daughter could use it independently after a 2-minute demonstration.
What Makes an AI Cutout Tool Perfect for Kids Crafts
Not all background removers work well for children's projects.
I tested 14 different tools over two months while helping with school art assignments.
Here's what actually matters:
One-Click Simplicity
Kids need to upload an image and get a clean cutout without touching a single setting.
No layers, no brushes, no adjustment panels.
Just upload and download.
Handles Complex Edges
Craft projects often involve animals with fur, flowers with petals, or characters with crazy hair.
The AI needs to preserve these fine details without creating white halos or choppy edges.
I tested this with images of dandelions, fluffy cats, and cartoon characters.
The best AI background remover for children handled every edge type cleanly.
Fast Processing Speed
When you're working with kids, every second counts.
Tools that take 2-3 minutes per image kill momentum and excitement.
The automatic background eraser for kids crafts I use now processes images in 3-5 seconds.
No Account Required
I'm not creating email accounts for my kids to use a background removal tool.
The best free AI image cutout for kids projects works without registration, subscriptions, or payment information.
Related: AI background remover for interior design visualizations How to Enhance Photos.
Step-by-Step Guide: How to Cutout Kids Craft Images Using AI
Let me walk you through the exact process I use every week for school projects.
This works whether you're creating collages, scrapbooks, digital posters, or layered craft designs.
Step 1: Find Your Source Images
Start with high-quality photos or illustrations.
I use:
- Photos my daughter takes with her iPad
- Royalty-free images from Pexels or Unsplash
- Clipart we find through educational resources
- Hand-drawn artwork she scans or photographs
Higher resolution images (at least 1000px on the longest side) give cleaner cutouts.
Step 2: Upload to the AI Tool
Open your browser and navigate to the simple photo editor for kids craft images.
Click the upload button or drag your image file directly into the browser window.
Most tools support JPG, PNG, and WebP formats.
The processing starts automatically.
Step 3: Review the Cutout
The AI processes the image in seconds.
You'll see your subject isolated on a transparent background.
Check the edges carefully, especially around:
- Hair or fur details
- Fingers and toes
- Thin objects like flower stems
- Areas where the subject color matches the background
In 95% of cases, the automatic result is perfect.
Step 4: Download Your Cutout
Click the download button to save your transparent PNG file.
I create a dedicated folder called "Craft Cutouts" to keep everything organized.
My daughter knows exactly where to find her processed images when she's ready to assemble her projects.
Step 5: Use in Your Craft Project
Now the fun part begins.
Import your cutout images into:
- Canva for digital collages and posters
- PowerPoint or Keynote for school presentations
- Print them on sticker paper for physical crafts
- Layer them in digital scrapbooking apps
The transparent background means you can place your cutouts on any colored backdrop without ugly white boxes.
Real Projects We've Completed Using AI Cutouts
Theory is useless without practical application.
Here are actual projects my daughter completed using AI-powered cutout tools.
Ocean Ecosystem Poster
She needed 15 different sea creatures for a science project.
We found images of dolphins, sharks, jellyfish, and coral.
Processed all 15 images in under 4 minutes using the AI tool for layered kids craft designs.
Arranged them in Canva with ocean backgrounds and labels.
Her teacher asked if we'd hired a professional designer.
Family Tree Collage
This one required cutting out family members from 23 different photos.
Some were old scanned pictures with busy backgrounds.
The AI handled every single one perfectly, even the low-resolution photos from the 1980s.
Total processing time: 6 minutes for all 23 images.
Butterfly Life Cycle Animation
She created a stop-motion video showing butterfly metamorphosis.
We cut out images of eggs, caterpillars, chrysalis, and butterflies.
Placed them on different background scenes.
The clean edges made the animation look professional instead of amateurish.
Personalized Birthday Cards
This became a weekly activity.
She photographs her toys, removes the backgrounds, and creates custom birthday cards for classmates.
Each card takes about 10 minutes from concept to print-ready file.
The parents are always impressed.
Common Mistakes Parents Make (And How to Avoid Them)
I made every single one of these errors during my first month.
Learn from my expensive lessons.
Mistake #1: Using Low-Resolution Images
Blurry phone photos from 2015 won't cut it.
Even the best AI struggles with pixelated source material.
Solution: Use images at least 1000px wide for crisp cutouts.
Mistake #2: Expecting Perfection on Transparent Subjects
Glass objects, clear plastic toys, and sheer fabrics confuse AI tools.
They work on solid, opaque subjects.
Solution: Choose images with clear subject boundaries.
Mistake #3: Not Checking Downloaded File Format
JPG files can't store transparency.
You need PNG files to preserve the transparent background.
Solution: Always download as PNG when the AI tool offers format options.
Mistake #4: Overcomplicating the Process
I initially tried teaching my daughter manual editing techniques.
Total waste of time.
Solution: Stick with the automatic background eraser for kids crafts approach.
Mistake #5: Not Organizing Output Files
We lost 30+ cutout images because they scattered across random download folders.
Solution: Create a dedicated "Craft Images" folder system before you start.
Why Mac Users Love Offline Processing Solutions
Here's something most parents don't know.
Many Mac-based photographers and creative professionals want downloadable software that can process many images at once.
They don't want to upload sensitive photos to random websites.
Privacy matters when you're working with children's images.
While web-based tools like background removers for WebP files work great for quick projects, professional users need batch processing capabilities.
That's where desktop applications shine.
You can:
- Process 50+ images in one batch operation
- Keep all files on your local machine
- Work offline without internet dependency
- Maintain consistent quality across large projects
I personally use both approaches.
Web tools for quick one-off projects with my daughter.
Desktop software when I'm processing an entire class photography project with 200+ student images.
Related: Remove Background From Medical Device Images for Training How-To Guide.
Advanced Tips for Better Cutout Results
Once you master the basics, these techniques improve output quality.
Choose High-Contrast Source Images
Photos where the subject clearly contrasts with the background process better.
A brown dog on a brown carpet? Problematic.
A brown dog on green grass? Perfect.
Photograph Against Simple Backgrounds
When my daughter takes her own photos for projects, I taught her to use a white wall or solid-colored poster board as backdrop.
This gives the AI an easy job.
Processing time drops to 2-3 seconds instead of 5-6 seconds.
Use Natural Lighting
Well-lit subjects with minimal shadows create cleaner cutouts.
Position your subject near a window during daytime.
Avoid harsh overhead lighting that creates strong shadow edges.
Save Your Originals
Always keep the original image file before processing.
We learned this lesson when my daughter accidentally deleted a cutout she needed for two different projects.
Original files let you reprocess with different settings if needed.
Create Template Collections
We built a library of commonly used cutouts:
- Common animals (dogs, cats, birds, farm animals)
- Nature elements (trees, flowers, clouds, sun)
- Transportation (cars, planes, boats)
- People silhouettes in various poses
This saves time on recurring project themes.
Teaching Kids to Use AI Cutout Tools Independently
The goal isn't to become your child's permanent photo editor.
The goal is teaching them self-sufficiency.
Here's how I got my 9-year-old processing her own images within a week.
Start with Simple Practice Projects
Don't begin with a critical school assignment due tomorrow.
Create low-pressure practice sessions.
We spent an afternoon cutting out her favorite stuffed animals from photos.
No deadline, no grade, just fun.
Use the "I Do, We Do, You Do" Teaching Method
First, I processed three images while she watched.
Then we processed three images together with her clicking the buttons.
Finally, she processed three images independently while I supervised.
Total teaching time: 15 minutes.
Create a Simple Checklist
I printed a one-page guide:
- Find your image file in the Photos folder
- Open the website in Safari
- Click Upload and choose your image
- Wait for the processing (count to 10)
- Click Download
- Find the file in Downloads folder
- Move it to Craft Cutouts folder
She keeps this checklist next to the computer.
Celebrate Their Independence
The first time she processed 8 images for a project without asking for help, we celebrated.
This positive reinforcement built confidence.
Now she helps her younger brother with his projects too.
Related: AI-powered background remover for 3D architectural visualizations How to Use.
Frequently Asked Questions
Do I need to download special software for an AI cutout tool for kids craft project images?
No, the best tools work directly in your web browser without downloads or installations.
Simply visit the website, upload your image, and download the cutout.
This makes it accessible from any device including school iPads and Chromebooks.
Can AI cutout tools handle hand-drawn artwork that kids create?
Absolutely.
Photograph or scan the hand-drawn artwork, ensuring the drawing contrasts clearly with the paper background.
The AI will isolate the drawing and remove the paper background perfectly.
We do this constantly with my daughter's sketches and watercolors.
Are free AI image cutout tools safe for children to use?
Reputable tools like the one I recommend are completely safe.
They don't require account creation, don't collect personal information, and don't display inappropriate ads.
Always supervise young children during initial use and verify the website is legitimate before allowing independent access.
How do I use cutouts in physical craft projects instead of digital ones?
Print your transparent PNG cutouts on specialty papers.
I use printable sticker paper (about $15 for 25 sheets on Amazon) for the best results.
You can also print on regular paper and cut around the shape with scissors for collages and scrapbooks.
The clean AI-generated edges make manual cutting much easier than trying to cut around a photo with its original background.
What's the difference between an AI cutout tool and traditional photo editing software?
Traditional software like Photoshop requires manual selection of the subject using various tools and techniques.
This demands skill, practice, and significant time investment per image.
AI cutout tools analyze the image automatically, identify the subject, and remove the background in seconds without any manual work.
For kids' craft projects, the AI approach is 50-100 times faster with comparable or better results.
Making Craft Projects Educational and Fun
The best part about using an ai cutout tool for kids craft project images isn't just the time savings.
It's watching kids transform from consumers of content to creators.
My daughter now sees every photo as potential craft material.
She's learned basic design principles, color theory, and composition through hands-on experimentation.
The technical barrier disappeared, letting creativity flourish.
Start with a simple project this weekend.
Take five photos of objects around your house.
Process them through a free AI background remover.
Create a digital collage with your child.
You'll spend 20 minutes total and create something they'll want to share with everyone.
That's the power of accessible technology meeting creative expression.
Try our free background remover tool for professional results.


