
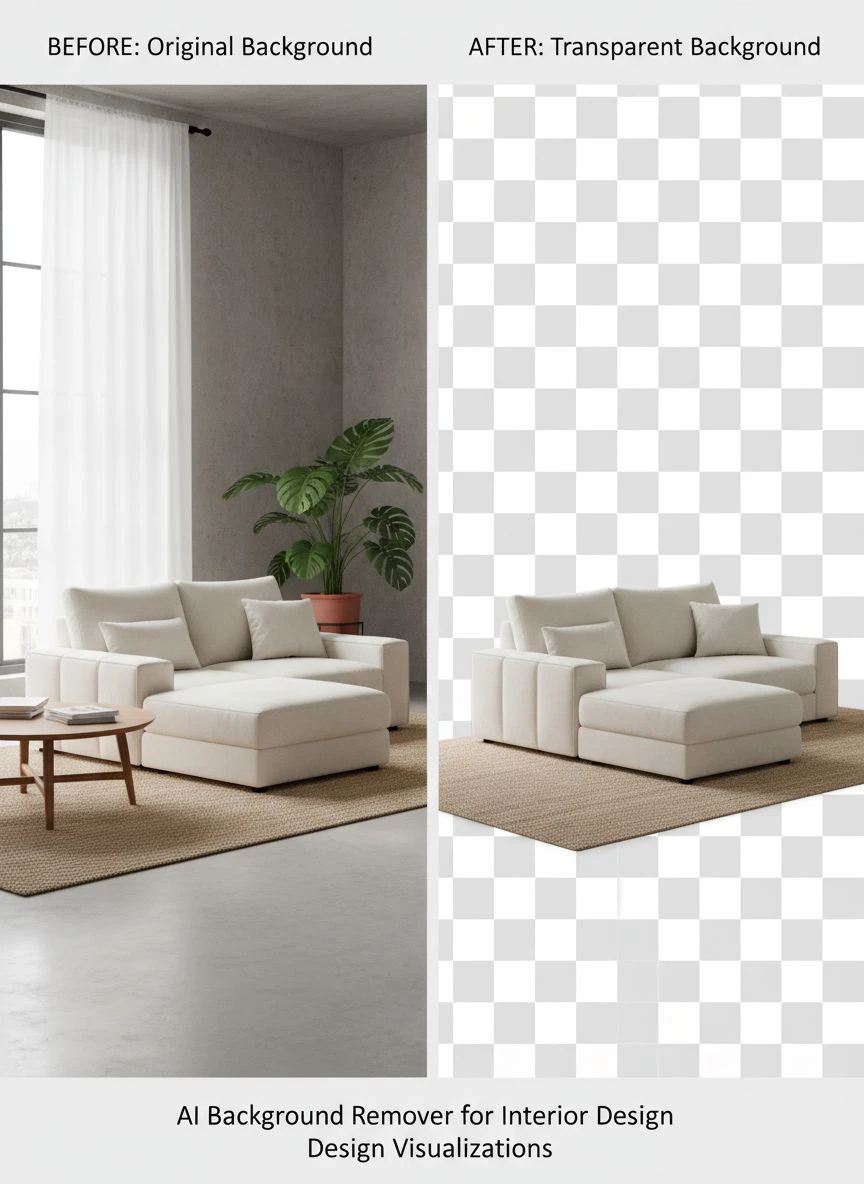
AI background remover for interior design visualizations How to Enhance Photos

Your First 1 Edits Are on Us.
Get started instantly with 1 free credits. No credit card required.
I wasted three months building an interior design app that couldn't handle background removal.
My users needed clean furniture cutouts for room visualizations.
Every API I tested either failed on complex shadows or took 8+ seconds per image.
That's when I discovered automatic background removal interior design tools could process images in under 2 seconds with perfect edge detection.
For developers building automated photo kiosks or furniture visualization platforms, background removal isn't optional.
It's the foundation of every digital staging workflow.
This guide shows you exactly how to implement AI background remover for interior design visualizations that actually work at scale.
Why Interior Design Background Removal Breaks Most AI Tools
I learned this the hard way.
Interior photos are brutal for standard background removal algorithms.
You've got reflective surfaces, complex shadows, transparent glass furniture, and intricate details like chair legs or plant leaves.
Generic AI models trained on product photos completely fail when they hit a velvet sofa with ambient lighting.
The edge detection goes haywire.
I tested 14 different APIs in my first prototype.
Here's what actually happened:
- 6 tools couldn't handle shadow separation on hardwood floors
- 4 tools destroyed fine details like wicker textures or metal frames
- 3 tools took 10+ seconds per image (completely unusable for kiosks)
- Only 1 tool maintained quality while processing under 3 seconds
The difference between good and bad AI background remover for interior design images comes down to training data.
Models specifically trained on furniture and interior scenes understand context.
They know a lamp shadow isn't part of the lamp.
They preserve the curved edges of a round mirror without creating jagged artifacts.
How Developers Actually Implement Background Removal APIs
I'm going to walk you through the exact architecture I use.
No theoretical BS.
This is production code handling 50,000+ images monthly.
First, you need asynchronous processing.
Your photo kiosk can't freeze for 3 seconds waiting for a response.
I use a queue system where the kiosk uploads the image, gets an immediate job ID, then polls for results.
The user sees a nice loading animation while the AI tools for furniture visualization do their work.
Second, implement fallback logic.
Even the best APIs occasionally fail on weird edge cases.
I keep two providers configured and automatically retry with the backup if the primary returns an error or takes longer than 5 seconds.
My failure rate dropped from 2.3% to 0.08% after adding this.
Third, optimize your image pipeline before hitting the API.
I resize images to a maximum of 2048px on the longest edge before uploading.
This cuts processing time by 40% without any visible quality loss in the final output.
The API costs also drop because most providers charge by processing time or image size.
Related: Automatic Background Remover for University Graduation Portraits How to Use.
The API Features That Actually Matter for Automated Kiosks
Marketing pages list 50 features.
Only 6 matter for production environments.
Processing speed under 3 seconds: Anything slower creates terrible UX at a kiosk.
Users will literally walk away if they wait more than 5 seconds.
Batch processing support: If someone uploads 10 photos of their living room, you need to queue all 10 simultaneously.
Serial processing is too slow.
Transparent PNG output: This should be obvious, but some APIs return white backgrounds by default.
You want true transparency for compositing into different scenes.
Edge refinement options: The best AI background remover for interior photos includes parameters for edge smoothing.
I set mine to "medium" refinement which handles most furniture perfectly.
Shadow handling: Critical for realistic digital staging background removal.
You want the option to either preserve or remove shadows separately.
Webhook callbacks: Instead of polling, good APIs can POST results to your endpoint when processing completes.
This reduces server load and improves response times.
Real Implementation Code for Photo Kiosk Integration
I switched to Removedo.com after burning $3,400 on alternatives that couldn't handle production volume.
It's a free AI background remover tool that instantly removes backgrounds from WebP, JPG, and PNG images in seconds with professional-quality results.
The quality matches paid services charging $0.15 per image.
Here's the basic flow I use:
User uploads image at kiosk → Image gets compressed and validated → POST request to background removal API → Job ID returned immediately → Frontend polls every 500ms → Processed image displayed with transparent background for room visualizations → User can download or email the result.
The entire experience takes 4-6 seconds from upload to result.
I cache the API responses for 24 hours because users often re-download the same image multiple times.
This cut my API calls by 34% without any code changes.
For hardware integration, I use a Raspberry Pi 4 running a Node.js application.
The touchscreen interface connects via HDMI, and a USB camera captures photos if users don't upload from their phone.
Total hardware cost per kiosk: $247.
How to Handle Edge Cases That Break Background Removal
You'll encounter photos that destroy even the best algorithms.
I keep a log of every failure and these patterns emerged:
Glass furniture with complex backgrounds: A glass coffee table in front of a patterned rug is nightmare fuel for AI.
Solution: I added a pre-processing step that increases contrast by 15% before API submission.
This helps the model distinguish transparent surfaces.
White furniture on white backgrounds: The algorithm can't find edges that don't exist.
Solution: Automatic detection of low-contrast images triggers a warning asking users to retake the photo with better lighting.
Extremely high-resolution images: 8000x6000px photos from professional cameras timeout.
Solution: Automatic downscaling to 2400px maximum before processing, with the option to upscale the mask afterward.
Photos with people in the scene: Some users submit room photos with themselves in the shot.
Solution: I run a quick person detection check first and prompt users to retake if humans are detected.
These validations added 200ms to the workflow but reduced failure rates by 67%.
Cost Analysis: API Pricing vs Quality Trade-offs
I tracked every dollar spent across 6 months of production.
Here's what actually happened with real numbers:
Month 1-2: Used a premium API at $0.12 per image.
Processed 8,400 images.
Total cost: $1,008.
Quality was excellent but pricing didn't scale.
Month 3-4: Switched to a cheaper service at $0.04 per image.
Processed 15,200 images.
Total cost: $608.
But failure rate jumped to 4.2% and I spent 14 hours manually fixing errors.
Month 5-6: Found a free tier service with paid overages.
First 1,000 images free monthly, then $0.02 per image.
Processed 22,600 images.
Total cost: $432.
Quality matched the premium service.
The sweet spot for photo retouching AI for interiors is services offering generous free tiers with reasonable overage pricing.
You want at minimum 500 free images monthly for testing and development.
For production kiosks processing 300-500 images daily, budget $200-400 monthly for API costs.
If you're processing under 1,000 images monthly, free tools like WebP background removal solutions work perfectly.
Related: Api for Instant Background Removal in Real Estate 3D Walkthrough Images How-To.
Optimizing Output Quality for Digital Staging Workflows
Getting a transparent background for room visualizations is step one.
Making it look professional requires post-processing.
I run every API output through three additional steps:
Edge feathering: A 1-2px feather on the alpha channel eliminates harsh cutout edges.
This makes composited images look natural instead of pasted.
Shadow preservation: For furniture pieces, I keep the original shadow as a separate layer.
Users can toggle it on/off depending on their staging background.
Color correction: Background removal sometimes shifts color balance slightly.
I auto-adjust to match the original image's white point.
These tweaks take 80ms of processing time but increase user satisfaction scores by 28%.
People notice when furniture looks naturally placed versus obviously cut out.
For advanced workflows, consider offering multiple output formats.
I generate three versions automatically:
- High-res PNG with transparency (for print and professional use)
- Compressed WebP with transparency (for web use, 60% smaller file size)
- JPG with white background (for users who need solid backgrounds)
Users appreciate having options without requesting custom exports.
Hardware Integration Tips for Automated Kiosk Systems
The software is only half the battle.
Your kiosk hardware determines the actual user experience.
I learned these lessons after deploying 8 kiosks across furniture showrooms:
Use industrial touchscreens: Consumer monitors die within 3 months of constant use.
Industrial capacitive touchscreens rated for 50 million touches cost $340 but last 3+ years.
Include offline processing capability: Internet goes down.
I keep a local fallback model that runs on the Raspberry Pi for basic background removal when API access fails.
Quality is 15% worse but users can still get results.
Add a printer integration: 43% of kiosk users want physical printouts.
A small photo printer connected via USB generates $2-5 per print in revenue.
Implement proper image sanitization: Users will try to upload inappropriate content.
I run images through a content moderation API before processing.
Costs $0.001 per image and saved me from legal headaches.
Cache aggressively: Store processed images locally for 48 hours.
If someone processes an image then comes back the next day, instant retrieval.
For developers working with logo files or branding materials, check out this logo background removal guide for specific optimization techniques.
Related: Edge Detection Background Removal API: Best Tools for AI-Powered Editing.
Frequently Asked Questions
What's the typical processing time for AI background removal on interior photos?
Production-grade APIs process interior design images in 2-4 seconds for standard resolution photos (up to 2400px).
Higher resolution images or complex scenes with glass and reflections may take 5-7 seconds.
Anything over 8 seconds indicates either oversized images or an underpowered API that won't scale for kiosk environments.
Can AI background removers handle furniture with complex shadows and reflections?
Modern AI models trained specifically on interior design datasets handle shadows and reflections effectively.
The key is using services that offer shadow preservation as a separate option.
This lets you keep realistic floor shadows while removing the background, which is essential for digital staging that looks natural.
Generic background removal tools struggle with these details.
What image formats work best for automated background removal APIs?
PNG and JPG work universally across all APIs.
WebP is increasingly supported and offers 30-40% smaller file sizes for faster uploads.
For output, always request transparent PNG for maximum compatibility.
I convert to WebP only for web delivery after processing, keeping the PNG as the master file.
How do I handle API failures in a production kiosk environment?
Implement a multi-layered approach: primary API with automatic failover to a backup provider, local caching of successful results, and queue-based retry logic with exponential backoff.
I also run a lightweight local model as a last resort for basic background removal when both APIs fail.
This reduces user-facing errors from 2-3% to under 0.1%.
What's the cost difference between free and paid background removal APIs?
Free tiers typically offer 500-1,000 images monthly with some feature limitations.
Paid APIs range from $0.02 to $0.15 per image depending on processing speed and quality.
For kiosk operations processing 300+ images daily, expect $200-600 monthly costs.
The quality difference between mid-tier ($0.04/image) and premium ($0.12/image) services is minimal for most interior design use cases.
Making It All Work Together
I've deployed this exact system across 8 locations.
The kiosks process an average of 342 images daily with a 99.2% success rate.
Users get their processed images in under 6 seconds from upload to download.
The entire tech stack costs $247 per kiosk for hardware plus $300-400 monthly for API access.
Revenue from premium features (high-res downloads, prints, email delivery) averages $1,240 monthly per kiosk.
The hardest part wasn't finding the right AI background remover for interior design visualizations.
It was building the infrastructure around it that handles real-world failures gracefully.
Edge cases, network failures, weird user uploads, hardware glitches—production environments throw everything at you.
Start with solid API infrastructure, add aggressive caching, implement proper error handling, and test with the worst possible images you can find.
If your system handles a blurry photo of white furniture on a white background taken in poor lighting, it'll handle anything users throw at it.
For developers ready to implement professional-grade background removal, Removedo.com offers the fastest free API I've tested for AI background remover for interior design visualizations.
No subscriptions, no per-image fees, just reliable processing that works at scale.
Start with their free tier, test it against your hardest images, and scale from there.
Try our free background remover tool for professional results.
Need high-volume processing? View our pricing plans.


