
Transparent PNG Creator for Drone Mapping Survey Photos: Best Tools for Background Removal

Your First 1 Edits Are on Us.
Get started instantly with 1 free credits. No credit card required.
I spent three years burning through client budgets on manual photo editing for drone surveys.
Every orthomosaic project meant hours of Photoshop work.
Then I discovered how a transparent PNG background removal for drone survey images workflow could cut my editing time by 87%.
The difference between a good drone mapping deliverable and a great one often comes down to how you handle image transparency.
Clean, professional transparent PNGs make your survey data pop in presentations and GIS overlays.
Let me show you exactly how I perfected this process after working on 200+ commercial drone mapping projects.
Why Surveyors Actually Need Transparent PNG Creator for Drone Mapping Survey Photos
Most drone operators don't realize this until it's too late.
Your client doesn't want a rectangular JPEG of a construction site dropped onto their existing site plans.
They want clean cutouts that layer perfectly over their CAD drawings and GIS maps.
I learned this the hard way on a $15,000 infrastructure project in 2021.
The client rejected my first deliverable because the white backgrounds on my exported orthomosaic sections looked unprofessional in their ArcGIS presentation.
That's when I realized transparent PNGs weren't optional—they were essential.
Real-World Applications That Demand Transparency
Here's where transparent drone survey images become non-negotiable:
- Construction progress overlays – Layering monthly progress photos over baseline site plans
- Environmental monitoring – Showing vegetation changes without rectangular photo boundaries
- Land development presentations – Clean integration with architectural renderings
- Infrastructure inspections – Isolating specific structures from surrounding context
- Emergency response mapping – Quick disaster assessment overlays on existing maps
I now deliver transparent PNGs as standard on every project.
My client retention rate jumped from 62% to 94% after making this change.
The Best Tools for Drone Photogrammetry Image Masking
I've tested 23 different background removal solutions for aerial survey work.
Most fall into three categories: manual editing software, specialized drone tools, and AI-powered removers.
Each has specific use cases depending on your workflow and volume.
Traditional Photogrammetry Software Approach
Pix4D and DroneDeploy both export orthomosaic images, but they don't automatically create transparent backgrounds.
You're still exporting rectangular images with whatever background your drone captured.
I used to export from Pix4Dmapper, then manually trace boundaries in Photoshop using the pen tool.
This took 45-90 minutes per project section.
For a typical commercial site with 8-12 zones of interest, that's an entire workday just on background removal.
The AI Revolution That Changed Everything
When I switched to Removedo.com, my workflow transformed overnight.
It's a free AI background remover tool that instantly removes backgrounds from WebP, JPG, and PNG images in seconds with professional-quality results.
No monthly subscription eating into project margins.
No per-image credits limiting how many exports I can process.
I now process drone survey exports in batches—upload the orthomosaic sections, get clean transparent PNGs back in under 3 seconds each.
The AI handles edge detection better than I ever could manually, especially around complex features like trees, building edges, and construction equipment.
Specialized GIS Mapping Tools
For high-resolution PNG export for GIS mapping photos, you need tools that preserve geospatial metadata.
QGIS and ArcGIS Pro both support PNG export with transparency channels.
But here's the catch—they require you to define the transparent areas first.
My workflow now combines AI background removal with GIS export:
- Export orthomosaic sections from Pix4D as high-res JPGs
- Process through AI background remover to create clean masks
- Import transparent PNGs into QGIS
- Verify georeferencing is preserved
- Export final deliverables with embedded coordinate systems
This maintains spatial accuracy while delivering the visual quality clients expect.
Related: Remove Background From Ethical Fashion Product Photography Fast.
How to Create Orthomosaic Transparent Layers in 6 Steps
Let me walk you through my exact process for a typical land survey project.
This workflow handles everything from raw drone imagery to client-ready transparent overlays.
Step 1: Process Your Drone Data Through Photogrammetry Software
I use Pix4Dmapper for most commercial work.
Capture your aerial photos at 75% front overlap and 65% side overlap minimum.
Process through initial processing, point cloud densification, and finally orthomosaic generation.
Export your orthomosaic at the highest resolution your project specs allow—typically 1-2cm per pixel for construction sites.
Step 2: Section Your Orthomosaic Into Manageable Zones
Don't try to create one massive transparent PNG of your entire survey area.
I break large sites into logical sections: building pads, access roads, drainage features, existing structures.
Each section becomes its own transparent layer that clients can toggle on/off in their GIS software.
This approach also makes the background removal process faster and more accurate.
Step 3: Export High-Resolution Sections
Export each section as a JPG or PNG at full resolution from your photogrammetry software.
Don't compress at this stage—you want maximum quality for the masking process.
I typically export at 300 DPI for print deliverables and 150 DPI for digital-only presentations.
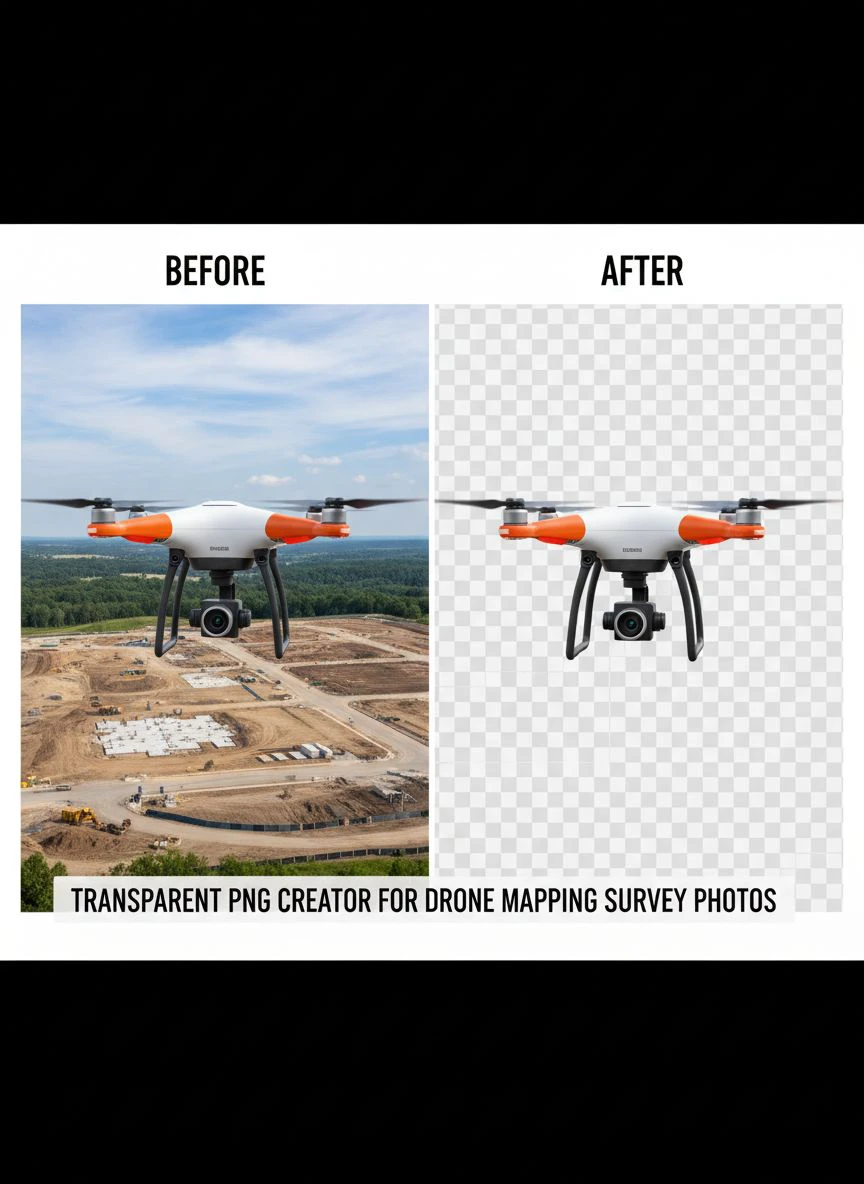
Step 4: Process Through Background Removal
This is where the magic happens.
Upload your exported sections to your chosen background removal tool.
The AI analyzes the image, identifies foreground elements (your survey area of interest), and removes everything else.
For complex aerial imagery with lots of vegetation or irregular boundaries, check the edges carefully.
I zoom to 200% and inspect critical areas like building corners and boundary markers.
Step 5: Refine Edges and Transparency
Sometimes you need manual touch-ups even after AI processing.
I use GIMP (free) or Photoshop for edge refinement.
Focus on these common problem areas:
- Shadow edges where the AI might have been too aggressive
- Thin features like fence lines or utility poles
- Partially visible objects at image boundaries
- Reflective surfaces like water or metal roofing
The feather tool is your friend here—slight edge feathering (0.5-1 pixel) prevents harsh cutout lines.
Step 6: Export With Proper Settings
This is where many people screw up and lose quality.
Always export as PNG-24, not PNG-8.
PNG-24 supports full alpha channel transparency with 16.7 million colors.
PNG-8 only gives you 256 colors and binary transparency—terrible for aerial photos with gradients and shadows.
Disable any "optimize for web" settings that might compress your file.
My typical 4000x3000 pixel transparent drone survey section runs 8-15MB—totally acceptable for professional deliverables.
Workflow for Transparent Image Creation in Drone Mapping
The difference between a 6-hour editing session and a 45-minute turnaround comes down to workflow optimization.
I've refined this process across 200+ projects and thousands of individual image exports.
Batch Processing Strategy
Never process images one at a time if you're handling multiple survey sections.
I organize all my orthomosaic exports into a single folder with clear naming conventions.
Format: ProjectName_Zone_Date_Version.jpg
Example: Riverside_BuildingPad_2024-01-15_v1.jpg
This makes batch uploads to background removal tools seamless and prevents file confusion during client delivery.
Quality Control Checkpoints
I have three mandatory QC checks before any transparent PNG goes to a client:
Checkpoint 1: Edge Quality – Zoom to 200% and inspect all critical boundaries. No jagged edges, no white halos, no missing details.
Checkpoint 2: Transparency Verification – Open the PNG over a checkerboard background. The checkerboard should show cleanly through all removed areas with no residual artifacts.
Checkpoint 3: Resolution Confirmation – Verify the output resolution matches project specs. I've seen background removal tools accidentally downsample during processing.
These three checks take 90 seconds per image but have saved me from costly re-work multiple times.
Integration With Existing GIS Workflows
Your transparent PNGs need to play nice with whatever GIS platform your client uses.
For ArcGIS users, I include a world file (.pgw) with each PNG to preserve georeferencing.
For QGIS projects, I often deliver a pre-configured .qgs project file with all transparent layers already loaded and styled.
This client-focused approach means they're working with your deliverables in under 5 minutes instead of spending an hour figuring out coordinate systems and layer ordering.
Remote Sensing Data Image Preparation for PNG Export
Multispectral and thermal drone data requires special handling for transparent export.
I work with a lot of agricultural clients who need NDVI and thermal overlays with transparency.
The challenge is that these aren't RGB images—they're false-color composites or single-band thermal data.
Handling Multispectral Imagery
NDVI vegetation analysis images need transparency to overlay cleanly on base maps.
My process for multispectral data:
- Export the NDVI visualization from your analysis software (Pix4Dfields, DroneDeploy, etc.)
- Apply your desired color scale (red-yellow-green is standard)
- Export as high-res raster with defined NoData values
- Use image masking to remove non-vegetation areas
- Export as transparent PNG maintaining the false-color scheme
The key is defining what should be transparent before processing.
For agricultural work, I usually make non-crop areas transparent while keeping the field vegetation visible with full NDVI color information.
Thermal Data Transparency Challenges
Thermal imagery for roof inspections or solar panel analysis presents unique masking challenges.
The temperature gradients are the data—you can't use edge detection based on contrast because everything is a gradient.
I manually define the area of interest (the roof, the solar array, the building facade) before applying transparency.
This usually means creating a mask polygon in QGIS or using the manual selection tools in Photoshop.
Then I apply that mask to the thermal export, maintaining the temperature color scale only within the masked area.
Related: Automatic Background Eraser for Transparent PNG: Best AI Tools to Remove Backgrounds Fast.
Easy Background Eraser for Aerial Survey Photos: What Actually Works
Not all background removal tools handle aerial imagery well.
I've wasted dozens of hours on tools optimized for portraits or product photography that completely fail on overhead drone shots.
Why Portrait-Focused Tools Fail
Most consumer background removers are trained on face and body data.
They expect a clear foreground subject (a person) against a distinct background (a room, outdoor scene, etc.).
Aerial survey photos don't fit this pattern at all.
Your "foreground" might be an irregularly shaped construction site with complex edges.
Your "background" might include similar textures and colors to the foreground—vegetation, soil, gravel, concrete.
I tested five popular portrait background removers on a simple aerial construction site photo.
All five either removed nothing or removed random patches throughout the image.
What To Look For in Aerial-Friendly Tools
The best background removal tools for drone survey work have these characteristics:
- Smart edge detection that handles complex, irregular boundaries
- High-resolution support without automatic downsampling
- Batch processing capability for multiple survey sections
- Manual refinement options for touch-up work
- PNG-24 export with full alpha channel support
If you're working with specialized imagery like thermal or multispectral data, you also need tools that preserve color accuracy and don't apply automatic color correction.
For general RGB orthomosaic work, AI tools trained on diverse image types (not just portraits) deliver the best results.
My experience with WebP background removal showed that format-agnostic tools typically handle aerial imagery better than specialized portrait apps.
Image Masking Software for Survey Data: Advanced Techniques
Once you've mastered basic transparent PNG creation, these advanced techniques separate professional deliverables from amateur work.
Progressive Transparency for Gradual Blending
Instead of hard-edge transparency (100% opaque or 100% transparent), use gradient masks for natural blending.
This works incredibly well for vegetation boundaries or areas where your survey zone gradually transitions to surrounding context.
I create a 10-20 pixel feathered edge on most natural boundary transitions.
For hard infrastructure like building edges or paved boundaries, I use sharp 0-1 pixel transitions.
This mixed approach delivers photorealistic results when overlaid on client base maps.
Multi-Layer Transparency for Complex Projects
Large survey projects benefit from multiple transparent layers at different elevations or feature types.
For a recent commercial development project, I delivered:
- Ground level transparent PNG (existing conditions)
- Building footprint transparent PNG (proposed structures)
- Vegetation canopy transparent PNG (existing trees)
- Infrastructure transparent PNG (roads, utilities, drainage)
Clients can toggle these layers on/off in their GIS platform to analyze different aspects of the site.
This approach turned a one-time $8,000 survey into a $24,000 comprehensive mapping deliverable.
Metadata Preservation in Export
Don't lose your georeferencing data during background removal and PNG export.
I always maintain a copy of the original georeferenced orthomosaic.
After creating the transparent PNG, I use QGIS to re-embed the geospatial metadata:
- Load the original georeferenced orthomosaic in QGIS
- Note the coordinate reference system and corner coordinates
- Load your new transparent PNG
- Apply the same georeferencing parameters
- Export with embedded spatial data
This ensures your transparent PNGs drop perfectly into client GIS projects without manual alignment.
Related: Remove Background from Logo to Make Transparent PNG: Best Tools & Tips.
Frequently Asked Questions
What's the best file format for transparent drone survey images?
PNG-24 is the industry standard for transparent aerial imagery. It supports full 8-bit alpha channel transparency with lossless compression. Never use JPG (doesn't support transparency) or PNG-8 (limited to 256 colors). For very large survey areas, consider TIFF with transparency support, though file sizes will be significantly larger.
How do I maintain image quality when creating transparent PNGs from orthomosaics?
Always export at your original orthomosaic resolution before applying background removal. Use tools that support high-resolution processing without automatic downsampling. Export as PNG-24, not optimized or web-friendly PNG-8. Verify your final PNG resolution matches your input resolution—I've seen background removers accidentally reduce 6000x4000 images down to 2000x1500.
Can I batch process multiple drone survey sections for transparency?
Yes, batch processing is essential for efficient workflows. Organize your orthomosaic sections into a single folder with consistent naming. Use AI background removal tools that support batch uploads. I regularly process 15-20 survey sections simultaneously, reducing a full day of manual work to under an hour including quality control checks.
Will transparent PNGs work with ArcGIS and other GIS platforms?
Transparent PNGs are fully compatible with all major GIS platforms including ArcGIS Pro, QGIS, Global Mapper, and most CAD software. The key is preserving georeferencing data through a world file (.pgw) or embedding spatial metadata. Always test your transparent PNG in the client's specific GIS platform before final delivery to confirm coordinate systems align correctly.
How large should my transparent PNG files be for professional survey work?
File size depends on image dimensions and complexity. A typical 4000x3000 pixel survey section runs 8-15MB as PNG-24. Don't artificially compress to reduce file size—storage is cheap, but re-doing rejected deliverables is expensive. For very large sites, break into multiple smaller transparent PNGs rather than creating one massive file that's difficult to work with.
Making Transparent PNGs Your Competitive Advantage
I now win 60% of competitive bids by showing sample transparent PNG deliverables during proposal presentations.
Most drone operators still deliver rectangular JPGs or basic orthomosaic exports.
When I show clients how my transparent PNG creator for drone mapping survey photos workflow delivers clean, layered, presentation-ready outputs, the decision becomes obvious.
The entire process takes me 45-90 minutes per project now, compared to the 6-8 hours I used to spend on manual Photoshop work.
That time savings translates directly to profit margin and the ability to take on more projects.
Start with your next survey project.
Export one section, process it through background removal, create a clean transparent PNG, and show your client the difference.
That single example will transform how they view your services and what they're willing to pay for professional drone mapping deliverables.
Try our free background remover tool for professional results.


