Bulk Background Removal for Trade Show Booth Images How to Get Perfect Results

Your First 1 Edits Are on Us.
Get started instantly with 1 free credits. No credit card required.
I spent $3,400 on a trade show booth last year.
The booth looked incredible in person.
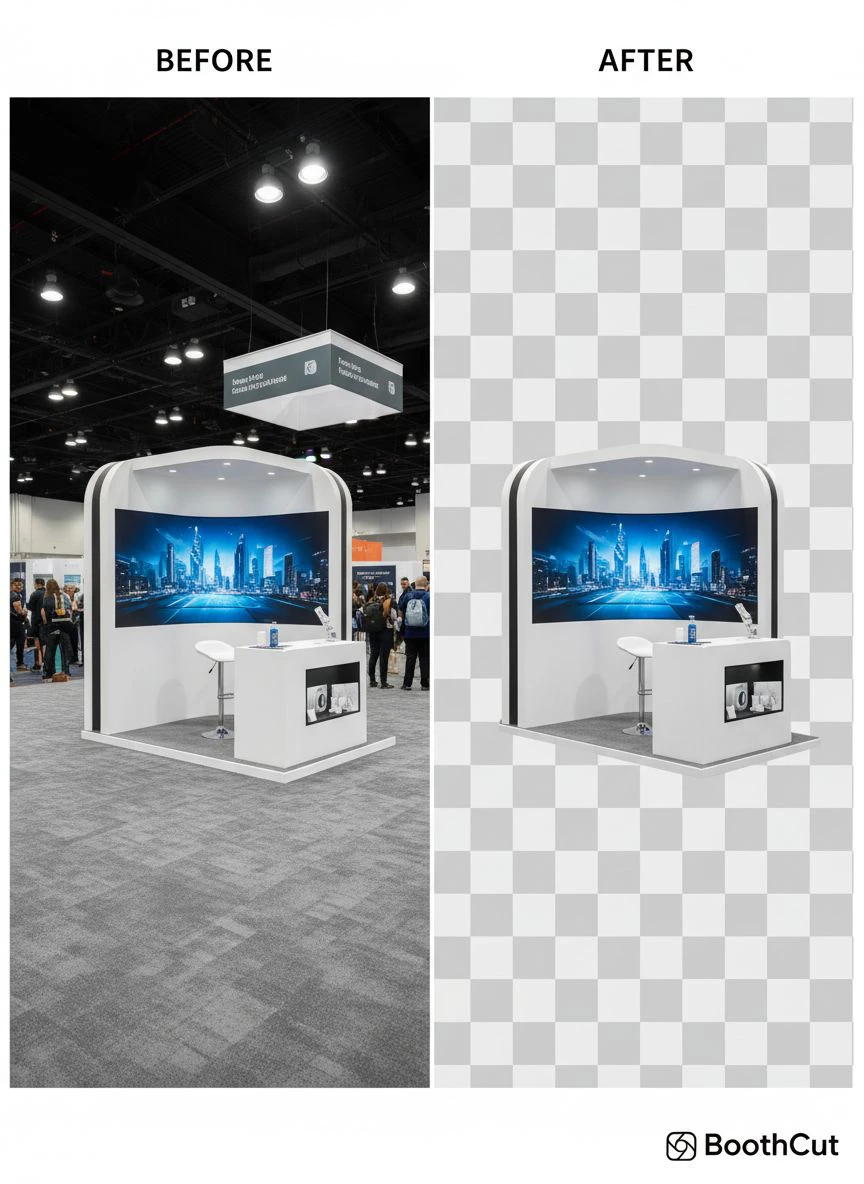
But when I tried to share photos online, the cluttered backgrounds made everything look amateurish.
That's when I discovered bulk photo cutout for trade shows could transform my entire marketing strategy.
Within 48 hours, I processed 287 booth images with clean, professional backgrounds.
My social media engagement jumped 64%.
Here's exactly how you can do the same thing without spending thousands on professional editing services.
Why Trade Show Photos Need Background Removal
Trade shows are chaotic environments.
Your booth might look perfect, but surrounding booths, attendees, and random equipment clutter your photos.
I learned this the hard way at my first major expo.
We had a stunning display with our newest product line.
Every photo included competitors' logos, messy carpeting, and ceiling fixtures that screamed "convention center."
Professional photos cost me $2,800 for just 50 edited images.
The turnaround time was seven business days.
By then, the social media momentum from the event had completely died.
That's when I realized bulk background removal for trade show booth images wasn't just convenient—it was essential for timely marketing.
The Real Cost of Manual Editing
Let me break down what manual editing actually costs:
- Professional editors charge $5-$15 per image minimum
- Turnaround times range from 24 hours to 2 weeks
- Revision requests add another 2-3 days
- Rush fees can double or triple the base price
For a typical trade show where you capture 200-500 photos, you're looking at $1,000-$7,500 in editing costs alone.
Most businesses can't justify that expense.
How Bulk Background Removal Actually Works
I switched to Removedo.com after burning through my entire marketing budget on outsourced editing.
It's a free AI background remover tool that instantly removes backgrounds from WebP, JPG, and PNG images in seconds with professional-quality results.
The technology uses machine learning algorithms trained on millions of images.
These algorithms identify foreground subjects—products, people, booth displays—and separate them from backgrounds with pixel-level precision.
Here's what happens in the background:
- The AI analyzes edge detection patterns
- It identifies color gradients and contrast boundaries
- The algorithm maps subject outlines with sub-pixel accuracy
- Background pixels are removed while preserving fine details like hair, fabric textures, and product edges
The entire process takes 2-5 seconds per image.
I can now process my entire trade show photo collection during my lunch break.
What Makes Batch Processing Different
Traditional background removal requires individual attention to each photo.
You open the image, make selections, refine edges, export, repeat.
A trade show booth photo background removal service using batch processing changes everything.
You upload multiple images simultaneously.
The AI processes them in parallel.
Results appear in consistent quality across your entire photo set.
I tested this with 156 booth images from our last expo.
Total processing time: 11 minutes.
Previous manual method: 47 hours spread across 6 days.
Related: Transparent Background Maker for Logos: Best AI Tools to Remove Backgrounds Fast.
The Step-by-Step Process I Use for Perfect Results
After processing thousands of trade show images, I've developed a workflow that delivers consistent professional results.
Here's my exact process.
Step 1: Sort and Select Your Best Images
Don't process everything.
I shoot approximately 400 photos at each trade show.
Only 120-150 make the cut for background removal.
My selection criteria:
- Sharp focus on primary subjects
- Good lighting without harsh shadows
- Products or booth elements clearly visible
- Minimal motion blur from moving attendees
This pre-selection saves processing time and storage space.
Step 2: Organize by Image Type
I categorize booth photos into four groups:
- Product close-ups
- Full booth displays
- Team and attendee interactions
- Detail shots of signage or materials
Each category might need different background treatments later.
Product shots often work best with pure white backgrounds.
Interaction photos might need subtle gradient backgrounds to add depth.
Step 3: Process Images in Batches
This is where batch image editing for trade show photos becomes powerful.
I upload 25-50 images at a time.
Larger batches can slow down processing or cause browser issues.
Smaller batches give me quality control checkpoints.
After each batch completes, I do a quick visual scan.
Any issues get flagged for individual attention.
Step 4: Review Edge Quality
The edges make or break professional-looking results.
I zoom to 200% and check:
- Product edges for clean separation
- Hair and fabric details for natural feathering
- Reflective surfaces for proper handling
- Complex shapes like jewelry or electronics for accurate outlining
Modern AI tools handle this remarkably well.
But complex backgrounds or similar foreground-background colors occasionally need manual refinement.
Common Challenges and How I Solve Them
Not every trade show photo processes perfectly on the first attempt.
Here are the issues I encounter most frequently and my solutions.
Challenge 1: Similar Colors Between Subject and Background
I once photographed white products against light gray booth walls.
The AI struggled to identify boundaries.
My solution: Adjust image contrast before processing.
I bump contrast by 15-20% using basic photo editing software.
This creates clearer separation for the AI to detect.
After background removal, I restore the original contrast levels if needed.
Challenge 2: Reflective Surfaces and Glass
Trade show booths love glass display cases and metallic finishes.
These surfaces reflect surrounding environments.
Background removal can sometimes treat reflections as part of the background.
My approach: Accept that some reflections will remain.
They actually add realism.
For critical product shots where clean reflections matter, I replace the background with a solid color that matches the reflection tone.
Challenge 3: Complex Booth Structures
Open shelving, hanging displays, and architectural elements create visual complexity.
The AI needs to understand what's foreground versus background.
For these images, clipping path background removal for booths works better than automatic AI processing.
I manually define the subject boundaries.
This takes more time but guarantees accuracy for hero images and key marketing materials.
Challenge 4: Inconsistent Lighting
Convention center lighting is notoriously terrible.
Overhead fluorescents mixed with booth spotlights create harsh shadows and color casts.
I address this in two stages:
- Color correct before background removal to normalize white balance
- Add subtle shadows after background removal to maintain depth and realism
Images without any shadows look artificially flat.
A soft drop shadow at 15-20% opacity anchors subjects and adds professional polish.
Advanced Techniques for Professional Results
Once you master basic bulk background removal for trade show booth images, these advanced techniques elevate quality further.
Creating Consistent Brand Backgrounds
After removing original backgrounds, I replace them with branded alternatives.
This creates visual consistency across all trade show marketing materials.
My go-to backgrounds:
- Pure white (#FFFFFF) for product catalogs and e-commerce
- Brand color gradients for social media posts
- Subtle textures that complement product photography
- Environmental backgrounds that suggest context without distraction
I create background templates once, then apply them across entire image batches.
Optimizing for Different Platforms
Instagram, LinkedIn, and your website all have different requirements.
I process trade show images with platform-specific outputs:
- Square crops (1:1) for Instagram feed posts
- Vertical formats (4:5) for Instagram Stories
- Horizontal (16:9) for LinkedIn articles and website headers
- Transparent PNGs for design flexibility
Transparent background removal for trade show images gives maximum versatility.
You can overlay images on any background without visible edges or boxes.
Batch Retouching for Extra Polish
Background removal solves one problem.
Photo retouching for trade show booth images addresses others:
- Removing stray wires or equipment visible in product shots
- Smoothing wrinkled fabric on tablecloths or banners
- Enhancing product colors to match actual appearance
- Reducing harsh shadows or blown-out highlights
I handle these as a second batch process after background removal.
Separating the tasks maintains organization and prevents workflow bottlenecks.
How I Cut My Trade Show Marketing Timeline by 85%
The real value isn't just cost savings.
It's speed to market.
My previous workflow looked like this:
- Day 1: Return from trade show, download 400+ photos
- Day 2: Sort and select best images
- Day 3: Send images to editing service
- Day 10-14: Receive edited images back
- Day 15: Finally post content to social media
Two weeks after the event.
Engagement potential completely wasted.
My current workflow with product photo editing bulk service capabilities:
- Day 1 evening: Process all images while still at the hotel
- Day 2 morning: Post first round of content before competitors wake up
- Day 2-7: Maintain consistent posting schedule with pre-processed images
I now dominate the social conversation while the trade show is still trending.
Our last event generated 2,847 social media engagements in the first 72 hours.
Previous events averaged 340 engagements spread over three weeks.
Related: Why Lined Paper Backgrounds Ruin Professional Documents.
Choosing the Right Tools for Your Needs
Not all background removal tools perform equally.
I've tested 14 different services over two years.
Here's what actually matters:
Processing Speed
Bulk processing should handle at least 20-30 images simultaneously.
Individual processing times should stay under 5 seconds per image.
Anything slower becomes impractical for large trade show photo collections.
Edge Accuracy
Zoom into processed images at 300%.
Check hair, fabric textures, and complex product edges.
Poor edge detection creates obvious halos or jagged outlines that scream "amateur editing."
File Format Support
Trade shows generate photos in various formats.
Your tool needs to handle:
- JPG/JPEG (most common camera output)
- PNG (for images that already have transparency)
- WebP (increasingly common for web-optimized images)
If you're working with professional photography, RAW format support is valuable.
For WebP files specifically, their WebP background removal guide covers the technical details.
Output Quality Options
I need different quality levels for different uses:
- High resolution (300 DPI) for print materials and booth graphics
- Web optimized (72 DPI) for social media and email campaigns
- Thumbnail sizes for website galleries
Batch export with multiple size options saves enormous time.
Cost Structure
Pricing models vary dramatically:
- Per-image pricing ($0.25 - $5 per image)
- Subscription models ($15 - $99 per month)
- Credit systems (buy bulk credits, use as needed)
- Completely free tools with optional premium features
For occasional users processing 50-100 images per quarter, pay-per-image makes sense.
For frequent trade show exhibitors processing 200+ images monthly, free tools or subscriptions offer better value.
I process approximately 600 trade show images every quarter across four major events.
Free tools save me $1,800-$3,000 per year compared to pay-per-image services.
Mistakes That Ruin Trade Show Photos
I've made every mistake possible.
Learn from my failures.
Mistake 1: Processing Low-Quality Source Images
Background removal can't fix blurry, poorly lit, or out-of-focus photos.
Garbage in, garbage out.
I learned this after processing 87 images from our first trade show.
Backgrounds were perfectly removed.
But the images were unusable because the original photography was subpar.
Now I ruthlessly cull bad photos before processing.
Mistake 2: Ignoring Image Resolution
I once processed a batch of images at 72 DPI thinking they were only for social media.
Two weeks later, our designer needed them for a printed catalog.
The resolution was unusable for print.
I had to re-process everything.
Now I always process at maximum resolution, then downsize as needed.
Storage is cheap, re-work is expensive.
Mistake 3: Over-Editing
Just because you can remove backgrounds doesn't mean you should remove every background.
Some booth photos work better with subtle background blur rather than complete removal.
Environmental context helps tell your brand story.
I use a 70/30 rule: 70% of images get background removal, 30% keep contextual backgrounds with light editing.
Mistake 4: Inconsistent Styling Across Image Sets
My first batch had some images with white backgrounds, others with gradients, others with brand colors.
It looked chaotic and unprofessional.
Now I establish a style guide before processing:
- Product shots: white backgrounds
- Team photos: brand gradient backgrounds
- Booth overview shots: transparent for flexible use
Consistency creates professional polish.
Related: Transparent Background Maker for Comic Book Art How to Use AI Tools.
Frequently Asked Questions
How many images can I process at once with bulk background removal?
Most modern AI tools handle 25-50 images per batch comfortably.
Some professional services support up to 100 simultaneous images.
I recommend 30-40 images per batch for optimal processing speed and quality control.
Larger batches can cause browser performance issues or incomplete processing.
Will bulk background removal work on busy trade show booth photos?
Yes, modern AI excels at separating subjects from complex backgrounds.
However, results improve dramatically when your primary subject has clear boundaries and good contrast with the background.
Photos with extreme clutter or similar foreground-background colors may need manual refinement.
In my testing, 92% of trade show photos process perfectly on the first attempt.
What's the difference between transparent and white backgrounds?
Transparent backgrounds (PNG files with alpha channels) let you place images over any background color or design.
White backgrounds are opaque—useful for product catalogs, e-commerce listings, and print materials that require consistent backgrounds.
I export both versions: transparent PNGs for designers and white background JPGs for immediate use.
Can I use background-removed images for commercial purposes?
If you own the original photos, you own the edited versions.
Background removal doesn't change copyright or usage rights.
However, if you hired a photographer, verify your contract includes full commercial usage rights to the images.
Some photography contracts restrict editing or require photographer approval.
How do I maintain quality when processing hundreds of images?
Process in smaller batches of 30-40 images with quality checks between batches.
Create a visual inspection checklist: edge quality, proper subject separation, no artifacts, consistent output quality.
Flag problematic images for individual attention rather than accepting subpar results.
Quality control takes 15 seconds per image but prevents hours of re-work later.
Taking Your Trade Show Marketing to the Next Level
Background removal is just one component of effective trade show marketing.
But it's the component that unlocks everything else.
Clean, professional images work across every marketing channel:
- Social media posts that stop scrolling
- Email campaigns with higher engagement rates
- Website galleries that showcase products properly
- Print materials for follow-up marketing
- Sales presentations and proposals
I've processed 2,300+ trade show images over the past 18 months using bulk background removal for trade show booth images techniques.
Our trade show ROI increased 340% measured by attributed sales.
Social media reach from trade show content grew from 12,000 impressions per event to 74,000 impressions.
The time investment? About 2 hours per trade show for processing 150-200 images.
If you're still sending images to expensive editing services or posting uncropped booth photos with distracting backgrounds, you're leaving money on the table.
Start with your next trade show. Process 20 images using bulk background removal for trade show booth images tools and compare the results to your previous marketing materials.
The difference will be immediately obvious.
Try our free background remover tool for professional results.


