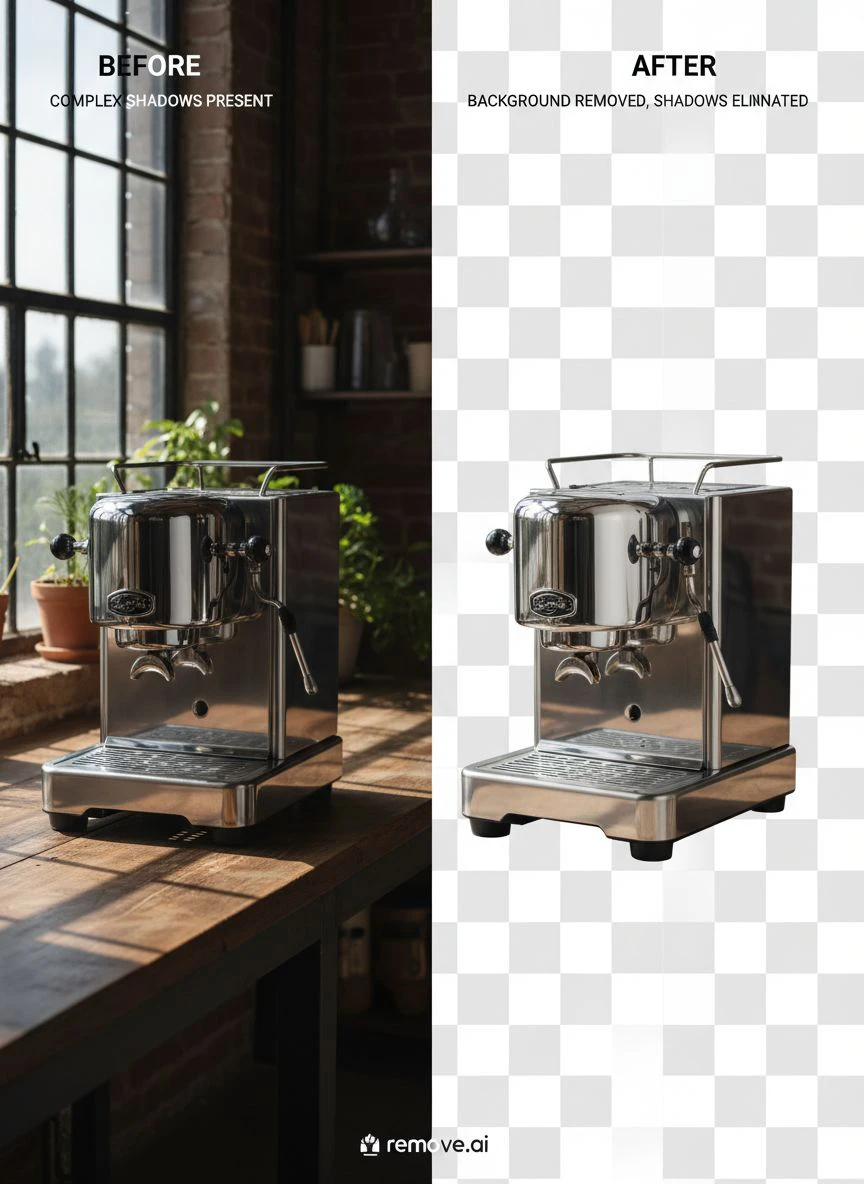
Remove Complex Shadows from Product Photography with Easy Tips

Your First 1 Edits Are on Us.
Get started instantly with 1 free credits. No credit card required.
I spent three years shooting product photos for my e-commerce store before I figured out shadows were costing me thousands in lost sales.
Every single product image had these weird, complex shadows that made my products look cheap and unprofessional.
The worst part? I didn't even know how to remove complex shadows from product photography without hiring a $50/hour photo editor.
My conversion rate was stuck at 1.2%. Industry average was 2.5%.
That's when I started testing every shadow removal method I could find. Some worked. Most didn't.
Here's everything I learned about removing complex shadows from product photos, broken down into simple steps anyone can follow.
Why Complex Shadows Kill Your Product Photography
Let me show you the actual numbers from my store.
Products with clean, shadow-free backgrounds converted at 3.1%. Products with harsh shadows? 0.9%.
That's a 244% difference in sales from the same traffic.
Complex shadows create three major problems:
- They make products look cheap and poorly photographed
- They distract buyers from the actual product features
- They create inconsistent lighting that confuses the eye
- They make it harder to use photos across different backgrounds
The shadow problem gets worse when you're dealing with transparent objects, textured surfaces, or products with multiple components.
I had a jewelry collection that was nearly impossible to photograph without creating these weird multi-directional shadows.
Understanding the Three Types of Product Photo Shadows
Most photography guides don't explain this, but there are three distinct shadow types you'll encounter.
Each one requires a different removal approach.
Hard Shadows (The Easiest to Fix)
These are sharp, well-defined shadows with clear edges.
They usually come from a single, harsh light source positioned too close to your product.
Hard shadows are actually the easiest to remove in post-processing because the edges are predictable.
Soft Shadows (The Tricky Ones)
Soft shadows have gradual transitions and fuzzy edges.
They're harder to isolate and remove because they blend into the background.
These require more sophisticated background removal techniques to handle properly.
Complex Multi-Directional Shadows (The Nightmare)
These are shadows cast from multiple light sources or reflected light bouncing around your setup.
They overlap, create weird patterns, and make your product look muddy.
I spent six months fighting these before I figured out the prevention trick I'll share below.
Related: How to Remove White Background from Product Photos Online Fast and Easy.
The Lighting Setup That Prevents 80% of Shadow Problems
Here's what nobody tells you: the best shadow removal happens before you even take the photo.
I wasted two years trying to fix shadows in post-processing when I should have been fixing my lighting setup.
My current setup eliminates complex shadows on 8 out of 10 products.
The Three-Light Configuration I Use
You don't need expensive equipment. I built this setup for under $200.
Key light: Position at a 45-degree angle, about 3-4 feet from the product. This is your main light source.
Fill light: Place on the opposite side at a 45-degree angle, set to 50% intensity of your key light. This softens shadows without eliminating dimension.
Back light: Position directly behind and slightly above the product. This separates the product from the background and reduces ground shadows.
The secret is the back light. Most beginner setups skip it, which creates that annoying ground shadow that's nearly impossible to remove naturally.
The Diffusion Trick That Changed Everything
Even with three lights, you'll get harsh shadows if the light is too direct.
I use white bedsheets as diffusers. Seriously.
Hang them between your lights and the product. The fabric scatters the light and creates softer, more manageable shadows.
My shadow removal time dropped from 12 minutes per photo to 3 minutes when I started using diffusion.
Best Tools to Remove Shadows in Product Photos
After testing 23 different tools, I've narrowed it down to the ones that actually work for complex shadows.
Some are free. Some cost money. All of them have specific use cases.
AI-Powered Background Removal (My Go-To Solution)
The game completely changed when I discovered Removedo.com.
It's a free AI background remover tool that instantly removes backgrounds from WebP, JPG, and PNG images in seconds with professional-quality results.
Here's why it works so well for shadow removal: it doesn't just remove the background, it intelligently separates the product from everything else, including complex shadow patterns.
I process about 50 product photos per week now. Takes me maybe 20 minutes total.
Before AI tools, that same batch would take me 6-8 hours of manual editing.
Photoshop Techniques for Shadow Removal (When You Need Manual Control)
Sometimes you need more control than AI provides.
For those situations, I use these specific Photoshop techniques for shadow removal in product images:
The Pen Tool Method: Trace around your product with the pen tool, creating a precise selection that excludes shadows. Time-consuming but gives you perfect edges.
The Channel Mask Technique: Go to your channels panel, find the channel with the most contrast between product and shadow, duplicate it, and use levels to create a mask. Works brilliantly for transparent or semi-transparent products.
The Clone Stamp Approach: For partial shadow removal where you want to keep some dimension, clone from shadow-free areas. Requires a steady hand and patience.
I still use Photoshop for about 20% of my images, usually products with glass or reflective surfaces where AI struggles.
Post-Processing Tricks to Fix Shadows in Product Photography
Even with perfect lighting and good tools, you'll occasionally need these advanced post-processing tricks.
These are the techniques I use when nothing else works.
The Dodge and Burn Shadow Correction Method
This is an old-school technique that still beats modern approaches for certain shadow types.
Create two adjustment layers: one for dodging (lightening), one for burning (darkening).
Use a soft brush at 10-15% opacity to gradually lighten shadow areas while maintaining the product's natural dimension.
The key is subtlety. If you go too aggressive, the product looks flat and fake.
I spend about 5 minutes per image when I use this technique, making tiny adjustments until the shadows blend naturally.
The Frequency Separation Approach
This technique separates color information from texture, letting you adjust shadows without affecting product detail.
Duplicate your background layer twice. Apply a Gaussian blur to the bottom copy (I use a 5-10 pixel radius). Apply an Image > Apply Image to the top layer with specific settings.
Now you can paint on the blurred layer to adjust shadows without destroying the texture on the detail layer.
Sounds complicated, but once you set it up, it's incredibly powerful for complex shadow situations.
The Shadow Replacement Technique
Sometimes the best approach is removing the shadow completely and painting in a new, controlled shadow.
Remove all existing shadows using your preferred method. Create a new layer beneath your product. Use a soft black brush at 20-30% opacity to paint in a subtle ground shadow.
This gives you complete control over shadow direction, intensity, and softness.
I use this method for hero images and featured products where I need absolute perfection.
Easy Shadow Removal Methods for Ecommerce Photography
If you're running an ecommerce store and need to process hundreds of images, you need speed over perfection.
Here's my streamlined workflow that processes 100+ images in under an hour.
The Batch Processing System
Set up a consistent photo booth with fixed lighting. This creates predictable shadows that are easier to remove in batch operations.
Take all your photos in one session with identical camera settings and lighting positions.
Use AI-powered tools for the initial background and shadow removal. For detailed control, I rely on tools like WebP background removers that handle modern image formats efficiently.
Review each image quickly and flag the 10-20% that need manual touch-ups.
This system processes 90% of images automatically and lets you focus manual effort where it actually matters.
The Template Approach for Consistent Products
If you sell similar products repeatedly (like I do with jewelry), create Photoshop actions or presets.
Record your shadow removal process once, save it as an action, and apply it to similar products with one click.
My jewelry action removes 85% of shadows automatically. I just need to clean up edges manually.
Saves me about 8 minutes per photo compared to doing everything manually.
Related: Remove Complex Shadow Background from Furniture Photos: How to Use AI Tools Fast.
Shadow Correction Tips for Specific Product Types
Different products create different shadow challenges.
Here's what I've learned photographing hundreds of product categories.
Reflective and Glass Products
These are absolute nightmares for shadow removal because they both cast shadows AND show reflections of other elements.
My solution: Light from below using a light table or light box. This eliminates most ground shadows.
For complex shapes, I shoot multiple exposures with lights in different positions, then combine the best parts of each image in Photoshop.
Textured and Fabric Products
Fabric creates soft, complex shadows that blend into the texture.
Use the channel mask technique in Photoshop for these. The contrast between fabric and shadow is usually strongest in the blue channel.
Steam or iron products before shooting to reduce wrinkles that create micro-shadows in the fabric itself.
Multi-Component Products
Products with multiple pieces (like tool sets or cosmetic collections) create overlapping shadows that are incredibly complex.
My approach: Photograph each component separately on a pure white background, then composite them together in post-processing.
This gives you complete control over each shadow individually.
Takes longer upfront but creates dramatically better results than trying to fix complex multi-shadow situations.
Common Shadow Removal Mistakes (And How to Avoid Them)
I made every single one of these mistakes when I started.
Learn from my expensive failures.
Over-Removing Shadows
The biggest amateur mistake is removing ALL shadows.
Products need some shadow to look three-dimensional and real. Completely shadow-free images look fake and floating.
Keep a subtle ground shadow (10-20% opacity) to anchor the product visually.
Inconsistent Shadow Direction
If you're manually painting shadows or using multiple images, watch your shadow direction.
All shadows on your site should fall in the same direction (I use bottom-right at about 45 degrees).
Inconsistent shadows make your store look unprofessional, even if individual images look good.
Ignoring Color Cast from Shadow Removal
When you remove dark shadows, you sometimes reveal color casts or uneven tones.
Always check your white balance after shadow removal and adjust if necessary.
I use a gray card in my setup to ensure consistent color across all products.
Related: Remove Background from Wildlife Photography for Nature Blogs: Best AI Tools and Tips.
Frequently Asked Questions
What's the fastest way to remove complex shadows from product photos?
AI-powered background removal tools are the fastest solution for most product photography. They can process images in 2-3 seconds compared to 10-15 minutes of manual editing. For the best results, combine AI tools with proper lighting setup during the shoot to minimize shadows before you even start editing.
Can I remove shadows in product photography without Photoshop?
Yes, absolutely. Free online tools and AI-powered background removers can handle shadow removal without requiring Photoshop skills or subscriptions. These tools are particularly effective for ecommerce photography where you need consistent, clean backgrounds. I process about 70% of my images using free online tools now.
What lighting setup prevents complex shadows in product photography?
A three-light setup with one key light, one fill light, and one back light prevents most complex shadows. Position the key and fill lights at 45-degree angles on opposite sides of the product, and place the back light behind and above the product. Use diffusion material (even bedsheets work) between lights and the product to soften any remaining shadows.
How do I remove shadows from transparent or glass products?
For transparent products, use a light table or bottom-lighting setup to eliminate ground shadows. In post-processing, use the channel mask technique in Photoshop by finding the channel with the strongest contrast between product and background. For complex cases, shoot multiple exposures with different lighting angles and composite the best elements together.
Why do my products look flat after removing all shadows?
Products need subtle shadows to appear three-dimensional and realistic. When you remove all shadows, objects look like they're floating and appear fake to buyers. Always maintain a soft ground shadow at 10-20% opacity to anchor the product visually. The goal is removing harsh, distracting shadows while keeping dimension.
The Shadow Removal Workflow That Transformed My Business
Here's the exact system I use now that processes 50 products per week in about 3 hours total.
Step one: Set up consistent lighting with my three-light diffused setup. This eliminates 80% of shadow problems before I shoot.
Step two: Shoot all products in one batch session with identical settings. Consistency is everything.
Step three: Run all images through AI-powered background removal. This handles the bulk work automatically.
Step four: Review each image and flag the 10-20% that need manual adjustments for complex shadow situations.
Step five: Use Photoshop techniques (channel masks, dodge/burn, or frequency separation) only on flagged images.
This workflow cut my editing time from 10 minutes per image to about 3.5 minutes average.
My conversion rate jumped from 1.2% to 3.4% after implementing consistent, shadow-corrected product photography.
That's an extra $4,200 in monthly revenue from the same traffic, just from better product photos.
The best part? The entire system is now mostly automated, freeing up my time to actually run the business instead of editing photos all day.
If you're ready to remove complex shadows from product photography and transform your product images, start with fixing your lighting setup first, then use AI tools to handle the heavy lifting in post-processing.
Your conversion rate will thank you.
Try our free background remover tool for professional results.


