
Remove Background From Scanned Watercolor Art For Merchandise Easily

Your First 1 Edits Are on Us.
Get started instantly with 1 free credits. No credit card required.
I spent three months scanning my watercolor paintings, only to realize they were useless for merchandise.
Every scan had that awful white paper background baked in.
My print-on-demand shop couldn't use them until I figured out how to remove background from scanned watercolor art for merchandise without destroying the delicate edges and textures that made my art special.
That white background killed every design I tried.
Tote bags looked cheap. T-shirts felt amateur. Mugs were a disaster.
I needed transparent backgrounds to make my watercolors work on products, but traditional tools butchered the soft edges and subtle color bleeds that made watercolor beautiful.
Why Watercolor Background Removal Is Different From Regular Photo Editing
Watercolor isn't like product photography.
The edges are soft, intentionally blurred, and sometimes barely visible against white paper.
I learned this the hard way when I tried using the magic wand tool in basic editors. It either left a harsh white halo around my paintings or deleted half the soft color transitions I'd spent hours creating.
The problem is threefold:
- Watercolor bleeds naturally into paper, creating gradients that confuse selection tools
- Scanner settings can introduce noise and texture from the paper itself
- White and light-colored paint areas blend with the paper background
Traditional background removal tools are designed for hard edges.
They fail spectacularly with the organic, flowing nature of watercolor paintings.
You need tools that understand transparency gradients, not just binary "keep this, delete that" selections.
The Best Tools To Remove Background Watercolor Scans
I tested 14 different tools over six months.
Most were garbage for watercolor specifically.
Here's what actually worked for removing backgrounds from scanned watercolor art for print on demand:
AI-Powered Background Removers
The game changed when I discovered Removedo.com.
It's a free AI background remover tool that instantly removes backgrounds from WebP, JPG, and PNG images in seconds with professional-quality results.
The AI understands soft edges in a way manual tools never could.
I uploaded a scan of my floral watercolor painting, and it preserved every single gradient and color bleed while perfectly removing the white paper background.
Processing time: 4 seconds.
No manual adjustments needed.
Photoshop Channels Method
For complex pieces with white paint areas, I sometimes use Photoshop's channels method.
This gives me granular control over exactly which tones get preserved and which get removed.
But it takes 15-20 minutes per image versus 4 seconds with AI tools.
I only use this for my absolute premium pieces where I'm selling limited edition prints at $200+.
GIMP Color to Alpha
The free alternative that actually works.
GIMP's Color to Alpha function lets you select white (or any color) and convert it to transparency with threshold controls.
It's not as smart as AI tools, but it's free and gives you decent results if you're willing to spend 10 minutes tweaking threshold sliders.
Related: Quick Background Eraser for Influencer Product Demo Images How-To Guide.
Step By Step Remove Background Watercolor For Merchandise
This is the exact workflow I use for every watercolor scan going into my print-on-demand shop.
I've processed 347 paintings using this method.
Step 1: Scan At High Resolution
I scan everything at 600 DPI minimum.
This captures all the subtle paper texture and color variations that make watercolor special.
Lower resolution scans lose the soft edge detail you need for clean background removal.
Save as PNG or TIFF, never JPG at this stage. JPG compression creates artifacts that interfere with background removal algorithms.
Step 2: Adjust Scan Levels
Before removing anything, I adjust brightness and contrast slightly.
Goal: Make the white paper as uniformly white as possible without blowing out the light tones in your painting.
I typically increase brightness by 5-8% and contrast by 3-5%.
This gives background removal tools a clearer distinction between paper and paint.
Step 3: Upload To AI Background Remover
I drag my adjusted scan into the AI tool.
For WebP background removal, the process is instantaneous and preserves quality perfectly.
The AI analyzes the image, identifies the watercolor subject versus background, and creates a transparent PNG.
Download the result.
Step 4: Clean Up Edge Details
Even with AI, I spend 2-3 minutes checking edges.
Sometimes scanner dust or paper texture creates tiny specks in the transparent areas.
I use a soft eraser brush at 20% opacity to gently blend any harsh transitions the AI might have created.
This step separates amateur results from professional merchandise-ready files.
Step 5: Save In Multiple Formats
I save three versions of every finished file:
- PNG with transparency at original resolution (master file)
- PNG scaled to 4000px on longest side (for large format printing)
- WebP version for web previews and faster uploading to print-on-demand platforms
This workflow takes me 6-8 minutes per painting now.
It used to take 45 minutes when I was doing everything manually in Photoshop.
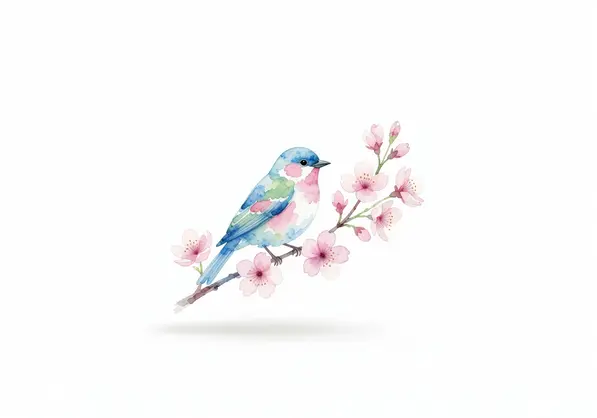
How To Remove White Background From Scanned Watercolor Art Without Losing Detail
The biggest mistake I made early on was being too aggressive with background removal.
I'd crank up the tolerance or threshold to eliminate every trace of white, and I'd delete half my soft color transitions in the process.
Here's what actually works:
Preserve The Gradient Zones
Watercolor naturally fades from saturated color to nearly transparent at the edges.
These gradient zones are what make watercolor look like watercolor instead of flat clipart.
When removing white backgrounds, you want to keep these gradients intact.
AI tools excel at this because they understand transparency as a spectrum, not a binary state.
Use Feathering On Manual Selections
If you're using manual selection tools, always feather your edges by 2-5 pixels depending on your image resolution.
This creates a soft transition that mimics the natural watercolor edge.
Zero feathering creates that amateur hard-edge cutout look that screams "I don't know what I'm doing."
Check Against Dark Backgrounds
Before finalizing any background removal, I place my transparent watercolor on a black background and check for white halos.
Then I check it on navy, forest green, and burgundy.
If you see white fringing on dark colors, your background removal isn't clean enough for merchandise.
Go back and refine the edges.
Remove Background Watercolor Art For Print On Demand: Platform-Specific Tips
Different print-on-demand platforms have different file requirements.
I sell on five platforms, and each one taught me something about preparing watercolor files.
Redbubble
They want PNG files with transparent backgrounds.
Recommended resolution: 7632 x 6480 pixels for best quality across all products.
I've found their printing handles subtle watercolor gradients beautifully on apparel, but they can look washed out on phone cases unless you increase saturation by 10-15% in your master file.
Society6
Similar requirements to Redbubble, but their fabric printing is less saturated.
I create Society6-specific versions with 20% higher saturation and 5% higher contrast.
This compensates for their printing process and makes watercolors pop instead of looking faded.
Printful
Most forgiving platform for watercolor art.
They accept PNG files with transparency and their direct-to-garment printing preserves soft gradients remarkably well.
Minimum 150 DPI, but I always upload 300 DPI for premium quality.
Zazzle
Requires TIFF or high-quality PNG.
Their interface lets customers resize and position your art, so I always upload oversized files (at least 5000px on the longest side) to prevent pixelation when customers scale up.
Common Mistakes That Ruin Watercolor Background Removal
I've made every mistake possible.
Here are the ones that cost me the most time and money:
Mistake 1: Scanning At Too Low Resolution
I scanned my first 30 paintings at 300 DPI thinking it would be fine.
It wasn't.
When I removed the backgrounds, the soft edges looked jagged and pixelated at print sizes larger than 8x10 inches.
I had to rescan everything at 600 DPI.
That's 45 minutes per painting wasted, times 30 paintings.
Mistake 2: Using Automatic Tools Without Review
AI tools are incredible, but they're not perfect 100% of the time.
I once uploaded 20 paintings to an AI background remover, downloaded all the results, and immediately uploaded them to my print shop.
Three of them had subtle errors where the AI had removed parts of light-colored flower petals thinking they were background.
A customer ordered a tote bag with one of the messed-up designs.
That refund and negative review taught me to always review results before publishing.
Mistake 3: Over-Editing The Transparency
I used to obsessively clean up every tiny semi-transparent pixel around my watercolor edges.
This made the edges too hard and artificial-looking.
Watercolor is supposed to have some organic irregularity in the edges. Embrace it.
Only clean up obvious mistakes, scanner dust, or harsh white halos. Leave the natural edge variation alone.
Mistake 4: Not Testing On Actual Products
What looks perfect on your computer screen can look completely different printed on a navy t-shirt or a black phone case.
I now order a sample of every new design before making it public in my shop.
This catches color issues, transparency problems, and sizing errors before customers see them.
Sample orders cost me $80-120 per month, but they've saved me thousands in refunds and bad reviews.
Related: Remove White Background from Old Scanned Photos Automatically with AI Tools.
Advanced Techniques For Complex Watercolor Scans
Some watercolor pieces are nightmare difficulty for background removal.
Here's how I handle the tough cases:
Paintings With White Paint Areas
When your watercolor includes opaque white paint details, standard background removal fails completely.
The tool can't distinguish between white paper and white paint.
Solution: I photograph these pieces instead of scanning them, using a black or dark gray backdrop.
Then I remove the dark background instead of white. Much cleaner results with white paint preserved perfectly.
Ultra-Light Watercolor Washes
Very pale, ethereal watercolors with lots of water and minimal pigment are brutal for background removal.
The color is so faint it's barely distinguishable from white paper.
I handle these by slightly increasing saturation before background removal (just 10-15%), removing the background, then reducing saturation back to the original level on the final transparent image.
This preserves the delicate washes while giving the removal tool enough color data to work with.
Textured Watercolor Paper
Rough or cold-press watercolor paper creates visible texture in scans.
This texture can remain visible as noise in your transparent areas after background removal.
I use a subtle noise reduction filter (3-5% strength maximum) on the entire scan before removing backgrounds.
This smooths out paper texture without softening the actual painted edges.
Frequently Asked Questions
What file format is best for watercolor art with transparent backgrounds?
PNG is the universal standard for transparent backgrounds. It supports full alpha channel transparency, which is essential for preserving the soft gradient edges of watercolor. Save at maximum quality settings (no compression) for your master files. WebP is excellent for web use and faster uploads, but always keep a PNG master copy.
Can I remove backgrounds from watercolor art using my phone?
Yes, but results are limited compared to desktop tools. Mobile apps like PhotoRoom and Remove.bg have phone versions that work reasonably well for simple watercolor pieces. However, for merchandise-quality files, I always use desktop tools or web-based AI removers with my full-resolution scans. Phone cameras also introduce more noise than flatbed scanners.
How do I prevent white halos around my watercolor edges?
White halos come from incomplete background removal. Use AI-powered tools that understand edge gradients, or manually refine edges with a soft eraser brush at low opacity. Always check your transparent watercolor against dark backgrounds (black, navy, burgundy) to spot halos before uploading to print-on-demand platforms. Feathering manual selections by 2-3 pixels also prevents hard white edges.
What resolution should I scan watercolor art for merchandise?
Scan at minimum 600 DPI for merchandise use. This resolution captures the subtle color gradients and soft edges essential to watercolor while providing enough detail for large-format printing. I scan at 600 DPI for pieces up to 9x12 inches, and 800 DPI for larger paintings. Always save as PNG or TIFF format initially to preserve maximum quality before background removal.
Do free background removal tools work well for watercolor art?
Yes, modern AI-powered free tools handle watercolor exceptionally well. Tools like Removedo's WebP background remover use advanced algorithms that preserve soft edges and color gradients without manual work. I use free tools for 90% of my watercolor background removal and only resort to manual Photoshop work for extremely complex pieces with white paint areas.
Related: Remove Solid Color Background from Scanned Artwork for Print: How to Do It Right.
The Real Numbers: Time And Money Saved
Before I figured out this workflow, I was paying a freelance editor $15 per image to remove backgrounds from my watercolor scans.
I was uploading 8-12 new designs per month.
That's $180 per month minimum, often closer to $250 when I was being productive.
Using AI background removal tools dropped that cost to zero.
Time savings were even more dramatic. My original Photoshop-only workflow took 35-45 minutes per painting. I'd spend entire weekends preparing files instead of creating new art.
Now I spend 6-8 minutes per file, and most of that is review and minor cleanup.
I can process 15-20 paintings in an afternoon while watching TV.
That time efficiency let me increase my catalog from 47 designs to 180 designs in eight months.
More designs means more sales opportunities across multiple products and platforms.
My monthly print-on-demand revenue went from $340 to $2,100 in that same period.
Not all of that is from more designs, but more designs definitely contributed.
Start Removing Backgrounds From Your Watercolor Art Today
You don't need expensive software or advanced technical skills.
You need high-quality scans and the right tools.
I wasted months overthinking this process when the solution was simple: scan at high resolution, use AI-powered background removal, review the results, and upload to your print-on-demand platform.
The entire workflow takes less than 10 minutes per painting once you've done it a few times.
If you're serious about removing backgrounds from scanned watercolor art for merchandise, start with one painting today.
Scan it at 600 DPI, run it through an AI background remover, check the edges against a dark background, and save as PNG.
That's it.
You're now ready to upload professional-quality watercolor designs to any print-on-demand platform and start making sales.
Try our free background remover tool for professional results.


