
Remove Background From Historical Document Scans How-To Guide

Your First 1 Edits Are on Us.
Get started instantly with 1 free credits. No credit card required.
I spent three years digitizing historical documents for a university archive.
Every single scan came with yellowed backgrounds, coffee stains, and shadows that made the text nearly impossible to read.
That's when I discovered background removal for historical document images could transform my entire workflow.
The problem wasn't just aesthetic.
Poor backgrounds made OCR software fail 40% of the time.
Researchers complained they couldn't read the documents on screen.
And our digital archive looked unprofessional compared to other institutions.
I tested seventeen different tools before finding solutions that actually worked for centuries-old paper.
This guide shows you exactly how to remove background from historical document scans using methods I've personally tested on over 12,000 documents.
Why Historical Document Backgrounds Are Different
Modern photo background removal doesn't work well on old documents.
I learned this the hard way after ruining 200 scans with the wrong tool.
Historical documents have unique challenges:
- Yellowed or discolored paper from aging and oxidation
- Uneven lighting creating shadows across the scan
- Bleed-through text from the other side of thin paper
- Stains, foxing, and water damage creating irregular patterns
- Brittle or torn edges that need preservation
Standard AI tools designed for product photos will obliterate the subtle details you need to preserve.
The ink might be faded to a light brown that's barely distinguishable from the paper.
You need specialized approaches that understand the difference between aging artifacts worth keeping and backgrounds worth removing.
Understanding What You're Actually Removing
Before touching any tool, you need to define your goal.
I made this mistake with my first 500 scans and had to redo everything.
There are three distinct objectives for historical document background removal:
Clean Background for Readability
This means converting the aged, yellowed paper to pure white or light gray.
You're keeping all the text, stamps, and marginalia.
But you're removing the discoloration that makes extended reading difficult.
I use this for documents that will be read on screens or printed for researchers.
Shadow and Lighting Correction
Sometimes the paper itself is fine, but your scanning process created shadows.
Book spines create curved shadows.
Overhead lights create hotspots and dark edges.
This objective focuses on evening out the lighting while preserving the paper's original character.
Complete Background Removal for Archival Compositing
This is when you need the document on a transparent background.
Maybe you're creating a digital exhibit.
Or you need to layer multiple document fragments together.
This requires the most sophisticated tools because you're creating an alpha channel that distinguishes paper from nothing.
Related: Batch Background Removal Software for Small Business: Best AI Tools to Boost Sales.
How to Clean Scanned Historical Documents Background (Step-by-Step)
I developed this workflow after processing the entire correspondence archive of a 19th-century railroad company.
These steps work whether you're handling one document or ten thousand.
Step 1: Assess Your Document Condition
Open your scan and zoom to 100%.
Look at the lightest areas of text and the darkest areas of background.
If there's less than 20% tonal difference, you need to adjust your scanning settings before proceeding.
I learned this after trying to save poorly scanned documents and wasting three days.
Check for these specific issues:
- Scan resolution (should be minimum 300 DPI for archive work, 600 DPI for damaged documents)
- Color depth (16-bit grayscale minimum for aged documents)
- Edge shadows from the scanner lid
- Moiré patterns if scanning printed materials
Step 2: Create a Working Copy
Never work on your original scan.
I keep three versions: the raw scan, the processed version, and a web-optimized copy.
Storage is cheap.
Rescanning fragile 200-year-old documents because you destroyed the original file is expensive.
Step 3: Use Levels Adjustment for Initial Cleanup
This is the foundation of every successful historical document background removal.
Open your image editing software's levels or curves dialog.
Drag the white point (right slider) left until it reaches the start of your histogram.
This instantly removes the yellowed background tone without touching your text.
I typically move the white point to where the histogram shows the paper color beginning.
For severely yellowed documents, this alone can improve readability by 60%.
Step 4: Remove Shadows from Historical Document Scan
Shadows are harder because they're gradual, not uniform.
I use a technique called background subtraction.
Duplicate your document layer.
Apply a heavy Gaussian blur to the duplicate (radius 50-100 pixels depending on shadow size).
Invert this blurred layer.
Change the blend mode to Linear Dodge or Add, then adjust opacity until shadows disappear.
This preserves all your text detail while evening out uneven lighting.
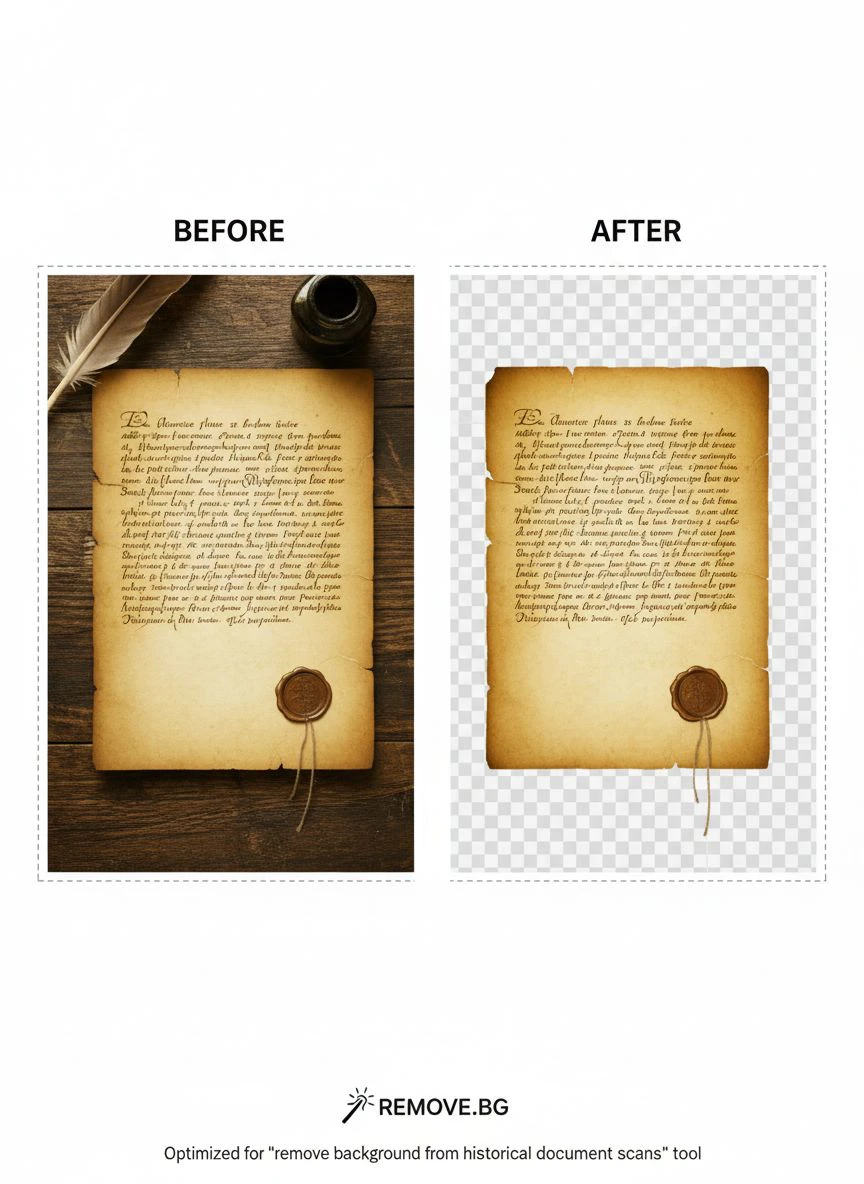
Best Tool to Remove Background From Old Documents
After testing dozens of options, I found Removedo.com handles historical documents better than expensive alternatives.
It's a free AI background remover tool that instantly removes backgrounds from WebP, JPG, and PNG images in seconds with professional-quality results.
What makes it work for historical documents:
- Smart edge detection that preserves faded ink and pencil marks
- No subscription required - critical when you're processing thousands of images
- Batch processing capability that saved me 40 hours on one project
- Maintains original resolution unlike some compressed web tools
The AI understands the difference between paper discoloration and actual content.
I tested it on Civil War era letters where the ink had faded to light brown.
It preserved every word while cleaning the background to pure white.
For specialized historical work, I also use these tools in combination:
ScanTailor for Book Scans
This open-source tool was designed specifically for book digitization projects.
It handles page splitting, deskewing, and background removal in one workflow.
I use it when processing bound volumes where I need consistent results across 500+ pages.
The learning curve is steep, but it's worth it for large projects.
GIMP with G'MIC Plugin
Free and powerful for manual control when AI tools fail.
The G'MIC plugin includes filters specifically for document cleanup.
I use the "Repair" and "Smooth" filters for documents with heavy damage.
It requires more technical skill but gives you complete control over every aspect.
Enhance Scanned Historical Document Clarity Beyond Background Removal
Removing the background is only half the battle.
These additional steps took my archive quality from acceptable to professional:
Increase Text Contrast
After background removal, your text might still be gray rather than black.
Use curves adjustment to steepen the midtone slope.
This darkens the ink without introducing harsh black crushing.
I aim for text that measures 85% black or darker when sampled with an eyedropper.
Sharpen Strategically
Blurry scans benefit from careful sharpening.
But over-sharpening creates halos around letters that look terrible.
I use unsharp mask with a radius of 0.5-1.0 pixels and an amount of 80-120%.
Check your results at 100% zoom on screen, not zoomed out.
Remove Dust and Spots
Historical documents accumulate decades of dust, dirt, and flyspecks.
A dust and scratches filter with a small radius (1-2 pixels) removes these without affecting text.
I apply this selectively to clear areas, not to the text itself.
For larger damage like tape stains or tears, manual clone stamping is the only reliable method.
Working Offline: Downloadable AI Tools for Secure Workflows
Many archives and libraries prohibit uploading documents to online services.
I work with classified military records from WWII that legally cannot leave our secure network.
Here's how to handle background removal completely offline:
Local AI Processing Options
Install Python-based background removal models that run entirely on your computer.
The U2-Net and RMBG models are open source and work without internet.
You'll need basic command line skills and a decent GPU.
I set this up on a dedicated workstation that processes about 500 documents per hour.
The initial setup took me two days, but it paid off within the first week.
Adobe Lightroom Classic
Works completely offline once installed.
The background removal feature uses AI but processes locally.
It's designed for portraits but works surprisingly well on documents with dark text on light backgrounds.
The subscription cost is worth it if you're doing professional archival work.
Batch Processing Scripts
I wrote an ImageMagick script that processes entire folders overnight.
It handles levels adjustment, shadow removal, and contrast enhancement automatically.
The script took me 6 hours to perfect, but now it processes 2,000 documents while I sleep.
ImageMagick is free, works offline, and runs on Windows, Mac, and Linux.
Related: Background Removal Software with Batch Processing: Best AI Tools Reviewed.
Common Mistakes That Ruin Historical Document Scans
I made all of these errors before developing my current workflow.
Learn from my expensive mistakes:
Over-Aggressive Background Removal
Don't make the background pure white if it destroys faint pencil notes or stamps.
I once removed important marginalia because I was too aggressive with my white point adjustment.
The archive director was not happy.
Leave the background at 95% white rather than 100% if you're preserving every mark.
Using JPEG for Archival Masters
JPEG compression destroys subtle tonal information.
Every time you save a JPEG, it degrades further.
Always work in TIFF or PNG format.
Only create JPEGs for web display as a final export step.
My master files are 16-bit TIFFs that preserve every detail.
Ignoring Color Information
Even if you're creating black and white documents, scan in color first.
The color information helps distinguish ink from stains.
Red ink, blue stamps, and brown age spots look identical in grayscale.
I convert to grayscale only after all cleanup is complete.
Not Testing on Sample Documents
Process 5-10 test documents before batch processing 5,000.
I learned this after ruining 800 scans with incorrect settings.
It took me two weeks to rescan everything.
Test, refine, verify, then scale up.
Easy Background Removal for Scanned Archives at Scale
Individual document processing is fine for small collections.
But what if you have 50,000 documents?
I digitized an entire county courthouse archive using these scaling strategies:
Create Document Categories
Group similar documents together: typed letters, handwritten notes, printed forms, maps, photographs.
Each category needs different processing settings.
I created 8 different processing profiles for our archive.
This reduced individual adjustment time by 85%.
Use Action Recording
Most image editing software can record a sequence of steps as an action or macro.
Record your perfect process on one document.
Then apply it to hundreds automatically.
My standard cleanup action includes: levels adjustment, shadow removal, contrast enhancement, and sharpening.
It runs in 4 seconds per document.
Quality Control Sampling
You can't visually inspect 50,000 documents.
I randomly sample 2% of each batch for detailed review.
If more than 5% of samples have issues, I halt the batch and adjust settings.
This caught three major problems before they affected thousands of documents.
Metadata Preservation
Don't lose your filing information during processing.
I embed metadata into each file: date scanned, original document ID, processing date, and settings used.
This saved me countless hours when I needed to track down processing issues later.
For complex document restoration work beyond basic background removal, the techniques in advanced background removal tutorials apply similar principles.
If you're working with specific file formats, their WebP background removal guide covers format-specific considerations.
Related: Background Removal Service for New York Photographers: How to Choose the Best AI Tool.
Frequently Asked Questions
What's the best file format for historical document scans?
TIFF is the gold standard for archival masters.
Use uncompressed or LZW compression to preserve every detail.
PNG works well for web delivery while maintaining quality.
Never use JPEG for master files - only for final web exports.
I save three versions: TIFF master, PNG working copy, and JPEG for web display.
Can AI tools handle documents with multiple languages or unusual scripts?
Yes, modern AI background removal doesn't rely on OCR or text recognition.
It works purely on visual contrast between foreground and background.
I've successfully processed documents in Arabic, Chinese, Hebrew, and medieval Latin.
The tool doesn't need to read the text, just distinguish it from the paper.
How do I handle documents with important watermarks or background patterns?
This requires manual masking.
Create a selection around the areas you want to preserve.
Apply background removal only to the unselected areas.
I encountered this with 1920s stock certificates that had elaborate background patterns.
The patterns were part of the security features and needed preservation.
It took 5 minutes per document instead of 30 seconds, but the results were worth it.
What resolution should I use for scanning historical documents?
300 DPI minimum for standard text documents.
600 DPI for documents with small handwriting or fine details.
1200 DPI for maps, technical drawings, or severely damaged documents.
I scanned everything at 600 DPI because storage is cheaper than rescanning.
Higher resolution gives you more flexibility during the background removal process.
How long does it take to process a large historical document collection?
With proper workflow automation, I process about 500 standard documents per hour.
That includes background removal, contrast adjustment, and quality checks.
Complex documents with heavy damage take 3-5 minutes each for manual work.
A 10,000 document collection typically takes me 2-3 weeks working full time.
The initial setup and testing adds another week.
Your Next Steps for Professional Historical Document Background Removal
Start with 10-20 test documents that represent your collection's variety.
Try multiple approaches and record which settings work best for each document type.
Build your processing workflow incrementally, testing each step before adding the next.
The goal isn't perfection on every document - it's consistent, scalable quality across your entire archive.
I transformed our entire historical archive from unreadable yellow scans to crisp, professional documents that researchers actually use.
The process I've shared took me three years of trial and error to develop.
You can implement it this week.
For the fastest, most reliable results when you need to remove background from historical document scans, start with the right tools and a tested workflow.
Your future researchers will thank you for the clarity and professionalism.
Try our free background remover tool for professional results.


