
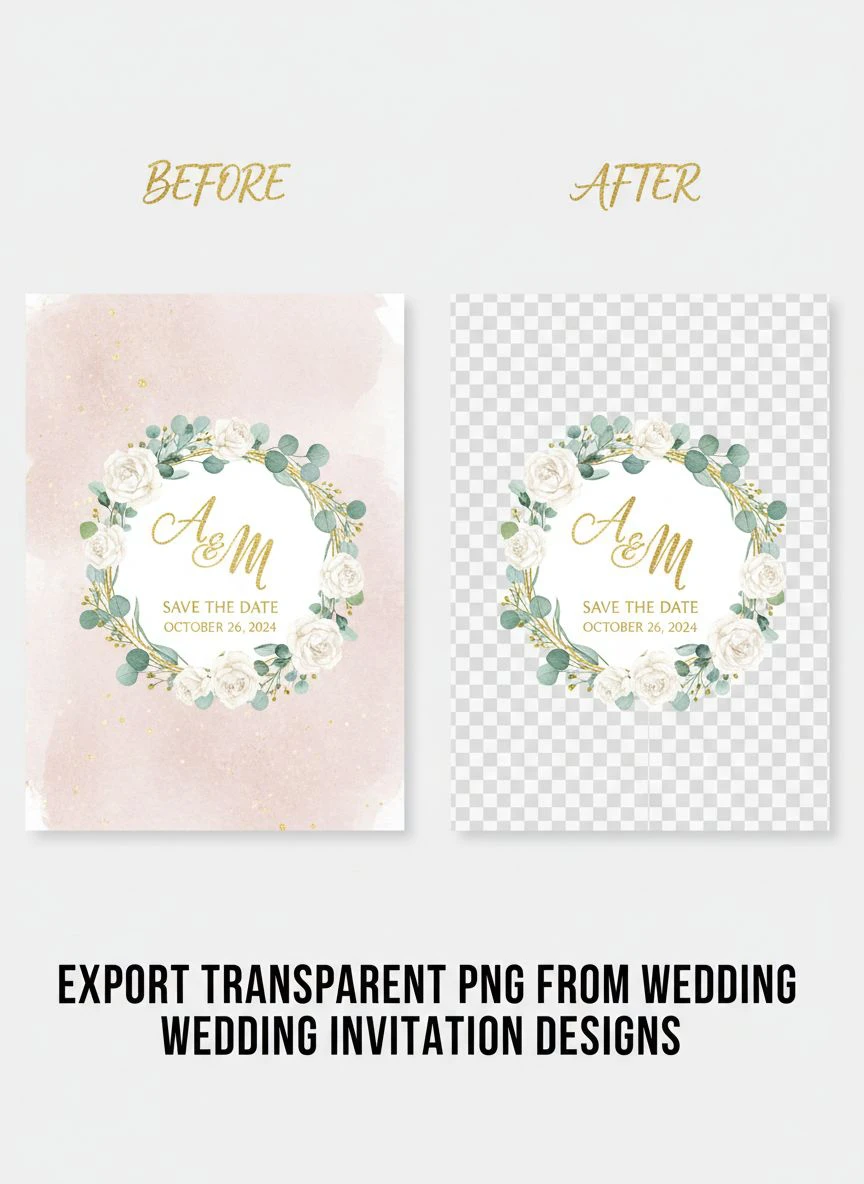
Export Transparent PNG from Wedding Invitation Designs Easily

Your First 1 Edits Are on Us.
Get started instantly with 1 free credits. No credit card required.
I spent three years running a wedding stationery business before I figured out the right way to export transparent png from wedding invitation designs.
Every single day, I was losing hours trying to get clean, transparent backgrounds for client previews and print files.
The worst part? I was charging premium prices but delivering average files because my remove background for wedding invitation PNG workflow was a complete mess.
Let me show you exactly how I fixed this problem and cut my export time from 20 minutes per design down to under 2 minutes.
Why Transparent PNGs Matter for Wedding Invitations
Here's what nobody tells you about wedding invitation files.
Your clients need transparent backgrounds for exactly three reasons: web galleries, print proofs, and vendor mockups.
When I started, I thought a white background was fine. Wrong. Every time a client wanted to preview their invitation on a colored background or a styled flat lay, my designs looked amateur.
The mockup would show a white box around the invitation instead of the design floating naturally on the background.
I lost a $4,200 order because of this exact issue. The bride wanted to see her invitation on a navy background for her website. My file had a white box. Her photographer's mockup looked terrible. She went with another designer.
That day, I committed to mastering transparent PNG exports.
How to Export Transparent PNG Wedding Invitations in Canva
Canva is where most designers start, and honestly, it's not bad for export transparent PNG in Canva wedding designs if you know the right settings.
Here's my exact process:
First, design your invitation with NO background element. Delete any background rectangles or colors. Your artboard should show the checkerboard pattern behind your design elements.
Click the "Share" button in the top right corner. Select "Download" from the dropdown menu.
In the file type dropdown, choose "PNG." You'll see a checkbox that says "Transparent background." Check that box. This is critical.
Before you download, check your image quality. Canva defaults to standard quality, but for wedding invitations, you need high resolution. Go to "File" > "Download" > "More" and select the highest quality available.
Here are the best settings for transparent PNG export wedding invites in Canva:
- File type: PNG
- Transparent background: Checked
- Quality: Maximum (300 DPI if available)
- Size: Original dimensions or larger
- Color profile: sRGB for web, CMYK for print
One thing that burned me: Canva Free only allows transparent backgrounds on certain elements. If you're serious about wedding invitations, the Pro account ($12.99/month) pays for itself in the first week.
Photoshop Transparent PNG Export Wedding Invitations Method
Photoshop gives you way more control, but the learning curve is steeper.
I switched to Photoshop after my 50th client project because I needed more precision.
Open your wedding invitation file in Photoshop. If you have a background layer, you need to delete it or hide it. Look in your Layers panel for a layer with a lock icon named "Background."
Right-click that background layer and select "Delete Layer." Now you should see a checkerboard pattern behind your design. That checkerboard means transparency.
Here's where most people mess up the Photoshop transparent PNG export wedding invitations process:
Go to File > Export > Export As. In the dialog box, select PNG from the format dropdown. Make sure "Transparency" is checked. This is easy to miss.
For wedding invitations, set these exact parameters:
- Format: PNG-24 (not PNG-8)
- Transparency: Checked
- Interlaced: Unchecked for print, checked for web
- Convert to sRGB: Checked for web use
- Resolution: 300 pixels/inch minimum
PNG-24 supports millions of colors. PNG-8 only supports 256 colors and will make your gradients look terrible.
I export two versions of every invitation: one at 300 DPI for print and one at 72 DPI for web galleries. The print version is usually 5-8 MB. The web version is under 500 KB.
One more thing about Photoshop: If your invitation has soft shadows or glows, make sure you're using PNG-24. PNG-8 will create harsh edges around those effects and ruin the professional look.
How to Save Wedding Invite as Transparent PNG in Other Design Tools
Not everyone uses Canva or Photoshop. Here's what I learned about other popular tools.
Adobe Illustrator
Illustrator is vector-based, which is perfect for clean invitation designs. To export, go to File > Export > Export As. Choose PNG, then click "Use Artboards" to export just your invitation area.
In the PNG Options dialog, set Resolution to High (300 PPI) and check the "Transparent" background option.
Illustrator's transparent exports are incredibly clean because it's working with vector data. Your text and shapes will have perfect edges.
Affinity Designer
Affinity Designer is my budget-friendly alternative recommendation. It's $69.99 one-time payment instead of Adobe's monthly subscription.
Go to File > Export. Select PNG from the format dropdown. Under "Area," choose "Whole Document" or select specific artboards. Check "Transparent background."
Set DPI to 300 for print quality. Affinity handles transparency really well, especially with complex layered designs.
GIMP (Free Option)
GIMP is completely free and handles transparent PNGs surprisingly well for wedding invitations.
Open your file, then go to Layer > Transparency > Add Alpha Channel. This enables transparency support. Delete or hide your background layer.
Export via File > Export As, choose PNG, and in the export dialog, make sure compression is set to 9 for smallest file size without quality loss.
The AI Solution That Changed Everything for My Print Shop
After exporting thousands of wedding invitations, I discovered something that saved me countless hours.
Sometimes clients send me invitation designs with backgrounds already baked in. Or I need to quickly remove a background from a scanned vintage invitation element.
I started using Removedo.com for these situations.
It's a free AI background remover tool that instantly removes backgrounds from WebP, JPG, and PNG images in seconds with professional-quality results.
Here's a real example: A bride sent me a JPG of her grandmother's vintage invitation. She wanted me to incorporate design elements from it into her new invitation. The scan had a cream-colored paper background.
I uploaded it to Removedo. Three seconds later, I had a perfect transparent PNG of just the floral elements. No manual selection, no edge refinement, just clean results.
The tool saved me at least 15 minutes of Photoshop work on that one file alone.
I now use it as part of my standard workflow for any client-provided images that need background removal. It handles high resolution transparent PNG for wedding cards without compression issues.
Common Mistakes That Ruin Transparent PNG Exports
I've made every mistake possible with transparent PNGs. Let me save you the headaches.
Mistake #1: Exporting at Too Low Resolution
Your wedding invitation might look perfect on screen at 72 DPI. But send that to a printer and it'll come out pixelated and blurry.
Always export at 300 DPI minimum for anything that might be printed. I learned this after a printer charged me a $180 rush fee to redo files because my originals were too low resolution.
Mistake #2: Using JPEG Instead of PNG
JPEG doesn't support transparency. Period. If you export a JPEG, any transparent areas will become white (or whatever your background color is set to).
I once sent a client 30 invitation variations as JPEGs instead of PNGs. Every single one had a white box. I had to redo all 30 exports. Two hours wasted.
Mistake #3: Not Checking Color Profiles
Wedding invitations often use specific colors (think blush pink, sage green, navy blue). If your color profile is wrong, those colors will shift when printed.
For web use, export with sRGB color profile. For print, ask your printer what they want. Most use Adobe RGB or CMYK.
I had a batch of 200 invitations print in the wrong shade of gold because I exported with the wrong color profile. Cost me $890 to reprint.
Mistake #4: Forgetting to Flatten Text Layers
Some design programs have issues with text transparency. If you're seeing weird halos or edges around your text in the exported PNG, try rasterizing or flattening your text layers before export.
In Photoshop, right-click your text layer and choose "Rasterize Type." In Canva, this happens automatically on export.
Mistake #5: Not Testing the File Before Sending
Always open your exported PNG in a different program to verify transparency actually worked. I open mine in Preview (Mac) or Windows Photo Viewer and place them against different colored backgrounds.
If you see a white or colored box instead of transparency, something went wrong in the export process.
Optimizing File Size Without Losing Quality
High resolution transparent PNG for wedding cards can get massive. I've exported files over 25 MB before.
That's a problem when you need to email files to clients or upload to wedding websites.
Here's how I optimize without sacrificing quality:
Use a PNG compression tool like TinyPNG or ImageOptim. These tools reduce file size by 50-70% without visible quality loss.
I run every web-destined PNG through TinyPNG. A 4 MB file becomes 1.2 MB with zero visual difference. Clients can actually download their previews without waiting 10 minutes.
For print files, I keep the originals at full size and only compress the client preview versions. The printer gets the uncompressed file, the bride gets the optimized one for her website.
Another trick: If your invitation has a lot of empty transparent space around it, crop it tighter. Transparent pixels still take up file size.
I reduced my average file size by 30% just by cropping closer to the actual design elements instead of exporting the full artboard with huge margins.
Batch Exporting Multiple Wedding Invitation Variations
Most wedding invitation projects involve multiple pieces: the main invite, RSVP card, details card, envelope liner, and thank you card.
Exporting each one individually is a time-killer.
In Photoshop, use File > Export > Export As and select "Export All Artboards." If you've set up each invitation piece on its own artboard, this exports all of them at once with your settings.
In Canva, create each invitation piece on a separate page in the same document. When you download, select "All pages" instead of "Current page." Canva exports each page as a separate PNG file.
In Illustrator, use File > Export for Screens. This gives you incredible control over batch exports, including different file sizes and formats simultaneously.
I set up an action in Photoshop that exports three versions of each file: print resolution (300 DPI), web resolution (72 DPI), and thumbnail (150px wide). One click exports all three versions.
This batch workflow cut my export time from 20 minutes per project down to under 2 minutes.
Frequently Asked Questions
What's the best DPI for exporting transparent PNG wedding invitations?
Export at 300 DPI minimum for print production. For web galleries and email previews, 72-150 DPI is sufficient. I always create both versions: a high-resolution print file and an optimized web file. The print version ensures quality if the client decides to print from a local shop, while the web version loads quickly on wedding websites.
Why does my transparent PNG show a white background when I open it?
This happens for three main reasons: you exported as JPEG instead of PNG, you forgot to check the "transparency" option during export, or your viewing program doesn't support transparency display. Try opening the file in a different program or placing it on a colored background in Photoshop to verify actual transparency. Sometimes Windows Photo Viewer shows white where transparency exists.
Can I export transparent PNGs from Canva Free or do I need Canva Pro?
Canva Free has limited transparent background support. You can use transparency on some elements, but many features require Canva Pro ($12.99/month). For professional wedding invitation work, Pro is worth it. I resisted upgrading for six months and regretted every day of it. The transparent background feature alone pays for the subscription.
How do I remove an existing background from a wedding invitation image?
If you have a wedding invitation with a background already embedded, you have several options. In Photoshop, use the Magic Wand or Quick Selection tool to select and delete the background. For faster results, AI tools like Removedo.com can remove backgrounds automatically in seconds. I use this method when clients send me scanned invitations or photos of physical samples they want digitized.
What's the difference between PNG-8 and PNG-24 for wedding invitations?
PNG-8 supports only 256 colors and creates smaller file sizes but can make gradients and complex colors look banded and unprofessional. PNG-24 supports millions of colors and maintains perfect color fidelity for wedding invitations with gradients, watercolors, or metallic effects. Always use PNG-24 for professional wedding stationery. The file size difference is worth the quality improvement.
Final Thoughts on Exporting Professional Wedding Invitation Files
The ability to export transparent png from wedding invitation designs properly is a fundamental skill that separates amateur designers from professionals.
I've shown you exactly how I do it in every major design platform, the mistakes that cost me thousands of dollars, and the optimization tricks that save hours every week.
The key takeaways: always export at 300 DPI for print, use PNG-24 format, verify transparency before sending to clients, and maintain both print and web versions of every file.
When you need to quickly clean up backgrounds or work with client-provided images, tools like Removedo.com can handle the heavy lifting while you focus on the creative work.
Start implementing these export workflows today. Your clients will notice the difference in quality, and you'll stop wasting hours fighting with file formats.
The wedding invitation business rewards those who deliver perfect files the first time, every time.


