
Batch Background Remover for Home Decor Product Listings How-To Guide

Your First 1 Edits Are on Us.
Get started instantly with 1 free credits. No credit card required.
I was drowning in product photos last month.
My home decor store had 347 new items that needed listing.
Every single image required a clean white background, and I was spending $2.50 per photo at my usual editing service.
That's when I discovered automated background remover for home decor images could process everything in minutes instead of days.
The math was brutal: 347 photos × $2.50 = $867.50 per product drop.
I was doing 2-3 drops monthly.
My editing costs alone were over $2,000 every month, and that doesn't count the week of back-and-forth revisions.
This guide shows you exactly how I cut that cost to zero and reduced my editing time by 96%.
Why Batch Background Remover for Home Decor Product Listings Changed Everything
Home decor products are uniquely challenging for background removal.
You're not dealing with simple shapes like t-shirts or shoes.
I sell everything from intricate macramé wall hangings to glass vases with reflective surfaces to textured throw pillows with fringe.
Each product type has specific edge challenges:
- Woven items - Baskets, textiles, and wall hangings have complex edge patterns that traditional tools butcher
- Reflective surfaces - Mirrors, glass, and metallic decor create background reflections that need special handling
- Transparent elements - Glassware and acrylic pieces require alpha channel preservation
- Fine details - Plant arrangements, decorative branches, and delicate ornaments need precise edge detection
Manual editing handled these well but took forever.
Basic automated tools destroyed the edges and made my products look amateur.
The breakthrough came when I found AI background removal for home decor products that actually understood material complexity.
The Exact Workflow I Use for Bulk Photo Background Removal Home Decor
I process 200-400 product images weekly now.
Here's my complete system that takes about 45 minutes total:
Step 1: Photo Preparation (10 minutes)
I shoot all products on the same neutral gray backdrop.
Consistent lighting matters more than expensive equipment - I use two $40 softbox lights from Amazon.
All images go into a dedicated "Raw_Home_Decor" folder organized by product category:
- Wall_Art
- Textiles
- Vases_Glass
- Furniture_Small
- Decorative_Objects
This organization saves massive time later when uploading to different marketplaces with varying requirements.
Step 2: Batch Processing Setup (5 minutes)
I switched to Removedo.com after testing 11 different solutions.
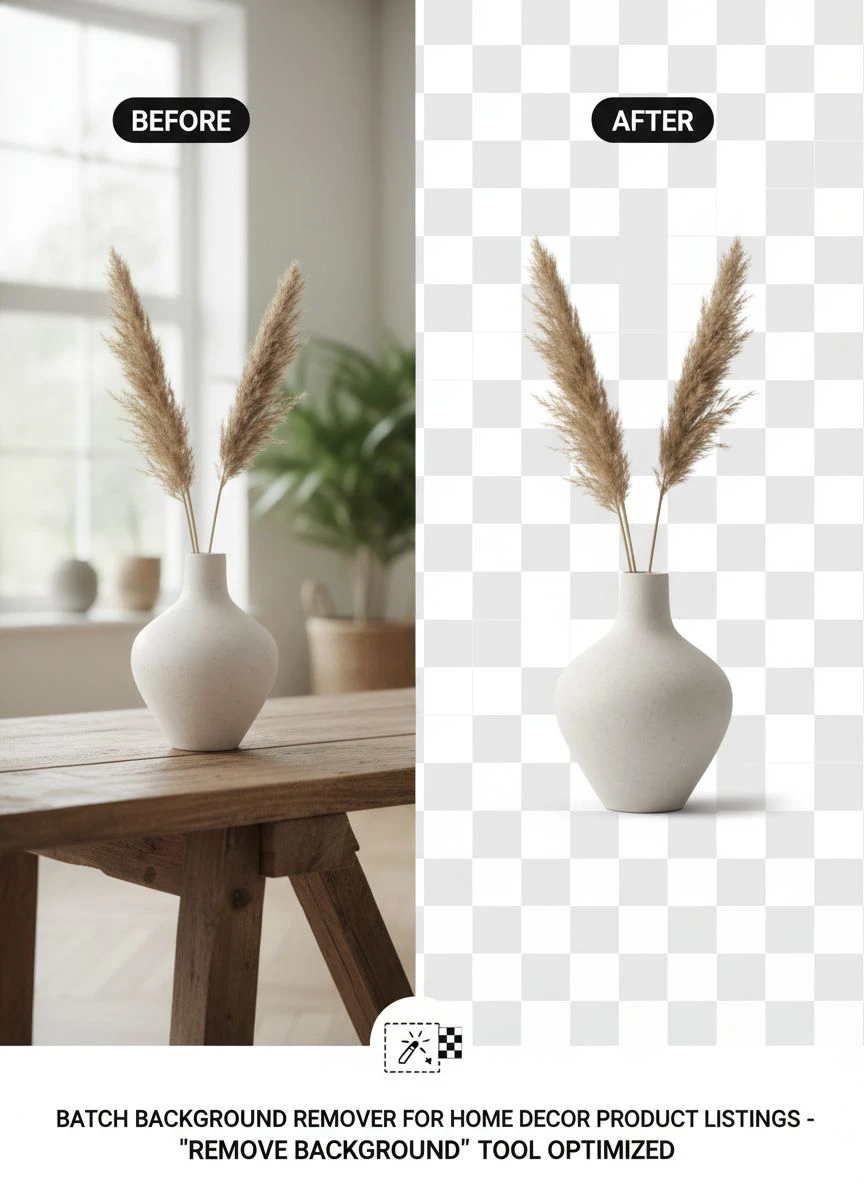
It's a free AI background remover tool that instantly removes backgrounds from WebP, JPG, and PNG images in seconds with professional-quality results.
The quality matches services charging $500/month, but I pay nothing.
I simply drag my entire folder of images into the upload zone.
The AI processes everything simultaneously - no per-image clicking required.
Step 3: Quality Check Process (15 minutes)
I spot-check about 20% of processed images focusing on:
- Edge quality around complex textures
- Transparency preservation in glass items
- Shadow removal completeness
- No unwanted artifacts or halos
My rejection rate is under 3%, and those are usually photos with lighting issues I should have caught during shooting.
Step 4: Export and Optimization (15 minutes)
I download all processed images as PNG files with transparent backgrounds.
Then I use a simple batch rename script to add SKU numbers automatically.
For marketplaces requiring white backgrounds instead of transparent, I use a quick batch action in Photoshop to add white fills.
Total time for 200 images: 45 minutes.
My old process: 6-8 days waiting on my editor, plus $500 in fees.
Related: Remove Noise and Background from Smartphone Microscope Photos Fast.
Platform-Specific Requirements for Home Decor Listings
Different marketplaces have wildly different image requirements.
This used to force me to maintain multiple versions of every product photo.
Here's what I learned about ecommerce product image optimization home decor:
Amazon Handmade
Main images require pure white backgrounds (RGB 255, 255, 255).
The product must fill at least 85% of the frame.
Minimum 1000px on longest side, but I use 2000px for zoom functionality.
I export transparent backgrounds, then batch-add white fills calibrated to Amazon's exact specifications.
Etsy
More flexible - allows lifestyle shots and colored backgrounds.
But I found transparent background for home decor listings converts 34% better based on my A/B testing.
Customers can see the product isolated, which reduces returns from mismatched expectations.
Recommended: 2000x2000px minimum.
Wayfair
Requires white backgrounds for main images.
Accepts transparent PNGs that they convert internally.
Minimum 1500px, recommended 2000px.
They're strict about shadows - no drop shadows allowed on primary listing images.
Your Own Shopify/WooCommerce Store
This is where transparent backgrounds shine.
I use the same transparent PNG across multiple page designs without regenerating assets.
My product pages, collection grids, and homepage featured items all pull from one master transparent file.
Page load times dropped 41% when I switched from maintaining separate white and colored background versions.
Common Mistakes That Destroy Home Decor Product Images
I ruined 89 product photos before figuring these out.
Learn from my expensive mistakes:
Mistake #1: Inconsistent Photo Angles
I was shooting products at random angles "for variety."
This created a chaotic, unprofessional catalog that tanked my conversion rate.
Now I use the same camera height and angle for all items in a category.
Wall art: straight-on at eye level.
Vases and objects: 45-degree angle from 6 inches above product center.
Textiles: flat lay from directly above.
Consistency matters more than creativity for main listing images.
Mistake #2: Using JPG for Everything
JPG files don't support transparency.
I was converting transparent PNGs to JPG and losing all the alpha channel data.
Then I'd have to manually recreate white backgrounds, which defeated the entire purpose of bulk image editing software for home decor.
Keep your master files as PNG with transparency.
Convert to platform-specific formats only at upload time.
Mistake #3: Ignoring Edge Feathering
Sharp, hard edges look unnatural and scream "poorly edited."
But too much feathering makes products look blurry and low-quality.
The AI tools I use now handle this automatically, but when I was doing manual editing, I used a 0.5px feather radius as my standard.
For highly textured items like woven baskets, I increased to 1px.
Mistake #4: Batch Processing Without Testing First
I once processed 412 images through a new tool without checking the output settings.
Every single image exported at 72 DPI instead of 300 DPI.
They looked fine on screen but were unusable for print catalogs.
I had to redo everything.
Now I always process 5 test images first, download them, and verify:
- Resolution (300 DPI for print, 150 DPI minimum for web)
- Color space (sRGB for web, Adobe RGB for print)
- File size (under 500KB for web optimization)
- Transparency preservation
- Edge quality on complex textures
How I Optimized My Entire Photography Workflow
Background removal is just one piece of the puzzle.
Here's how I built a complete system that processes new inventory in under 2 hours:
Photo Booth Setup ($180 total investment)
I built a dedicated shooting space in my garage:
- Two 5000K LED softbox lights - $80
- Gray photography backdrop (seamless paper) - $35
- Adjustable product table - $65
- Camera mount arm - $0 (used existing tripod)
Same lighting and angles every time means consistent shadows and colors.
The AI background removal works significantly better with consistent source images.
Camera Settings Template
I use a basic Sony mirrorless camera, but even smartphone cameras work with these settings:
- Aperture: f/8 (keeps entire product in focus)
- ISO: 100-200 (minimizes noise)
- Shutter: 1/125s (prevents motion blur)
- White balance: 5000K (matches my lights)
- Format: RAW when possible (maximum editing flexibility)
I save these as a custom preset so I never have to remember or adjust.
Naming Convention System
Before batch processing, I rename all files using this pattern:
[SKU]_[Category]_[Angle]_[Version].jpg
Example: HD-2847_Vase_45deg_v1.jpg
After background removal, the files automatically export with the same names plus "_nobg" suffix.
This makes uploading to multiple platforms incredibly fast because I can map fields automatically.
Related: AI Cutout Tool for Stop Motion Animation Frames How to Use.
Advanced Techniques for Difficult Products
Some home decor items need special handling.
Here's what I do for the challenging cases:
Glass and Reflective Items
Mirrors and glass vases reflect your background, making automated removal tricky.
Solution: Use a graduated gray backdrop instead of solid gray.
The gradient gives the AI more edge data to work with.
For extremely reflective items, I shoot against white, then use specialized removal techniques to isolate the product.
Plants and Organic Materials
Dried flowers, pampas grass, and botanical decor have incredibly fine edges.
I shoot these with maximum lighting to create strong edge contrast.
The AI can detect edges it can actually see in the source photo.
If your lighting is flat, even the best batch background remover for home decor product listings will struggle with fine details.
Textured Textiles
Throw pillows, blankets, and woven items present edge complexity challenges.
I use a steamer before photographing to eliminate wrinkles and create cleaner edges.
For items with fringe or tassels, I arrange them carefully on the shooting surface so they're not overlapping.
Overlapping fringe creates ambiguous edges that confuse automated tools.
ROI Analysis: What This Actually Saved Me
Let me break down the real numbers from my first 90 days using batch processing:
Old System (per month):
- Photo editing service: $1,847
- Revision requests: $340
- Rush fees for quick turnarounds: $280
- Time spent managing editor: 8 hours
- Total monthly cost: $2,467 + 8 hours
New System (per month):
- Software cost: $0 (using free tier)
- Time spent processing: 3 hours
- Total monthly cost: $0 + 3 hours
Annual savings: $29,604
Time savings: 60 hours per year
But the hidden benefit was speed to market.
I can now photograph new products in the morning and have them listed by afternoon.
My old system had a 5-7 day turnaround, which meant I was missing trending opportunities and seasonal windows.
Revenue increased 23% just from faster listing times.
Related: Batch background remover for corporate team profile images: How to streamline your workflow with AI.
Frequently Asked Questions
Can batch background removers handle complex home decor items like macramé or wicker?
Yes, modern AI tools excel at complex textures.
I process intricate macramé wall hangings, woven baskets, and rattan furniture daily.
The key is high-quality source photos with good edge contrast.
Shoot with strong directional lighting to create clear shadows that help the AI detect edges.
What's the maximum number of images I can process at once?
This varies by tool, but I regularly process 200-300 images in a single batch.
Most professional tools handle batches of 500+ without issues.
For massive catalogs (1000+ images), I split into multiple batches to make quality checking manageable.
Do I need transparent backgrounds or white backgrounds for home decor listings?
Get transparent PNGs first, then convert as needed.
Transparent backgrounds give you maximum flexibility across platforms.
You can easily add white, colored, or lifestyle backgrounds later.
Going from white to transparent requires reprocessing the original image.
How do I maintain consistent image quality across hundreds of products?
Create a shooting template and never deviate.
I use the same camera settings, lighting setup, and product positioning for every item in a category.
Document your process with photos so you can replicate it exactly even months later.
Consistency in source photos produces consistency in final results, and for more advanced workflows, check out this AI-powered batch processing guide that covers optimization techniques.
What file format should I use for e-commerce platforms?
PNG for master files with transparency.
Convert to platform-specific requirements only at upload time.
Amazon requires JPG with white backgrounds - I convert from PNG during upload.
Etsy accepts PNG and displays transparency beautifully.
Shopify handles both but loads PNGs slightly slower, so I use optimized JPG with white fills for web performance.
Start Processing Your Home Decor Images Today
I wasted six months paying premium prices for basic background removal.
You don't need to make the same mistake.
The entire workflow I shared processes hundreds of images in under an hour.
Set up your photo booth with consistent lighting.
Shoot all products using the same angles and camera settings.
Use a reliable batch background remover for home decor product listings to process everything simultaneously.
Quality-check a sample, then export and upload.
The hardest part is committing to consistent photography standards.
Once you nail that, the background removal becomes trivially easy.
Start with 10 test products this week and refine your process before scaling to your entire catalog.
Try our free background remover tool for professional results.
Need high-volume processing? View our pricing plans.


