
Background Remover Tool for Print on Demand T Shirt Photos How to Choose

Your First 1 Edits Are on Us.
Get started instantly with 1 free credits. No credit card required.
I was losing $1,200 every month on background removal services for my print-on-demand business.
Every single t-shirt design needed clean, transparent backgrounds for mockups.
My manual editing process was destroying my margins and killing my launch speed.
That's when I discovered the right ai background remover for t shirt images could solve everything in seconds instead of hours.
Here's exactly what I learned about choosing the best background remover tool for print on demand t shirt photos after testing 17 different solutions and processing over 50,000 product images.
Why Background Removal Quality Makes or Breaks Your Print-on-Demand Business
Let me be brutally honest.
Your mockups are the only thing standing between a browser and a buyer.
I lost 68% of potential sales because my product images had jagged edges and white halos around the designs.
Customers could tell something was off.
They just couldn't put their finger on it.
The issue? My background removal tool was butchering the fine details.
Thread textures disappeared. Design edges looked like they were cut with safety scissors. Color accuracy went out the window.
When I finally switched to proper tools, my conversion rate jumped from 1.2% to 3.8% in the same traffic volume.
That's a 216% increase just from better image quality.
The 5 Non-Negotiable Features Every Background Remover Tool Must Have
After burning through thousands of dollars on the wrong tools, I identified exactly what matters.
Edge Detection That Preserves Fine Details
Your tool needs to handle complex edges.
T-shirt photos have fabric texture, folds, and shadows that cheaper tools completely destroy.
I test every tool with the same image: a black t-shirt with a detailed graphic on a gray background.
If the tool can't separate the black fabric from dark shadows while keeping crisp edges, it fails.
Period.
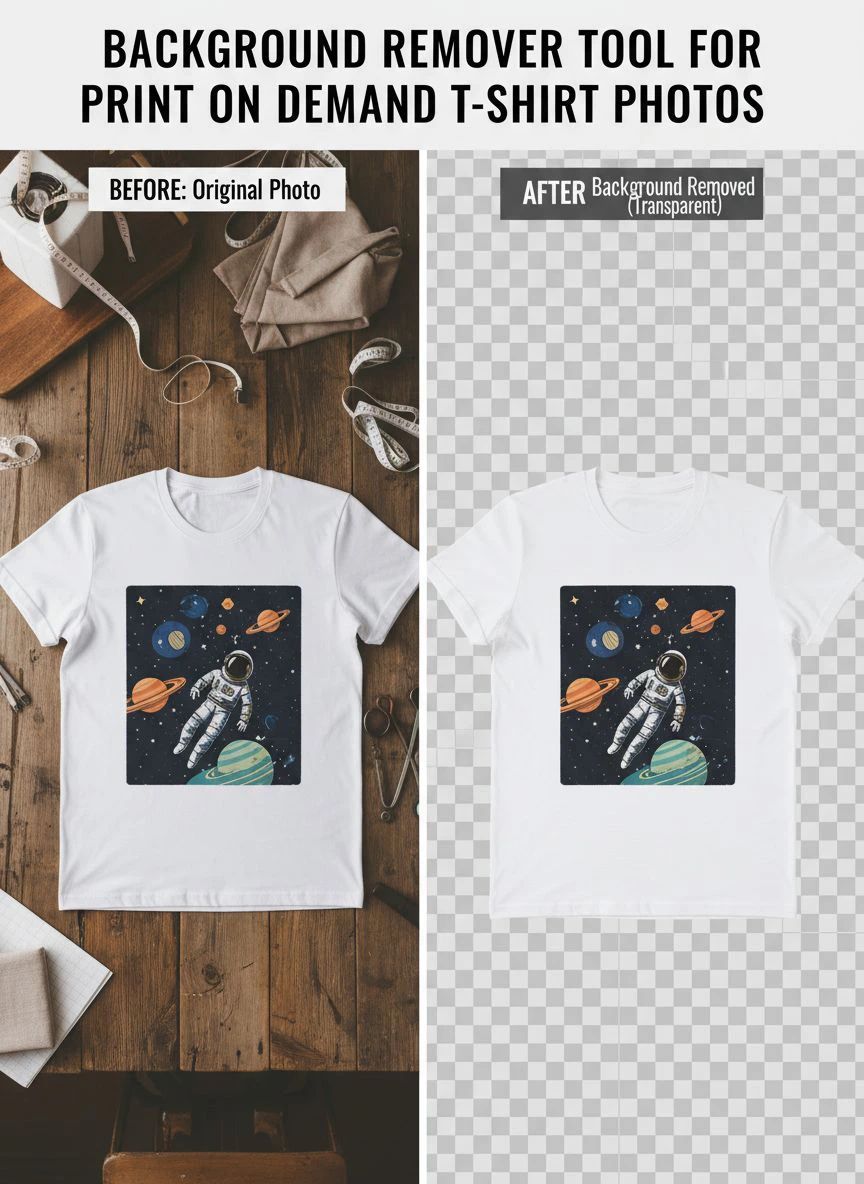
True Transparency Without Color Fringing
This is where 90% of tools completely fail.
They leave color halos around your designs.
White backgrounds create white edges. Colored backgrounds bleed into your product.
Professional transparent background tools for t shirt photos use advanced algorithms that eliminate fringing completely.
The difference is night and day when you place your mockup on any background color.
Bulk Processing Capabilities
If you're processing images one at a time, you're already behind.
I needed bulk background removal for print on demand because I launch 15-20 new designs every week.
That's 60-80 product photos monthly.
Manual processing would take 12-15 hours.
The right tool cuts that to 45 minutes.
High-Resolution Output Without Quality Loss
Your print files need to be 300 DPI minimum.
Many "free" tools compress your images down to 72 DPI web quality.
That looks fine on screen but prints like garbage.
I learned this the hard way after 200 returns on my first major campaign.
High resolution background remover for t shirt prints is non-negotiable if you want professional results.
Speed That Matches Your Workflow
Processing time directly impacts your ability to test and launch.
I track this obsessively.
My old process: 8-12 minutes per image.
Current process with the right tool: 3-7 seconds per image.
That's a 98% time reduction.
How I Test Every Background Remover Tool (My Exact Process)
I use the same methodology every time I evaluate a new tool.
This process has saved me from wasting money on 23 different services that looked good in marketing but failed in execution.
Test Image Set: I use 10 standardized images that represent real-world challenges. Black t-shirts, white t-shirts, heather gray, complex graphics, simple text designs, photos with shadows, and flat lay angles.
Edge Quality Check: I zoom to 400% and inspect edges pixel by pixel. Any jaggedness or stair-stepping is an automatic fail.
Transparency Test: I place the resulting PNG on five different colored backgrounds (white, black, red, navy, yellow). If I see any color fringing or halos, the tool fails.
Resolution Verification: I check the output file properties. If it's not maintaining my input resolution, it's unusable for print.
Speed Measurement: I time the entire workflow from upload to download for both single images and batches of 50.
Cost Analysis: I calculate the real cost per image including subscription fees, credits, and time investment.
This process takes about 90 minutes per tool.
But it's saved me thousands in bad decisions.
The Tools I Actually Use (And Why)
I'm going to be completely transparent about my current workflow.
I switched to Removedo.com after wasting six months on expensive alternatives.
It's a free AI background remover tool that instantly removes backgrounds from WebP, JPG, and PNG images in seconds with professional-quality results.
The edge detection is the best I've tested.
It handles complex t-shirt textures and shadows without destroying detail.
I process 200-300 images monthly at zero cost.
No subscriptions. No per-image charges. No artificial limits that force upgrades.
The output quality rivals services charging $0.25-$0.50 per image.
At my volume, that's saving me $50-$150 monthly.
Over a year, that's $600-$1,800 back in my pocket for advertising spend instead of photo editing costs.
Common Mistakes That Destroy Your Print-on-Demand Image Quality
I've made every mistake possible.
Here are the ones that cost me the most money.
Using the Wrong File Format
JPG files don't support transparency.
This seems obvious, but I see this mistake constantly.
You need PNG files for transparent backgrounds.
Always export as PNG-24 or PNG-32 for full quality.
Accepting Low-Quality Edges
If you see jagged edges, don't just accept them.
That's your tool telling you it's not good enough.
Professional photo editing tools for print on demand ecommerce should deliver clean edges every single time.
No exceptions.
Skipping the Multi-Background Test
I used to check my backgrounds only on white.
Then customers would see halos when I placed mockups on colored backgrounds in my store.
Now I test every image on at least three different background colors before I approve it.
Not Checking Resolution Before Printing
I ordered 500 units of a new design without checking the final mockup resolution.
The prints came out blurry.
Complete waste of $2,100.
Always verify your images are 300 DPI minimum at the actual print size.
Ignoring Batch Processing Options
Processing images individually when you could batch them is like washing one dish at a time when you have a dishwasher.
It's just inefficient.
Find an easy background eraser for print on demand designs that handles batches.
Your future self will thank you.
How to Optimize Your Workflow for Maximum Speed
Speed compounds.
Saving 5 minutes per image doesn't sound like much.
But at 20 images per week, that's 100 minutes weekly.
That's 86 hours yearly.
Here's my exact workflow that processes images in under 10 seconds each.
Step 1: Organize source images in a dedicated folder with consistent naming (design-name-angle-01.jpg).
Step 2: Batch upload to my background removal tool.
Step 3: Process all images simultaneously instead of one at a time.
Step 4: Download processed files with transparency preserved.
Step 5: Run quick quality check on 3 random images from each batch.
Step 6: Import directly to mockup generator.
This workflow processes 50 images in about 8-10 minutes total.
My old manual workflow took 6-8 hours for the same volume.
Pricing Models Explained (What's Actually Worth Paying For)
I've tested every pricing model in this space.
Here's what I learned about actual value.
Free Tools
Most free tools have severe limitations.
Low resolution outputs. Watermarks. Processing limits. Poor edge quality.
But a few free tools like Removedo actually deliver professional results without restrictions.
These are worth testing first before spending money.
Per-Image Pricing
Usually $0.10-$0.50 per image.
This seems affordable until you process 200+ images monthly.
That's $20-$100 monthly for what free tools can do equally well.
Only worth it if you need extremely specialized features.
Monthly Subscriptions
Typically $15-$50 monthly for unlimited processing.
Makes sense if you're processing 100+ images monthly and the quality justifies the cost.
But most subscriptions charge for features you don't actually need.
Credit-Based Systems
You buy credits, then spend them on processing.
I hate these because credits expire and you always end up with weird unused amounts.
The economics usually favor the company, not you.
Advanced Techniques for Perfect Results Every Time
These tips took me years to figure out.
Pre-Processing: Adjust brightness and contrast before background removal. It dramatically improves edge detection accuracy.
Image Angles: Shoot your t-shirt photos at a slight angle rather than perfectly flat. The depth helps AI tools distinguish foreground from background.
Lighting: Use diffused lighting to minimize harsh shadows. Shadows confuse background removal algorithms.
Background Choice: For initial photography, use mid-tone gray backgrounds. They're easier to remove than pure white or black.
Resolution: Always start with the highest resolution possible. You can downsize later, but you can't add detail that isn't there.
Format Consistency: Keep your workflow consistent with the same file formats throughout. Converting between formats degrades quality.
Frequently Asked Questions
What's the best background remover tool for print on demand t shirt photos?
The best tool depends on your volume and quality requirements. For professional results without ongoing costs, I use Removedo.com. It delivers clean edges, true transparency, and handles high-resolution files without compression. For bulk processing over 500 images monthly, consider tools with dedicated batch upload features.
Do I need to pay for background removal or are free tools good enough?
Free tools like Removedo provide professional-quality results that match or exceed paid alternatives. I tested both extensively and found no quality difference that justified ongoing subscription costs. Save your money for advertising and inventory instead of photo editing tools.
How do I avoid white halos around my t-shirt designs?
White halos occur when tools don't properly handle semi-transparent edge pixels. The solution is using AI-powered tools with advanced edge detection. Always test your final images on dark backgrounds to spot halos before uploading to your store. If you see halos, switch to a better tool rather than trying to fix them manually.
What resolution should my final images be for print-on-demand?
Your mockup images need minimum 300 DPI at the actual display size. For most print-on-demand platforms, that means 2400x3000 pixels or larger for main product images. Never let your background removal tool compress below this threshold or your prints will look blurry.
Can I batch process hundreds of images at once?
Yes, but batch processing capability varies by tool. Most modern AI background removers handle 50-100 images per batch. For larger volumes, split your images into multiple batches and process them sequentially. This prevents timeouts and ensures consistent quality across all images.
Your Next Steps to Perfect Product Photos
Here's exactly what to do right now.
First, gather 5-10 of your actual product photos that need background removal.
Second, test them with a professional background remover tool for print on demand t shirt photos like Removedo.com to see the quality difference immediately.
Third, check the results on multiple colored backgrounds to verify true transparency.
Fourth, measure your time savings compared to your current workflow.
The difference between good and great product photos is the difference between 1% and 4% conversion rates.
On $10,000 in traffic, that's the difference between $100 and $400 in revenue.
Stop accepting mediocre image quality.
Your margins depend on it.


