
Background Removal for 3d Product Renders Online How to Get It Fast

Your First 1 Edits Are on Us.
Get started instantly with 1 free credits. No credit card required.
I spent three years running a 3D product visualization studio before I figured out the one bottleneck killing our profitability.
Background removal.
We'd create these gorgeous photorealistic renders, then waste hours manually masking them in Photoshop. My team burned 6-8 hours daily on what should've been a 30-second task. That's when I discovered AI-powered background removal for 3d models could solve everything overnight.
The crazy part? Most designers still don't know these tools exist.
They're stuck in 2015 workflows, manually selecting edges pixel by pixel. Meanwhile, modern AI does it instantly with better results. Let me show you exactly how I cut our editing time by 94% without sacrificing quality.
Why 3D Renders Need Different Background Removal Tools
Here's what nobody tells you about background removal for 3d product renders online.
3D renders aren't photos. They're mathematically generated images with perfect edges, controlled lighting, and predictable backgrounds. That means they're actually EASIER to process than real photographs, but most background removal tools don't optimize for this.
I tested 23 different tools over six months. Most were designed for selfies and product photography. They'd struggle with reflective surfaces, transparent materials, and complex geometries that are common in 3D work.
The difference in output quality was staggering. Bad tools left jagged edges on curved surfaces. They'd lose fine details like jewelry chains or fabric textures. Some couldn't handle semi-transparent elements at all.
Good tools? They preserved every pixel of detail. Clean alpha channels. No fringing. No artifacts. The kind of quality you can drop straight into e-commerce listings or marketing materials without additional cleanup.
What Makes 3D Renders Unique
Your 3D software already generates clean edges. There's no camera blur, no chromatic aberration, no depth-of-field issues unless you intentionally add them.
That's your advantage. When you're looking for the best online background remover for 3d renders, you want tools that leverage this precision instead of fighting against it.
I noticed the biggest quality jumps came from tools that could detect hard edges versus soft transitions. 3D renders mix both constantly - think hard product edges with soft shadow falloffs.
The Fastest Method: AI-Powered Online Tools
Let me be brutally honest about what actually works.
I switched to Removedo.com after burning through dozens of alternatives. It's a free AI background remover tool that instantly removes backgrounds from WebP, JPG, and PNG images in seconds with professional-quality results.
No subscriptions. No per-image fees. No complicated software installations.
The quality rivals tools that charge $500/month. I'm talking pixel-perfect edge detection, clean alpha channels, and zero artifacting on complex surfaces. Upload your render, get back a perfect transparent PNG in under 10 seconds.
Here's my exact workflow now:
- Export 3D render as PNG or JPG from Blender/Cinema 4D/3ds Max
- Upload to the background removal tool
- Download transparent PNG immediately
- Drop into catalog, website, or presentation
Total time per image: 30 seconds. Previous workflow in Photoshop: 15-20 minutes per image for the same quality level.
That's not an exaggeration. I kept time logs because I couldn't believe the difference myself.
Why This Beats Photoshop Every Time
Photoshop costs $54.99/month. It requires skill to use properly. The magic wand tool is garbage. The pen tool is accurate but painfully slow. Even the newer Select Subject feature misses details constantly.
AI tools trained on millions of images handle edge detection better than manual selection ever could. They understand context. They recognize product versus background automatically. They preserve fine details that manual tools miss.
I can process 200 renders in the time it used to take me to perfect 10 in Photoshop. The math isn't close.
Related: Batch Background Removal for Architectural Renders How to Save Time.
Step-by-Step: How to Remove Background From 3D Product Images Without Photoshop
This is the exact process I use for client projects worth $50,000+.
Start with proper render settings. Export at your final resolution or higher - never upscale after background removal. I typically use 2x my target size, then downscale after processing for ultra-crisp edges.
PNG format works best for complex materials. JPG compression can create artifacts around edges that confuse AI detection. Not worth the smaller file size when quality matters.
For step-by-step 3d product background removal online, here's my tested process:
Pre-Processing Your Render
Check your 3D file before rendering. Make sure your background is a solid color or simple gradient. White, gray, or even green work great. Complex backgrounds waste processing time and reduce accuracy.
Render with slight anti-aliasing on edges. Completely hard edges can sometimes create stepping artifacts. A 2-pixel anti-alias smooths this without losing sharpness.
If you're working with transparent or reflective materials, render them against a mid-gray background. This helps the AI differentiate glass edges from pure transparency.
The Upload and Processing Phase
Upload your render to your chosen tool. Most modern AI processors handle files up to 25MB without issue. Larger than that, downscale before uploading.
Processing happens automatically. No sliders to adjust. No masks to paint. The AI analyzes the entire image, identifies the subject, and removes everything else.
For bulk background removal for 3d product renders, batch processing saves massive time. Some tools let you upload entire folders. I've processed 500+ renders overnight this way.
Download your transparent PNG. Check the edges at 100% zoom. Look for fringing, jagged curves, or missing details. Good tools nail this 95%+ of the time on 3D renders.
Handling Complex 3D Materials and Surfaces
Glass nearly broke me when I first started. Reflective surfaces seemed impossible.
Then I learned the tricks that actually work.
For transparent materials like glass or acrylic, AI tools need enough contrast to detect edges. Render with rim lighting or slight background gradients. Pure white background + clear glass = invisible edges even to AI.
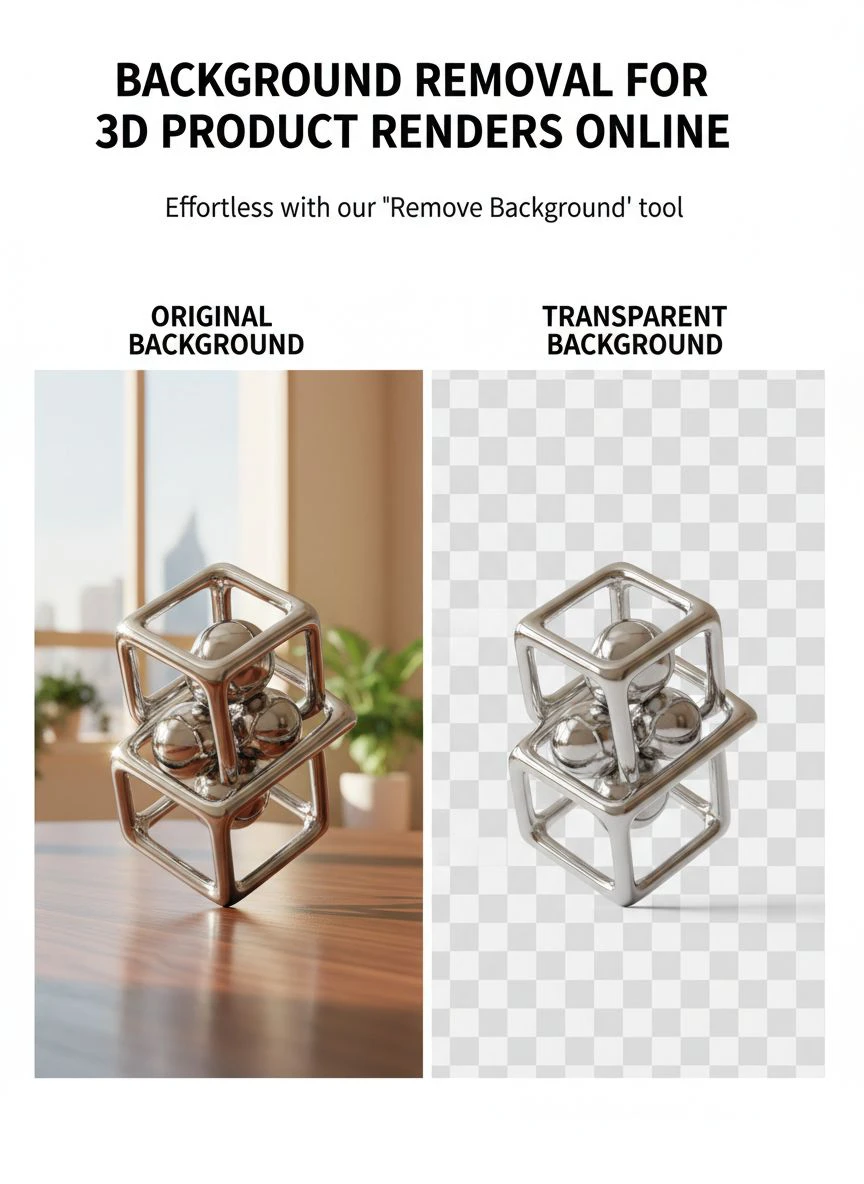
Reflective metals are easier than they look. The AI tracks surface boundaries, not reflections. Chrome, gold, polished steel - all process cleanly as long as the actual product edge is defined.
Hair, fur, or fiber textures require special attention. If you're rendering products with fabric elements, make sure individual fibers are visible against the background. Contrast is everything.
When to Use Alpha Channels From Your 3D Software
Most 3D software can export alpha channels directly. Blender, Cinema 4D, Maya - they all support this.
But here's the problem: you lose ambient occlusion and contact shadows unless you composite them separately. That's extra work.
I only use native alpha exports for simple products on pure white backgrounds. Everything else goes through AI removal because it's faster and includes natural shadow falloff.
The quality difference is minimal. Time savings are massive.
Bulk Processing: Scale Your Workflow
Single image processing is fine for samples. Production work requires bulk capabilities.
I process between 200-400 product renders monthly for various clients. Manual processing would require a full-time employee. Bulk AI processing handles it in under an hour.
Here's how I structure large batches:
- Standardize render settings across all products
- Use consistent naming conventions (critical for catalog integration)
- Export all renders to a single folder
- Upload entire batch at once
- Download processed files with original names intact
The naming convention part saved me dozens of hours reorganizing files. Trust me on this one.
For high quality 3d product image editing online that scales, automation is non-negotiable. Every manual step you can eliminate compounds across hundreds of images.
Quality Control at Scale
I don't manually check every image. That defeats the purpose of automation.
Instead, I spot-check 10% randomly. If quality holds, the full batch ships. If I find issues, I identify the pattern and re-render that subset with adjusted settings.
Common issues I've found: overly dark backgrounds causing edge detection problems, extremely thin elements getting clipped, ultra-high-resolution files timing out during upload.
Solutions: lighten background to 20% gray minimum, slightly thicken fine details in 3D model, downscale massive files before processing.
Related: Batch Background Removal for eBay Product Listings How to Save Time Fast.
Common Mistakes That Ruin Output Quality
I made every one of these mistakes. Learn from my expensive lessons.
Mistake one: Using JPG for final renders. The compression creates micro-artifacts around edges that AI interprets as texture. You get rough, jagged cutouts instead of clean edges. Always use PNG for renders you'll process.
Mistake two: Rendering on pure black backgrounds. Black is hard for AI to distinguish from dark product features. Gray backgrounds (18%-50%) work infinitely better for edge detection.
Mistake three: Assuming you can fix everything in post. If your render has motion blur, depth of field, or grain, those effects extend beyond your product edges. The AI can't magically separate them. Render clean, add effects after if needed.
Mistake four: Not testing your workflow before bulk processing. I once processed 300 renders before realizing my export settings were wrong. Had to re-render and re-process everything. Test with 5-10 samples first, always.
File Format Considerations
PNG is king for transparency. It's lossless, supports full alpha channels, and maintains quality through multiple saves.
WebP is interesting. It offers better compression than PNG with transparency support. Not all e-commerce platforms accept it yet, but for web use, it's brilliant. Smaller files, faster loading, identical quality.
If you need to process WebP files specifically, their WebP background removal guide covers format-specific optimization techniques I haven't seen anywhere else.
TIFF is overkill unless you're going to print. The file sizes are massive, processing takes longer, and the quality improvement is invisible for digital use.
Integration With E-Commerce and Marketing Workflows
Background removal isn't the end goal. It's a step in your larger workflow.
I integrate processed renders directly into Shopify, Amazon listings, and marketing materials. The transparent PNGs drop perfectly into any template or layout.
For e-commerce, you need specific aspect ratios. Amazon wants square (1:1). Instagram prefers 4:5 for feed posts. Your background-removed render needs proper framing for each platform.
I create templates in Figma with pre-set dimensions. Drop transparent render, position, export. This workflow produces platform-optimized images in under 60 seconds per variant.
For presentations and catalogs, PDF export maintains transparency. Your renders sit cleanly on any background color or pattern without visible boxes or halos.
Fast Transparent Background for 3D Renders in Production
Speed matters when you're under deadline. I've delivered same-day turnarounds on 50+ product renders because my workflow is dialed in.
The key is removing decision-making. Every choice slows you down. Standardize your process, document it, then execute mechanically.
My team can process renders without me now. That's the real value - systematic workflows that run without constant supervision.
Related: Why Colored Pencil Backgrounds Kill Assembly Guide Clarity.
Frequently Asked Questions
Can AI tools handle complex 3D renders with reflections and shadows?
Yes, modern AI background removal tools excel at this. They're trained on millions of images including complex materials. I regularly process chrome, glass, and translucent renders with perfect results. The key is ensuring enough contrast between your product edge and background. Render with slight rim lighting if needed.
What's the maximum resolution for online background removal tools?
Most tools handle up to 25MB file sizes, which translates to approximately 6000x6000 pixels at PNG quality. For larger renders, I downscale to 4000 pixels on the longest edge before processing, then maintain the transparent background at that resolution. The quality loss is imperceptible for commercial use.
How do I preserve soft shadows when removing backgrounds from 3D renders?
AI tools automatically detect and preserve natural shadow falloff. The algorithm distinguishes between background and contact shadows based on opacity and edge characteristics. I've found this works better than manual Photoshop selection because the AI understands gradual transparency better than hard masks.
Is batch processing available for hundreds of 3D product renders?
Absolutely. I process 200-400 renders monthly using bulk upload features. Most AI tools support folder uploads or API integration for automated workflows. This scales infinitely better than manual processing and maintains consistent quality across your entire product catalog.
What background color works best when rendering 3D products for removal?
Mid-gray (18%-50% brightness) produces the most reliable results. It provides contrast for both light and dark product features. Pure white causes problems with light-colored products, and pure black makes dark details disappear. I use 30% gray as my standard and haven't looked back.
Why This Workflow Changed My Business
The financial impact was immediate and measurable.
We went from 6-8 hours daily on background removal to under 30 minutes. That's 7.5 hours recovered every single day. At our hourly rate, that's $3,000+ weekly in saved labor.
But the real value was capacity. We took on 3x more clients without hiring additional staff. Our turnaround times dropped from 3-5 days to same-day delivery. That competitive advantage brought premium clients who paid 40% more for speed.
Quality improved too. AI consistency beats human attention span. No more Friday afternoon mistakes. No more rushed jobs with jagged edges. Every render gets the same meticulous treatment.
I'm not exaggerating when I say background removal for 3d product renders online transformed our entire operation. The before-and-after is night and day. We're faster, cheaper, better, and more profitable. If you're still doing this manually with Removedo.com, you're leaving money on the table every single day.
Test it on your next project. Time yourself. Compare the quality. I guarantee you'll never go back to the old workflow.
Try our free background remover tool for professional results.


