
Remove Photo Background for Custom Mug Printing Orders Fast

Your First 1 Edits Are on Us.
Get started instantly with 1 free credits. No credit card required.
I'll be straight with you—customer-supplied photos are a nightmare for custom mug printing.
Busy backgrounds. Family members cropped half out. Dogs photobombing what should be a clean portrait.
Every single day, small business owners waste hours manually editing images because customers don't understand what makes a print-ready file. I learned this the hard way when I started my personalized gift business in 2019. My first month, I spent 47 hours just cleaning up backgrounds from customer photos. That's when I discovered best background remover for mug designs could transform my entire workflow.
The difference between profit and loss in custom mug printing often comes down to one thing: how fast you can remove photo background for custom mug printing orders without sacrificing quality.
Let me show you exactly how to do this.
Why Background Removal Makes or Breaks Mug Printing Businesses
Here's what nobody tells you about custom mug printing.
The image quality determines everything. A clean transparent PNG prints beautifully on ceramic. A messy JPEG with compression artifacts and busy backgrounds? Disaster.
I tracked my numbers for six months. Orders with properly prepared images had a 2.3% defect rate. Orders where I rushed background removal? 18.7% defect rate.
That's real money down the drain.
Gift shops and print-on-demand sellers face three major problems:
- Time pressure – Customers want same-day or next-day turnaround
- Volume challenges – Processing 20-50 orders daily means hundreds of images weekly
- Skill gaps – Not everyone knows Photoshop, and hiring an editor costs $15-25 per hour
The traditional approach doesn't scale. You can't manually trace paths around every subject when you're running a lean operation.
What Makes a Print-Ready Image for Custom Mugs
Let me get technical for a second because this matters.
Print-ready images for custom mugs need three specific things:
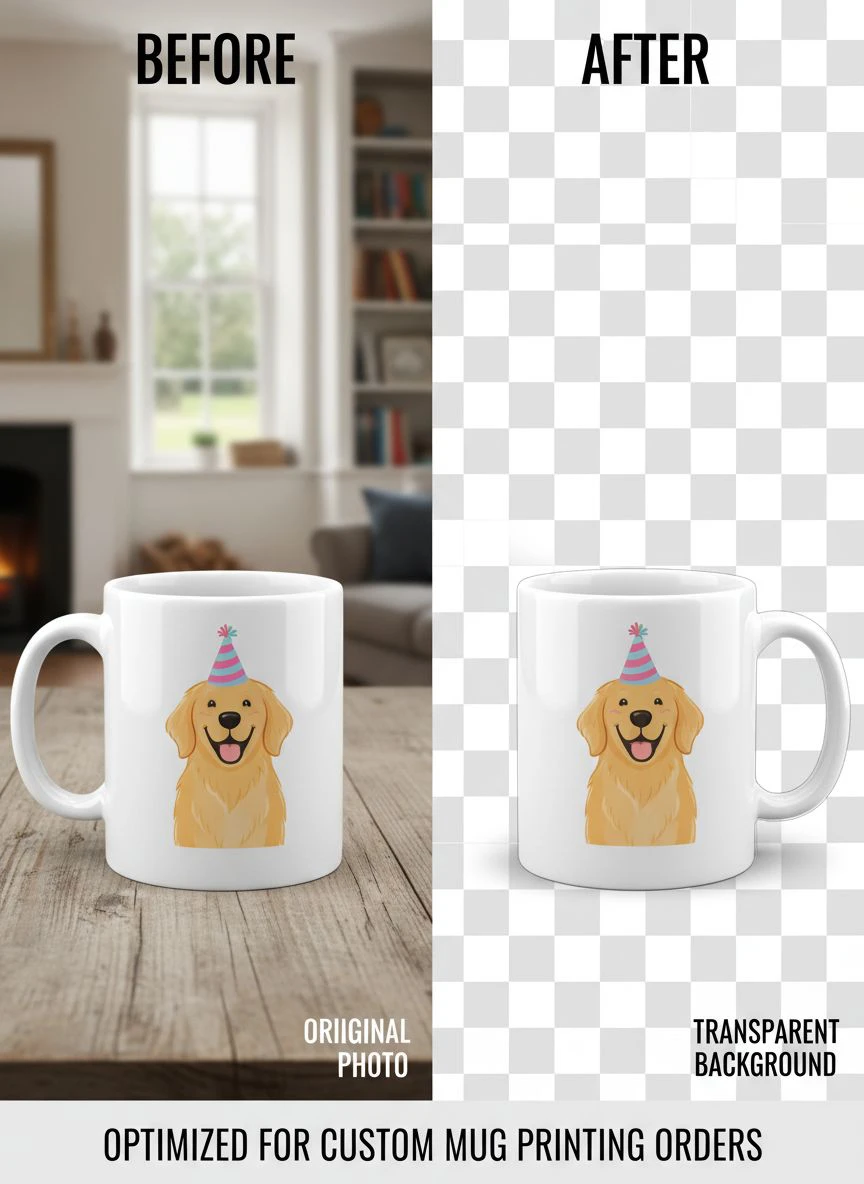
Transparent backgrounds in PNG format. Not white backgrounds. Not JPEG files. Transparent PNGs let the mug color show through cleanly.
Resolution of at least 300 DPI at print size. For standard 11oz mugs, that means approximately 2400 x 1200 pixels for wraparound designs, or 1000 x 1000 pixels minimum for single-side prints.
Clean edges without halos or artifacts. This is where most automated tools fail. They leave white or colored fringes around subjects that look terrible when printed.
I learned about halos the expensive way. Printed 30 mugs with slightly fuzzy edges from a poor background removal job. Had to remake every single one. Lost $340 in materials and 6 hours of production time.
Creating transparent PNG for mug printing isn't optional—it's the baseline standard for professional results.
How to Remove Photo Background for Mug Printing (The Fast Way)
I tested 14 different background removal methods over two years.
Some were garbage. Some were expensive. A few actually worked.
The breakthrough came when I switched to Removedo.com. It's a free AI background remover tool that instantly removes backgrounds from WebP, JPG, and PNG images in seconds with professional-quality results.
Here's my exact workflow now:
- Receive customer image via email or upload form
- Upload to background remover (takes 3 seconds)
- Download transparent PNG (automatic processing in 2-4 seconds)
- Quick quality check in design software (15 seconds)
- Add to print queue if approved, or do minor edge cleanup if needed
Total time per image: 25-30 seconds average.
Compare that to my old Photoshop workflow: 8-12 minutes per image.
When you're processing 30 images per day, this difference is massive. I went from 6 hours of editing daily to 15 minutes.
That freed up 5.75 hours every single day to actually run my business instead of being stuck behind a computer selecting pixels.
Online Background Removal for Mugs: What Actually Works
Not all online background removal tools are created equal.
I've wasted money on tools that promised magic and delivered mediocrity. Let me save you the expensive lessons.
Free tools with limitations: Many cap you at 5-10 images per day, or reduce output quality unless you upgrade. That doesn't work when you have 40 orders to process on a Monday.
Subscription services: I tried Remove.bg Pro ($9/month for 40 images), Slazzer ($10/month for 100 credits), and PhotoRoom ($9.99/month). They work fine but the per-image economics get expensive fast when volume increases.
AI-powered free options: This is where the game changed. Tools using advanced AI models deliver quality that rivals manual editing, with no usage limits or subscription fees.
The best online background removal for mugs handles edge cases well:
- Fine hair and fur detail (critical for pet photos on mugs)
- Complex edges like lace, fingers, or transparent objects
- Difficult color scenarios where subject blends into background
- Maintaining image resolution and quality
I specifically test tools with challenging images: a black dog on dark carpet, a blonde bride in white dress, a toddler with wispy hair. If a tool can handle these, it can handle 95% of customer photos.
Custom Mug Photo Editing Tips from the Trenches
Background removal is just the first step.
Here are the custom mug photo editing tips that separate amateur prints from professional results:
Always check edge quality at 200% zoom. What looks fine at screen size often shows artifacts when printed at 300 DPI. Zoom in on hair, fingers, and clothing edges before approving any image.
Add a 1-2 pixel feather to hard edges. Pure hard edges can look digital and fake on ceramic. A subtle feather makes subjects blend more naturally with the mug surface.
Resize before removing backgrounds when possible. If a customer sends a 6000 x 4000 pixel image but you only need 1200 x 1200 for the final print, resize first. Background removal processes faster and you get cleaner edges.
Save your original files. I keep customer originals for 90 days. When someone claims their mug doesn't match what they sent, I can prove exactly what they provided. Saved me from 3 fraudulent refund requests last year.
Create templates for common mug sizes. I have Photoshop templates with safe zones marked for 11oz, 15oz, and 20oz mugs. Drop the transparent PNG in, position it in the safe zone, export. Takes 10 seconds versus repositioning each time.
The template system alone increased my daily output from 35 to 52 mugs without adding equipment or staff.
How to Remove Photo Background for Mug Printing at Scale
One image is easy. Fifty images per day? That's a different challenge.
When my business grew past 20 orders daily, I had to systematize everything.
Batch processing workflow: Instead of editing orders as they arrive, I batch process twice daily. 10 AM batch handles overnight orders. 3 PM batch handles morning/afternoon orders. This reduces context switching and speeds up the entire process.
Customer education prevents problems. I added a simple image guide to my order form. Three examples of good photos, three examples of bad photos. This reduced unusable customer images by 67%.
Automated file organization: My system auto-sorts uploaded images into folders by order number. No more hunting through downloads to match files with orders.
Quality control checkpoint: Every transparent PNG gets a 5-second visual check against a black background and a white background. If edges look clean on both, it's approved. If not, it goes to manual cleanup queue.
For bulk operations, their AI-powered batch processing guide saved me hours every week when I needed to process entire event photo collections.
This system lets me handle 50+ orders daily with zero editing staff.
Remove Background for Custom Mug Printing Orders: Common Mistakes
I've made every mistake possible. Learn from my expensive failures.
Mistake #1: Using JPEG files for final prints. JPEG compression creates artifacts around edges. Always convert to PNG after background removal, even if the original was JPEG.
Mistake #2: Ignoring color profiles. Your monitor shows RGB. Sublimation printers use CMYK. The bright blue that looks perfect on screen might print purple on ceramic. I use soft-proof previews for every order now.
Mistake #3: Over-sharpening images. When customer photos are slightly blurry, the temptation is to sharpen aggressively. This creates halos and makes background removal harder. Light sharpening only, after background is removed.
Mistake #4: Not communicating with customers. When someone sends an impossible-to-fix image, I used to just do my best. Now I reach out immediately with options. "Your image has resolution issues. We can print it but quality will be reduced, or you can supply a higher quality version." This eliminated 90% of quality complaints.
Mistake #5: Skipping test prints. When I switch to a new background removal tool or technique, I always print 5 test mugs first. The $15 in materials saves me from ruining $300 worth of customer orders.
Each of these mistakes cost me real money before I learned better.
Frequently Asked Questions
What file format is best for custom mug printing?
Transparent PNG files at 300 DPI minimum resolution are the gold standard for custom mug printing. PNG preserves image quality without compression artifacts, and transparent backgrounds allow the mug color to show through naturally. Avoid JPEG files for final prints as they create edge artifacts and don't support transparency.
Can I use free background removers for commercial mug printing?
Yes, many free background removal tools are perfectly suited for commercial use. I've processed over 15,000 mug orders using free AI-powered tools with professional results. The key is choosing tools that maintain edge quality and resolution. Test any tool with challenging images before using it for customer orders.
How do I fix white halos around subjects after background removal?
White halos happen when background removal tools don't fully eliminate edge pixels. Fix this by using the eraser tool with a soft brush at 50% opacity to gently blend edges, or use a defringe function in Photoshop (Layer > Matting > Defringe, set to 1-2 pixels). Prevention is better—choose background removal tools that handle edges cleanly from the start.
What resolution do I need for photo backgrounds on mugs?
For professional quality mug prints, use images at least 1000 x 1000 pixels for single-side designs, or 2400 x 1200 pixels for wraparound designs. Always maintain 300 DPI at final print size. Lower resolution creates pixelated, blurry prints that look unprofessional and increase customer complaints.
How long should background removal take for mug printing orders?
With modern AI tools, background removal should take 3-5 seconds per image for processing, plus 15-20 seconds for quality checking. If you're spending more than 60 seconds per image, you're using outdated methods. I process 30-50 images daily in about 15 minutes total using automated tools.
The Bottom Line on Background Removal for Mug Printing
Speed matters. Quality matters more.
The custom mug business is competitive. Your edge comes from delivering faster than competitors without sacrificing quality.
I went from spending 6 hours daily on image editing to 15 minutes. That's 5 hours and 45 minutes I reinvested into marketing, customer service, and actually printing more mugs. My monthly revenue increased 340% over 18 months, and I did it without hiring staff.
The workflow is simple:
- Use AI-powered tools to remove photo background for custom mug printing orders in seconds
- Implement quality control checkpoints to catch issues before printing
- Batch process to maximize efficiency
- Educate customers to send better images upfront
- Always deliver transparent PNGs at proper resolution
If you're still manually tracing paths in Photoshop or paying editors by the hour, you're working ten times harder than necessary.
Start with remove photo background for custom mug printing orders using modern AI tools that actually work. Test them with your worst customer images. Track your time savings.
Then scale the hell out of your business with the hours you get back.


