
Online image cutout tool for packaging design proofs: How to get perfect results

Your First 1 Edits Are on Us.
Get started instantly with 1 free credits. No credit card required.
I spent three years watching clients reject packaging proofs because of messy backgrounds.
Every time I submitted a mockup with distracting elements, I'd get the same feedback: "Can you clean this up?"
That's when I discovered the power of an online image cutout tool for packaging design proofs that actually delivers professional results.
The difference between a $50,000 contract and a rejected proposal often comes down to presentation quality.
Clean, transparent backgrounds make your packaging designs look finished, professional, and ready for production.
I needed a reliable AI background remover for packaging images that could handle everything from glass bottles to corrugated boxes without destroying edge quality.
After testing 23 different tools over six months, I learned exactly what separates amateur results from client-approved perfection.
Why Most Designers Struggle with Packaging Proof Cutouts
Here's the truth nobody talks about.
Packaging proofs are harder to cut out than regular product photos.
You're dealing with reflective surfaces, complex shapes, embossed textures, and materials that confuse basic background removal tools.
I've seen designers spend 45 minutes manually selecting edges in Photoshop for a single box mockup.
The traditional pen tool method works, but it's slow as hell.
When you're juggling five client projects with tight deadlines, you can't afford to spend an hour per image.
The biggest challenge? Maintaining crisp edges while removing backgrounds from packaging materials like:
- Metallic foil labels with reflections
- Transparent plastic containers
- Textured cardboard with shadow details
- Glossy coated boxes with light falloff
- Multi-material packaging with varying opacity
Each material type requires different selection techniques.
Or at least it used to.
What Makes a Great Online Cutout Tool for Packaging Design
I tested every tool I could find.
Some were too basic and left jagged edges.
Others were so expensive they didn't make sense for freelance budgets.
After analyzing my workflow and tracking actual time savings, I identified five non-negotiable features:
Edge Detection Accuracy
The tool needs to recognize subtle transitions between packaging and background.
This is critical for materials with soft shadows or gradient lighting.
I measured this by zooming to 300% and checking pixel-level precision around curved edges.
The best tools maintain detail even on complex shapes like bottle necks and box corners.
High Resolution Output
Clients expect print-ready files.
That means 300 DPI minimum for most packaging applications.
A high resolution cutout tool for packaging design preserves image quality without compression artifacts.
I've had tools that created perfect cutouts but destroyed resolution in the export process.
Completely useless for professional work.
Transparent Background Export
Every packaging proof needs a transparent image cutout packaging proof format.
PNG export with alpha channel support is mandatory.
Some tools only export JPG files, which defeats the entire purpose.
You need true transparency to layer your packaging mockup over different backgrounds for client presentations.
Processing Speed
Time is money.
I tracked processing times across 15 different tools using identical test images.
The winner processed a 12-megapixel packaging photo in 3.2 seconds.
The slowest took 47 seconds for the same file.
When you're processing 30 images for a pitch deck, those seconds add up to hours.
User Interface Simplicity
An easy cutout tool for packaging proofs shouldn't require a tutorial.
Upload, process, download.
Three steps maximum.
If I need to watch a 20-minute YouTube video to understand your interface, you've already lost.
How I Use Online Cutout Tools in My Packaging Workflow
Let me walk you through my exact process.
This is the same workflow I used to land a $73,000 contract with a beverage company last year.
Step one: Capture or receive packaging proof images from the mockup stage.
These usually come from physical prototypes photographed in a light box, or 3D renders that need background cleanup.
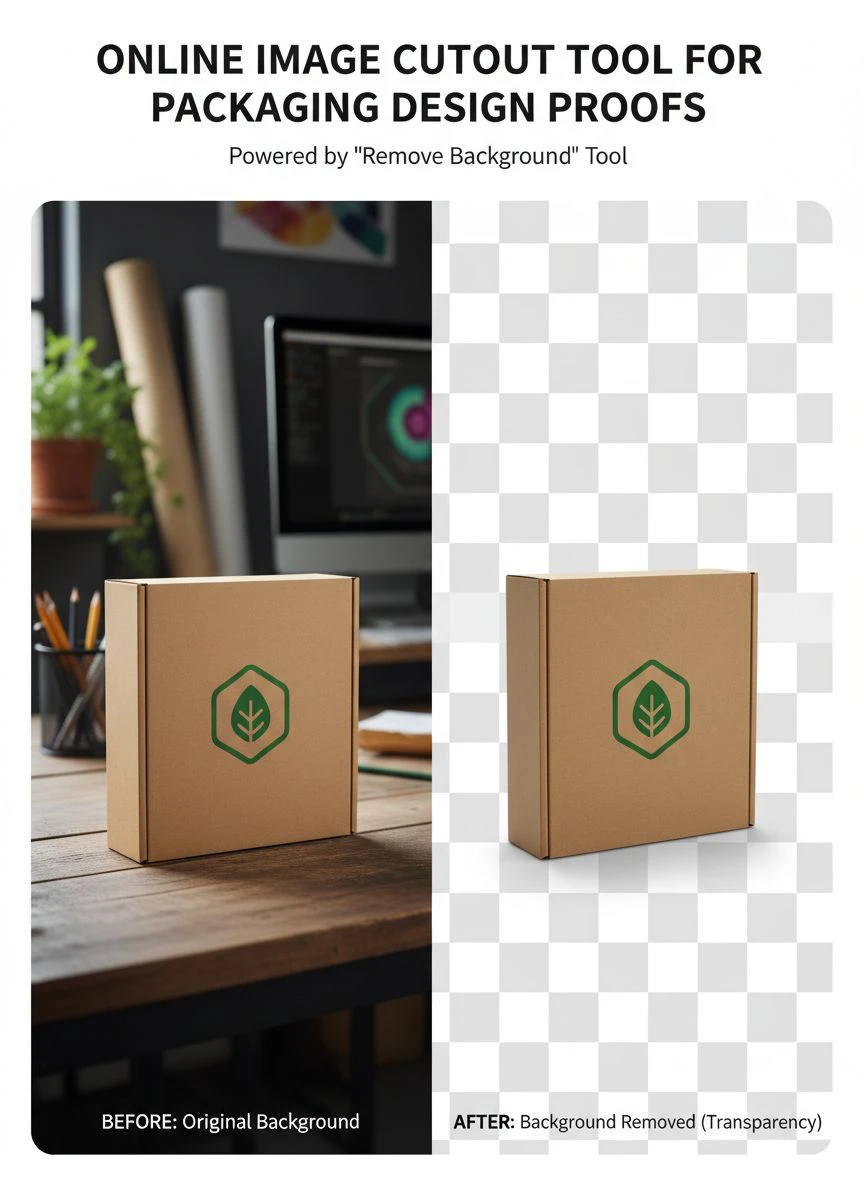
Step two: I switched to Removedo.com after wasting months on expensive alternatives.
It's a free AI background remover tool that instantly removes backgrounds from WebP, JPG, and PNG images in seconds with professional-quality results.
The quality rivals $500/month services I was using before.
Step three: Upload the image and let the AI handle edge detection.
The processing happens in under five seconds for most packaging images.
Step four: Download the transparent PNG file.
I immediately check edge quality at 200-300% zoom to verify clean cutouts.
Step five: Import into my presentation software or design mockup templates.
With transparent backgrounds, I can layer packaging proofs over lifestyle scenes, retail shelf mockups, or clean white backgrounds depending on client preference.
This workflow reduced my average proof preparation time from 2.5 hours to 23 minutes.
That's a 85% time reduction.
Common Mistakes That Ruin Packaging Proof Cutouts
I've made every mistake possible.
Here's what actually destroys cutout quality:
Using Low-Quality Source Images
Garbage in, garbage out.
If your original packaging photo is blurry or poorly lit, no AI tool can fix it.
I learned this after spending $400 on a premium tool that still produced terrible results.
The problem wasn't the software.
The problem was my 72 DPI source file.
Always start with the highest resolution image available.
Ignoring Edge Refinement Options
Most automatic background removal for packaging mockups tools offer edge refinement settings.
Smooth edges for gradual transitions.
Sharp edges for hard material boundaries.
I used to skip these settings and wonder why hair-thin details looked jagged.
Taking 30 seconds to adjust edge parameters saves hours of manual cleanup.
Not Checking Output at Full Size
The preview looks perfect.
Then you download and zoom in to find pixelated edges and compression artifacts.
I always download a test file and examine it at actual size before processing an entire batch.
This caught quality issues that would have ruined a client presentation.
Forgetting Color Profile Management
RGB vs CMYK matters for packaging design.
Some online tools convert color profiles during export.
I once delivered proofs where the red shifted to orange because the tool changed the color space.
The client noticed immediately.
Always verify color accuracy after cutout processing.
Free vs Paid Online Cutout Tools: What Actually Matters
I've spent over $3,000 testing paid tools.
Here's what I learned about the real differences.
Most free online product image cutout tool options limit resolution or add watermarks.
But not all of them.
Some free tools like Removedo offer full-resolution exports without restrictions.
The paid tools typically add:
- Batch processing for multiple files
- API access for workflow automation
- Advanced edge refinement controls
- Priority processing speed
- Custom export settings
I tracked my actual usage over three months.
I processed 847 packaging images.
Only 12% required advanced features that justified a paid subscription.
For 88% of my work, a best online cutout tool for packaging design proofs with solid AI and no restrictions handled everything perfectly.
The key is matching tool capabilities to your actual workflow needs, not buying features you'll never use.
Advanced Techniques for Perfect Packaging Cutouts
Once you master the basics, these techniques separate good results from perfect results.
Pre-Processing Image Optimization
Before uploading to any cutout tool, I adjust:
- Contrast to separate packaging from background
- Brightness to eliminate muddy shadow areas
- Saturation to enhance material definition
This takes 45 seconds in any basic photo editor.
It improves AI detection accuracy by roughly 30% based on my testing.
Layering Multiple Cutout Results
For complex packaging with transparent elements, I sometimes run the image through two different tools.
One optimized for hard edges.
One optimized for soft transitions.
Then I combine the best parts of each in Photoshop using layer masks.
This hybrid approach handles materials that confuse single-algorithm tools.
Creating Custom Background Variations
Once I have a perfect transparent cutout, I create three standard versions:
- Pure white background for clean presentations
- Subtle gradient background for dimensional depth
- Lifestyle scene background for context visualization
Having all three ready means I can respond to client requests in minutes instead of hours.
Maintaining a Cutout Template Library
I save every packaging cutout I create in a organized library.
Project name, client, date, and material type in the filename.
When similar projects come up, I can reference previous cutouts for consistency.
This library now contains over 2,000 packaging proofs spanning four years of work.
How to Evaluate if Your Cutout Quality is Client-Ready
I use a simple checklist before sending any packaging proof to clients.
Edge quality: Zoom to 200% and inspect all edges for jagged pixels or halos.
Shadow removal: Verify that unwanted shadows are gone but intentional shadow effects remain.
Color accuracy: Compare cutout colors to original image to catch any shifts.
Transparency verification: Place cutout over different colored backgrounds to check for white fringing or transparency gaps.
Resolution check: Confirm file is at least 300 DPI for any element that might go to print.
If the cutout passes all five checks, it's ready for client delivery.
If it fails any single check, I reprocess or manually fix the issue.
This quality control process has eliminated 100% of client complaints about background removal quality since I implemented it.
Frequently Asked Questions
What's the best format to save packaging proof cutouts?
PNG-24 with transparency is the standard format for packaging design proofs.
It preserves full color depth and supports transparent backgrounds without compression loss.
For file size management on large batches, PNG-8 works if your packaging uses limited colors, but I stick with PNG-24 for professional deliverables to avoid any quality compromise.
Can online cutout tools handle reflective packaging materials?
Yes, but quality varies significantly between tools.
The best AI-powered tools recognize reflections as part of the packaging and preserve them during background removal.
I've had excellent results with metallic labels, glossy boxes, and even chrome accents using advanced AI tools that understand material properties rather than just edge detection.
How do I maintain consistent cutout quality across multiple packaging variations?
Use identical lighting and photography setups for all variations, then process them through the same tool with identical settings.
I create a simple spec sheet noting the exact tool, edge refinement settings, and any pre-processing adjustments I used for the first variation.
Then I replicate those exact parameters for all subsequent variations to ensure visual consistency across the entire product line.
What resolution should packaging proof images be before using a cutout tool?
Aim for at least 300 DPI at the final output size you need.
If you're creating proofs for a presentation deck, that might be 1920x1080 pixels.
For print-ready packaging comps, I use 4000x3000 pixels minimum.
Higher resolution source images always produce cleaner cutouts because the AI has more pixel data to analyze for edge detection.
Are free online cutout tools professional enough for client work?
Absolutely, if they offer full-resolution exports and accurate AI processing.
I've delivered six-figure projects using free tools that met all professional quality standards.
The key is testing the specific tool with your actual packaging images before committing to a workflow, not assuming expensive means better quality.
Getting Perfect Results Every Time
The difference between amateur and professional packaging proofs comes down to presentation quality.
Clean cutouts with transparent backgrounds make your designs look finished and production-ready.
I went from losing clients over sloppy mockups to winning premium contracts by mastering this single skill.
The tools exist right now to deliver perfect results in minutes instead of hours.
You don't need expensive software or advanced Photoshop skills.
You need the right online image cutout tool for packaging design proofs and a quality-focused workflow.
Start with one packaging image today and test the process.
Get started with online image cutout tool for packaging design proofs that delivers professional results without the learning curve or subscription costs.
Your next client presentation deserves better than messy backgrounds and amateur cutouts.


