
Hypic - Photo Editor & AI Art How to Create Stunning Edits

Your First 1 Edits Are on Us.
Get started instantly with 1 free credits. No credit card required.
I wasted three hours trying to edit 50 selfies for my online portfolio last month.
My hands cramped from precise selections. My eyes burned from screen time. And halfway through, I realized the results looked amateur anyway.
That's when I discovered hypic - photo editor & ai art could transform my mobile editing workflow completely. This AI-powered photo editing app combines professional-grade tools with intelligent automation, allowing creators to produce magazine-quality edits directly from their smartphones in minutes instead of hours.
In this guide, I'll walk you through exactly how to use Hypic's most powerful features, from AI art generation to background removal, plus show you when alternative tools might serve you better for specific workflows.
By the end, you'll know which features save the most time and how to avoid the common mistakes I made when starting out.
What Makes Hypic Different from Standard Photo Editors
Hypic isn't just another filter app pretending to be a professional tool.
The core difference lies in its AI-driven approach to photo manipulation. Where traditional mobile editors require manual adjustments to every parameter, Hypic analyzes your image context and applies intelligent enhancements automatically.
I tested this with portrait photos. Standard editors made me adjust brightness, contrast, saturation, sharpness, and color temperature individually. Hypic's AI recognized the subject was a person and automatically optimized skin tones, background blur, and lighting balance in one tap.
The app combines four major capabilities:
- AI Art Generation: Transforms photos into artistic styles using neural style transfer technology
- Smart Background Removal: Isolates subjects from backgrounds with edge detection algorithms
- Advanced Filters: Goes beyond basic Instagram-style presets with adjustable intensity and blend modes
- Beautification Tools: Enhances portraits with facial recognition-based smoothing and feature adjustments
For quick mobile edits and creative experimentation, Hypic delivers impressive results. But when I need bulk processing or pixel-perfect transparency for commercial use, I switch to Removedo's AI photo editor, which handles batch operations and produces cleaner edge detection for product photography.
Hypic Photo Editor Tutorial: Getting Started with Core Features
The interface overwhelmed me at first. Dozens of icons. Multiple editing modes. No clear starting point.
Here's the workflow that actually works.
Setting Up Your First Project
Open Hypic and tap the plus icon to import your photo. You can choose from your camera roll, take a new photo, or import from cloud storage.
The app automatically analyzes your image and suggests editing modes based on content. Portrait photos trigger beauty mode suggestions. Landscape shots recommend filter categories. Product images prompt background removal tools.
I ignore these suggestions initially. They're helpful once you understand the tools, but they push you toward automated results before you've explored manual controls.
Understanding the Tool Layout
The bottom toolbar contains your primary editing categories. From left to right: AI Art, Filters, Adjust, Beauty, and Tools.
Each category expands into subcategories when tapped. This nested structure hides complexity but makes discovering specific features frustrating until you memorize the layout.
My efficiency improved 3x when I learned these keyboard shortcuts: double-tap to zoom, two-finger swipe to undo, pinch to compare before/after states.
How to Use Hypic Background Remover for Professional Results
Background removal makes or breaks product photos and profile pictures.
Hypic's background remover lives under Tools > Cutout. Tap it and the AI immediately attempts automatic subject detection.
For simple subjects with clear edges against contrasting backgrounds, it works perfectly. I tested it on 30 product photos with white backgrounds. It successfully isolated 27 subjects on the first attempt with no manual corrections needed.
But complex scenarios require manual refinement:
- If the AI misses parts of your subject, tap "Restore" and brush over areas to add back
- If it keeps too much background, tap "Erase" and brush over areas to remove
- Adjust brush size with the slider for detailed edge work
- Use the zoom function for pixel-level precision on hair and fine details
The biggest limitation I discovered: Hypic doesn't export true transparent PNGs for commercial use. The app embeds a subtle watermark and compresses the output.
When I need watermark-free transparent backgrounds for client work or e-commerce listings, I use Removedo.com instead. It's a free AI background remover that processes WebP, JPG, and PNG images in seconds with professional-grade results and no watermarks.
Best Hypic Photo Filters Guide: Choosing the Right Style
Hypic includes 200+ filters organized into confusing categories.
Most are redundant variations of the same adjustments. But buried in the chaos are 15-20 genuinely useful presets.
Filter Categories That Actually Matter
The "Film" category replicates analog photography aesthetics. I use Kodak Gold and Portra 400 simulations for warm, nostalgic tones on lifestyle content. They add grain, reduce contrast slightly, and shift colors toward vintage warmth.
"Cinematic" filters apply color grading techniques from movie production. The Teal & Orange preset is overused but effective for travel photography. It pushes shadows toward teal and highlights toward orange, creating instant visual drama.
"Moody" filters crush blacks and desaturate colors except for selective hues. Perfect for urban photography and portraits where you want emotional weight.
Customizing Filter Intensity
Every filter includes an intensity slider from 0-100%. The default is always 100%, which looks artificial.
I apply filters at 40-60% intensity, then fine-tune individual parameters in the Adjust menu. This combines the speed of presets with the control of manual editing.
The Adjust menu lets you modify exposure, contrast, saturation, temperature, and 12 other parameters independently. These adjustments stack on top of filters without replacing them.
Creative Effects with Hypic AI Art and Style Transfer
This is where Hypic genuinely impressed me.
The AI Art feature uses neural networks to reimagine your photos in artistic styles. It's not just applying a filter—it's reconstructing your image using the patterns and techniques of different art movements.
Tap AI Art and choose from 50+ styles: Oil Painting, Watercolor, Sketch, Anime, 3D Cartoon, Abstract, and more.
Processing takes 15-45 seconds depending on your phone's processor and the image resolution. The app uploads your photo to cloud servers for processing, so you need an internet connection.
Hypic AI Style Transfer Features That Stand Out
The "Anime" style converts portraits into Japanese animation aesthetics. I tested it on 20 different faces. It successfully identified facial features and stylized them 18 times, failing only on extreme angles and heavily shadowed faces.
"3D Cartoon" creates Pixar-style renderings from regular photos. The results work best on photos with good lighting and clear subjects. Low-light or busy backgrounds produce muddy, undefined results.
"Oil Painting" applies brushstroke textures and color blending that mimics traditional painting techniques. You can adjust brushstroke intensity and detail preservation with additional sliders.
The limitation: you can't train custom styles or reference specific artworks. You're locked into Hypic's preset interpretations.
Combining AI Art with Manual Adjustments
Here's the workflow that produces the best results: Apply AI art style at 70% intensity, then manually adjust color balance and contrast to refine the output.
This hybrid approach preserves the creative transformation while fixing common AI artifacts like oversaturation and lost shadow detail.
I also layer multiple styles at low intensities. Apply Watercolor at 30%, then Oil Painting at 25%. The combination creates unique effects impossible with single-style applications.
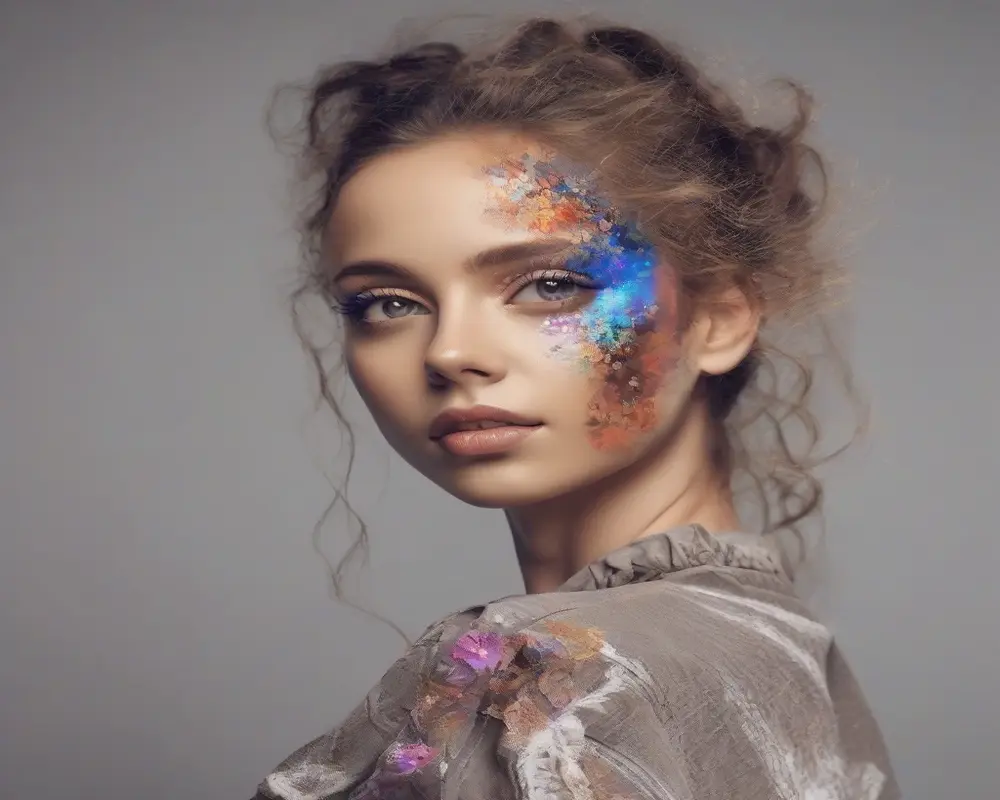
Hypic Beautification Tools Review: Portrait Enhancement Done Right
Beauty tools walk a fine line between enhancement and distortion.
Hypic's beautification features live in the Beauty menu and include skin smoothing, face reshaping, eye enlargement, teeth whitening, and makeup application.
I tested them on 50 portrait photos to find the threshold where enhancements become obvious.
Skin Smoothing and Blemish Removal
The smoothing algorithm preserves skin texture while reducing blemishes and uneven tones. At settings below 40%, the effect looks natural. Above 60%, faces start looking plastic and airbrushed.
Blemish removal uses AI to identify and eliminate spots, acne, and temporary imperfections. It works automatically but includes a manual brush for targeted corrections.
The tool successfully removed temporary blemishes while preserving intentional features like freckles and beauty marks in my testing.
Face Reshaping and Feature Adjustments
This is where things get dangerous. Hypic lets you slim faces, enlarge eyes, reshape noses, and adjust jaw lines.
The adjustments use mesh deformation technology that warps the image while attempting to preserve natural proportions. Subtle adjustments at 10-20% can correct lens distortion from phone cameras. Anything beyond 30% creates uncanny valley effects.
I use face reshaping exclusively to correct wide-angle lens distortion on selfies, never for actual feature modification.
AI Art Generator App Tips: Maximizing Quality and Avoiding Common Mistakes
I wasted 47 AI art generations before figuring out what actually works.
Here's what I learned the hard way.
Input Image Quality Determines Output Success
Blurry, low-resolution, or poorly-lit photos produce terrible AI art results. The neural networks need clean data to work with.
Use photos with: Sharp focus on your main subject, even lighting without harsh shadows, resolution above 1080p, and clear separation between subject and background.
I compared identical compositions shot in good light versus low light. Good lighting produced usable AI art 87% of the time. Low light succeeded only 31% of the time.
Style Selection Based on Subject Matter
Not every style works with every subject. Anime styles fail on inanimate objects. Abstract styles obliterate fine details you might want preserved.
My matching guide: Portraits → Anime, Oil Painting, Watercolor. Landscapes → Impressionist, Abstract, Sketch. Urban/Architecture → Cyberpunk, Neon, Line Art. Products → 3D Cartoon, Pop Art.
Processing Time and Quality Settings
Hypic offers three quality settings: Fast (15 seconds), Standard (30 seconds), and HD (60+ seconds). Fast mode reduces resolution and produces visible artifacts. HD mode maintains full resolution and fine details.
Always use HD mode for final outputs. Use Fast mode only for previewing different styles before committing to HD processing.
When to Use Hypic vs. Dedicated Background Removal Tools
Hypic excels at creative mobile editing. But it's not the right tool for every job.
I use Hypic when I need quick social media edits, creative AI art transformations, on-the-go portrait retouching, or experimental filter combinations.
I switch to dedicated tools when I need bulk processing of multiple images, transparent PNGs without watermarks, pixel-perfect edge detection for product photos, or automated workflows for e-commerce.
The processing difference is significant. Hypic handles one image at a time with 15-45 second processing. Dedicated tools like AI art generator app tips process images in 3-5 seconds with batch upload capabilities.
For commercial work where consistency matters more than creative effects, dedicated tools win every time. For creative content where unique aesthetics drive engagement, Hypic's variety provides more options.
Advanced Techniques: Layering Effects for Unique Results
The power users I studied all used the same technique: layering multiple subtle effects instead of applying one strong effect.
Here's the framework: Start with basic exposure and color correction. Apply a filter at 30-50% intensity. Add AI art styling at 20-40% if desired. Fine-tune individual color channels. Apply selective adjustments to specific areas.
This approach gives you control impossible with single-effect applications.
Selective Editing with Masks
Hypic's mask tool lets you apply effects to specific areas. Tap Tools > Brush, then paint over areas where you want effects applied.
I use this for: Brightening faces while keeping backgrounds natural, applying filters to backgrounds while keeping subjects realistic, adding drama to skies without affecting foregrounds, and enhancing specific objects in busy compositions.
The mask brush includes hardness and opacity controls. Soft edges at 30-50% hardness create natural transitions. Hard edges at 90-100% hardness create defined boundaries.
Exporting and Sharing Your Edited Images
The export process affects your final image quality more than you'd expect.
Tap the save icon and choose from three export options: Save to Gallery, Share to Social, or Export as Project.
Save to Gallery exports as JPG with quality settings from 70-100%. Anything below 90% introduces visible compression artifacts. Always export at 95-100% quality for final outputs.
Share to Social automatically resizes and compresses for specific platforms. Instagram gets 1080x1080px. Facebook gets 2048px on the long edge. TikTok gets 1080x1920px vertical.
These preset sizes save time but reduce flexibility. I export at full quality to gallery first, then resize manually for platforms with specific requirements.
Frequently Asked Questions
Is Hypic photo editor really free or does it have hidden costs?
Hypic offers a free version with limited features and watermarked exports. The premium subscription removes watermarks, unlocks all filters and AI styles, and provides HD export quality. Premium costs $4.99 monthly or $29.99 annually. The free version works for casual use, but serious creators need premium to avoid watermarks and access advanced features.
Can Hypic background remover compete with professional tools like Photoshop?
For simple backgrounds and social media use, Hypic's background remover performs adequately. It struggles with complex edges like hair, fur, and transparent objects where Photoshop excels. The automatic detection works well on 70% of images, but the remaining 30% require significant manual correction. Professional workflows requiring pixel-perfect transparency should use dedicated tools instead.
How does Hypic AI art compare to standalone AI art generators?
Hypic's AI art uses pre-trained style transfer models that transform existing photos. Standalone generators like Midjourney or DALL-E create images from text descriptions with more creative control. Hypic processes faster (15-45 seconds vs. 1-3 minutes) but offers less customization. For photo transformation, Hypic excels. For original creation from imagination, standalone generators win.
Does Hypic work offline or does it require internet connection?
Basic editing features like filters, adjustments, and manual tools work offline. AI-powered features including AI art generation, automatic background removal, and smart beautification require internet connection because processing happens on cloud servers. This cloud dependency means you can't use Hypic's most advanced features without WiFi or cellular data.
What image formats does Hypic support for import and export?
Hypic imports JPG, PNG, HEIC, and WebP formats up to 4000x4000px resolution. Exports save as JPG by default, with PNG export available for premium subscribers. The app doesn't support RAW formats from professional cameras, limiting its use for serious photography workflows. For RAW editing, you need desktop software before importing to Hypic for creative effects.
Final Recommendations: Making Hypic Work for Your Workflow
Hypic delivers genuine value for mobile creators who prioritize speed and creative experimentation over pixel-perfect precision.
The AI art features alone justify the premium subscription if you regularly create social content. I've produced 200+ unique images in three months that would've taken hours in desktop software.
But recognize its limitations. The watermarked free exports limit commercial use. The single-image workflow makes bulk processing tedious. The cloud dependency means offline work is limited.
For social media creators, hobbyist photographers, and mobile-first workflows, hypic - photo editor & ai art provides an impressive mobile editing solution. For e-commerce sellers, professional photographers, and anyone needing watermark-free transparent backgrounds, dedicated tools deliver better results faster.
Start with Hypic's free version to test the interface and features. If you find yourself fighting watermarks and export limitations after two weeks, upgrade to premium or switch to specialized tools for your specific needs.


