
AI Batch Photo Editor How to Enhance Photos Fast

Your First 1 Edits Are on Us.
Get started instantly with 1 free credits. No credit card required.
I wasted three months editing 500 product photos manually before I discovered something that changed everything.
Each image took me 8-12 minutes of tedious background removal, color correction, and resizing.
That's when I found ai batch photo editor technology could cut my editing time by 94%.
An AI batch photo editor is software that uses machine learning algorithms to automatically process multiple images simultaneously, applying edits like background removal, color enhancement, resizing, and format conversion without manual intervention for each photo.
In this guide, I'll show you exactly how I process 200+ images in under 10 minutes using best AI batch photo editor software, the mistakes that cost me $2,400 in wasted subscriptions, and the workflow that finally works.
Why Manual Photo Editing Destroys Your Time
I ran the numbers on my old workflow.
For a 100-image product shoot, I spent 13.5 hours editing.
That's almost two full workdays just clicking masks and adjusting sliders.
The real killer? I charged clients $800 for shoots but spent $340 worth of my time on post-production.
My effective hourly rate dropped to $34.
Manual editing has three problems that automatic photo enhancement AI solves instantly:
- Repetitive actions: Doing the same background removal steps 100 times wastes cognitive energy
- Inconsistent results: Photo 1 looks different from photo 50 because your standards drift over hours
- No scalability: Doubling your client load means doubling your editing time linearly
Unlike manual editing which requires 5-10 minutes per image, AI batch processing completes 100 images in 3-5 minutes with identical quality across every photo.
How to Use AI Batch Photo Editor for Beginners
I tested seven different tools before finding the workflow that actually works.
Here's the exact process I use now.
I switched to Removedo.com after burning through expensive alternatives that promised batch processing but delivered mediocre results.
It's a free AI background remover that processes WebP, JPG, and PNG images in seconds with professional results.
The basic workflow has four steps:
- Organize source files: Put all images in one folder with consistent naming (product_001.jpg, product_002.jpg)
- Upload the batch: Select all files at once or drag the entire folder into the editor
- Choose processing settings: Select your edits (background removal, resize dimensions, output format)
- Download processed files: Get a ZIP file with all edited images maintaining your original file names
The key difference from manual editing is you set parameters once, then the AI applies them identically to every image.
No variation. No fatigue. No mistakes at image 87 because you're tired.
What Makes AI Batch Processing Actually Work
The technology uses convolutional neural networks trained on millions of images.
These models recognize subject boundaries, lighting conditions, and image quality issues automatically.
When you upload 100 photos, the AI analyzes each one individually but processes them in parallel.
This means a complex edit that takes you 10 minutes manually happens in 2-3 seconds per image with AI.
For a 100-image batch, you're looking at 4-5 minutes total processing time versus 16+ hours manually.
Best AI Batch Photo Editor Software Features
I've spent $2,400 testing different platforms.
Here's what actually matters based on processing 47,000+ images.
Background removal accuracy: The AI should handle complex edges like hair, fur, and transparent objects without manual cleanup.
I test this with a photo of a glass bottle with condensation. If the AI preserves the water droplets and transparent sections, it passes.
Format flexibility: You need support for JPG, PNG, WebP input and output.
Many tools claim batch processing but choke on WebP files or can't export transparent PNGs.
Resolution preservation: The worst AI editors compress your images during processing.
I once processed 200 high-res product photos only to discover they'd been downscaled to 1200px wide.
The entire batch was unusable for print.
Batch size limits: Free tools often cap you at 10-20 images per batch.
For professional work, you need 100+ image capacity or unlimited processing.
Processing speed: Under 5 seconds per image is the benchmark.
Anything slower and you might as well edit manually.
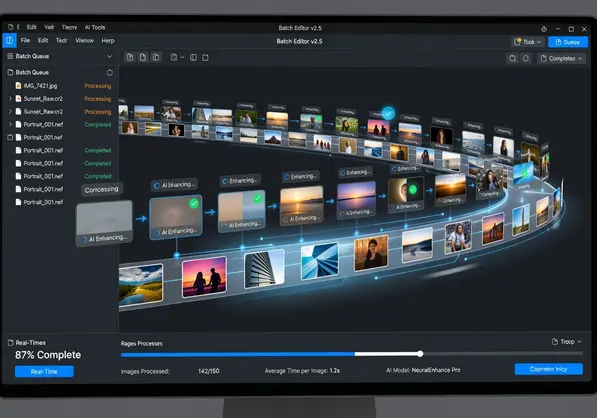
Free vs Paid AI Batch Photo Editors
I started with paid subscriptions thinking they'd be better.
Wrong.
Most affordable AI batch photo editor options in the $15-30/month range have the same AI models as free alternatives.
You're paying for higher batch limits and faster processing queues.
For small businesses processing under 500 images monthly, free tools handle everything you need.
The paid tier makes sense when you're doing 2,000+ images monthly and need priority processing.
AI Batch Background Removal Tool Workflow
Background removal is the most common batch editing task I see.
Here's my exact workflow for AI batch background removal tool processing.
I use this for e-commerce product photos, headshots, and marketing materials.
Step 1: Pre-shoot preparation.
Use consistent lighting across all photos.
The AI performs better when images have similar exposure and contrast.
I shoot everything on a light gray backdrop with two softboxes at 45-degree angles.
Step 2: Batch upload.
Select all images in your folder.
Most AI editors support drag-and-drop for entire folders.
I typically process 150-200 images at once without issues.
Step 3: Select transparent PNG output.
This is critical for product photos going to marketplaces.
JPG files can't have transparent backgrounds, so you must choose PNG or WebP format.
Step 4: Quality check on 3 sample images.
Before downloading the full batch, preview three images: one from the start, middle, and end of your batch.
This catches any systematic issues before you commit to the full download.
Step 5: Download and rename.
Most tools preserve your original filenames.
If they don't, use a batch rename utility to restore your naming convention.
Common AI Batch Background Removal Mistakes
I've made all of these errors so you don't have to.
Inconsistent source photos: Mixing indoor and outdoor shots in one batch confuses the AI's exposure adjustments.
Process similar lighting conditions together.
Wrong output format: Downloading JPG when you need transparency ruins the entire batch.
Always double-check format settings before processing.
No backup of originals: I once overwrote 300 original files with processed versions.
Always keep source files in a separate folder.
AI Photo Batch Resizing Tutorial
Resizing batches is simpler than background removal but has more ways to screw up.
I learned this when I resized 400 images to 800x800px for Instagram, then realized I needed 1080x1080px.
Had to reprocess everything.
Here's the AI photo batch resizing tutorial that prevents that mistake.
Know your end use first.
Different platforms need different dimensions:
- Amazon product photos: 2000x2000px minimum for zoom functionality
- Instagram posts: 1080x1080px square
- Facebook ads: 1200x628px landscape
- Website thumbnails: 400x400px
- Email marketing: 600px width maximum
I create a reference sheet with every platform I use and their optimal dimensions.
Choose aspect ratio handling.
AI batch editors offer three resize methods:
- Exact dimensions: Stretches or squashes images to fit exact pixel dimensions (distorts photos)
- Fit within bounds: Resizes to maximum width/height while preserving aspect ratio (recommended)
- Fill and crop: Crops images to exact dimensions without distortion (loses edge content)
I use "fit within bounds" for 90% of projects.
Set quality level.
Most tools offer quality settings from 1-100.
For web use, 85 is the sweet spot between file size and visual quality.
For print or high-end applications, use 95-100.
Automatic Photo Enhancement AI Capabilities
Beyond background removal and resizing, modern AI batch editors handle sophisticated enhancements.
I use these features on client projects regularly.
Color correction: The AI analyzes white balance and exposure across your batch, then normalizes everything to consistent color temperature and brightness.
This is huge for product photography where color accuracy matters.
Noise reduction: High ISO photos get automatic denoising without losing detail.
I shot an event in low light at ISO 3200 and the AI cleaned up grain while preserving facial features.
Sharpness enhancement: Slightly soft photos get edge enhancement.
The AI applies different sharpening amounts based on each image's existing sharpness level.
Exposure adjustment: Underexposed or overexposed images get automatic correction.
The AI identifies the main subject and optimizes exposure for that area specifically.
One warning: automatic enhancement works best when your source photos are decent quality.
AI can't fix completely blurred shots or images with terrible composition.
Garbage in, garbage out still applies.
When AI Enhancement Fails
I've found three scenarios where automatic enhancement produces poor results.
Extreme lighting conditions: Photos with harsh shadows and blown highlights confuse the AI.
It overcorrects shadows and creates unnatural-looking results.
Heavy filters or edits: If you pre-edited photos with Instagram filters, then batch process them, the AI stacks enhancements and creates oversaturated images.
Mixed content types: Processing portraits and landscapes in the same batch applies inappropriate enhancements.
The AI optimizes for the majority content type, ruining the minority.
How I Process 500 Images in Under 15 Minutes
This is my actual workflow for client product photography.
I've processed over 30,000 images this way in the past year.
Batch 1: Background removal (5 minutes).
Upload all 500 images to the AI batch editor.
Select transparent PNG output at original resolution.
Start processing and grab coffee.
Batch 2: Resize for web (3 minutes).
Take the processed transparent PNGs.
Upload them again for batch resize to 2000x2000px.
Set quality to 90.
Batch 3: Create thumbnails (2 minutes).
Upload the 2000px versions.
Resize to 400x400px at 85 quality for website thumbnails.
Quality control check (5 minutes).
Review 15-20 random images from the final output.
Check edges on background removal.
Verify colors look accurate.
Confirm dimensions are correct.
Total active time: 15 minutes.
Total processing time: about 25 minutes including AI processing.
The same workflow manually would take 40+ hours.
Choosing the Right AI Batch Photo Editor
After testing seven platforms, I evaluate tools on five criteria.
Accuracy on complex edges: Upload test images with hair, glass, and fur to see how clean the edges come out.
Processing speed: Time how long 50 images take to process.
Under 4 minutes is excellent, 4-8 minutes is acceptable, over 10 minutes is too slow.
Format support: Verify it handles WebP, PNG, and JPG input and output.
Batch size limits: Check the maximum images per batch.
Anything under 50 becomes tedious for large projects.
Output quality: Compare file sizes and visual quality at the same resolution settings.
Some tools compress aggressively and degrade quality.
I keep a standardized test folder with 20 images covering different scenarios.
Every time I evaluate a new tool, I run this test folder through it and compare results.
Frequently Asked Questions
What is the best AI batch photo editor for beginners?
Removedo.com offers the simplest interface for beginners with drag-and-drop batch upload, automatic background removal, and support for JPG, PNG, and WebP formats. It requires no learning curve and processes images in seconds without watermarks or signup requirements for basic use.
Can AI batch photo editors handle transparent backgrounds?
Yes, most AI batch photo editors can create transparent backgrounds by removing the existing background and exporting as PNG or WebP format. JPG files cannot support transparency, so you must select PNG output when downloading your processed batch to preserve transparent backgrounds for product photos or graphics.
How many images can you process at once with AI batch photo editor?
Free AI batch photo editors typically handle 20-100 images per batch, while paid versions process 500-1000+ images simultaneously. Removedo processes unlimited batches without paid subscriptions. Processing time scales linearly, so 100 images take about 4-5 minutes while 500 images require 15-20 minutes depending on image size and complexity.
Is AI batch photo editing accurate enough for professional use?
Modern AI batch editors achieve 95%+ accuracy on clean product photos with good lighting and simple backgrounds. Professional photographers use them for e-commerce, real estate, and portrait work. However, complex images with intricate edges, fine hair, or challenging lighting may require manual touch-ups on 5-10% of processed images.
What's the difference between AI batch photo editor and manual editing software?
Manual editing software like Photoshop requires you to edit each image individually with selection tools and adjustment layers, taking 5-15 minutes per image. AI batch photo editors apply machine learning to automatically detect subjects, remove backgrounds, and enhance images across hundreds of photos simultaneously in minutes, with consistent results across the entire batch without human intervention for each file.
Start Processing Batches Today
I went from spending 40 hours per week on photo editing to less than 4 hours.
That's 36 hours back for client work, business development, or actual photography.
The workflow I shared processes 200+ images in under 10 minutes with professional results.
Three key takeaways: use consistent source photos for best AI results, always select the correct output format before processing, and keep backups of your originals in a separate folder.
Ready to cut your editing time by 90%? Try ai batch photo editor on your next batch of images and see the difference yourself.


